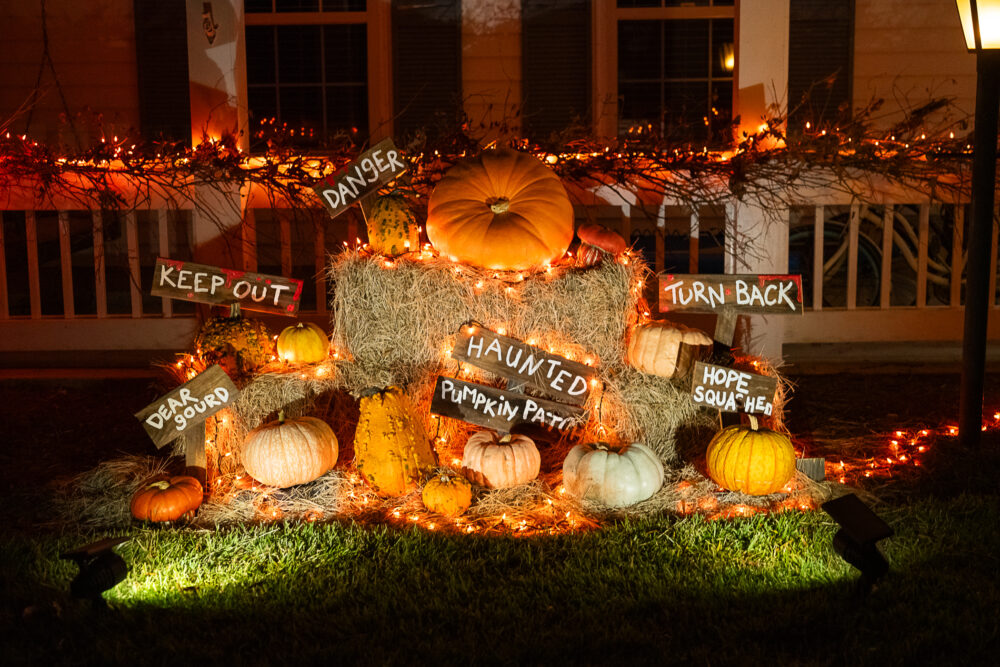
How To Make a Spooky DIY Haunted Pumpkin Patch
Are you looking for sustainable Halloween decorations for your outdoor space? This DIY haunted pumpkin patch features eco-friendly Halloween decorations that you can pop into your compost heap after Halloween is over!
This post contains affiliate links.
When it comes to decorating for Halloween, it’s go big or go home in our family. Why only decorate the house when you can decorate the cars, too? Why put up one strand of lights when you could do fifteen and a 7-foot-tall inflatable cat?
This year, my goal was to opt for a more responsible, sustainable Halloween display in the front yard, but I still wanted something over-the-top and eye-catching. I hoped that, after spooky season drew to a close, I wouldn’t be adding anything new to either 1) our storage bins in the attic, 2) the landfill, or 3) the mountains of junk at our local Goodwill, which really narrows down the materials you can use.
Fortunately, inspiration struck during a drive-by of our local U-pick pumpkin farm. “We’re doing a haunted pumpkin patch,” I told my husband during the last week of September, cackling with glee on my way out the door with the keys to his truck in hand. “I’m getting a pumpkin that’s bigger than the dog!”
It’s worth noting that we have a 43-pound Australian Shepherd, and my husband’s raised eyebrows suggested a vague attitude of doubt that such a gem of a gourd existed.
Now, I don’t know exactly how much our pumpkin weighs, but I can lift the dog by myself, and the pumpkin takes both of us and a subsequent visit to the chiropractor.
I later reminded him of his moment of doubt as the two of us waddled across the lawn with the world’s largest pumpkin between us as he grunted, “I… hate… your… stupid… pumpkin!”
I love my stupid pumpkin, and I love my haunted pumpkin patch even more. Here’s why my stupidly large pumpkin and our haunted pumpkin patch is a winner when it comes to sustainable Halloween ideas:
- My pumpkins were all sourced from a sprawling local pumpkin patch, so they were grown locally in the appropriate season, and they were not shipped in from across the planet.
- I can reuse the pumpkins and hay as Thanksgiving decor.
- Other than the Halloween lights, screws in the signs, and the acrylic paint on the wood, everything in this haunted pumpkin patch is compostable and biodegradable.
And, lastly, this haunted pumpkin patch took next to no time to assemble… leaving me plenty of time to go to town on the inside of the house and put together a spooky playlist to listen to on repeat through November 1.
Note: Please don’t skip the How to Dispose of Your DIY Haunted Pumpkin Patch Responsibly at the end of this article! You’ll find lots of useful information on how to break down your decorations in a way that benefits our planet.
Suggested Materials for Your DIY Haunted Pumpkin Patch
For the pumpkin patch:
- An assortment of 10-15 medium-to-large pumpkins
- 4 hay bales, such as those sold at Tractor Supply
- Solar-powered spotlights or garden lights (We relocated our landscaping lights to highlight our seasonal decor.)
- Scrap wood or pieces from a wood pallet
- 1-2 strings of lights
Notes: You can save money and lessen your environmental impact by buying locally-grown pumpkins from a nearby farm or farm stand if they’re available in your area. You can also reuse your Christmas lights if you don’t already own Halloween-themed string lights.

For the DIY Spooky Yard Signs from a Wood Pallet (optional):
- 1-2 weathered wood pallets
- 3/4-inch wood screws
- Drill
- Saw
- Acrylic paint
- Paint brushes
For the DIY Twig Garland (optional):
- Twigs and small branches from the yard
- Sisal twine
- Clusters of dried leaves (optional)
- 1-2 strings of lights
Other Supplementary Eco-friendly Halloween Decor Additions (not pictured):
- No time to make a twig garland? Try tying up dried corn stalks behind your pumpkin patch.
- Do you live in an area where the leaves change early? Work sprigs of brightly colored leaves into your twig garland.
- Do you already own plastic skeletons, zombies, or headstones? Why not work them into your pumpkin patch!
- Do you have an old sheet or tablecloth? Try hanging some old-fashioned sheet ghosts over your railing or from a nearby tree to enhance the ghostly feel.

How to Assemble Your Haunted Pumpkin Patch
- Game plan where you’ll put your haunted pumpkin patch. Factors to consider when selecting the ideal location include whether or not your patch can be seen from the road, if will kill the grass beneath it, if it will interfere with mowing the lawn, and how much sun your pumpkins will be able to tolerate, especially if you live in a warmer climate.
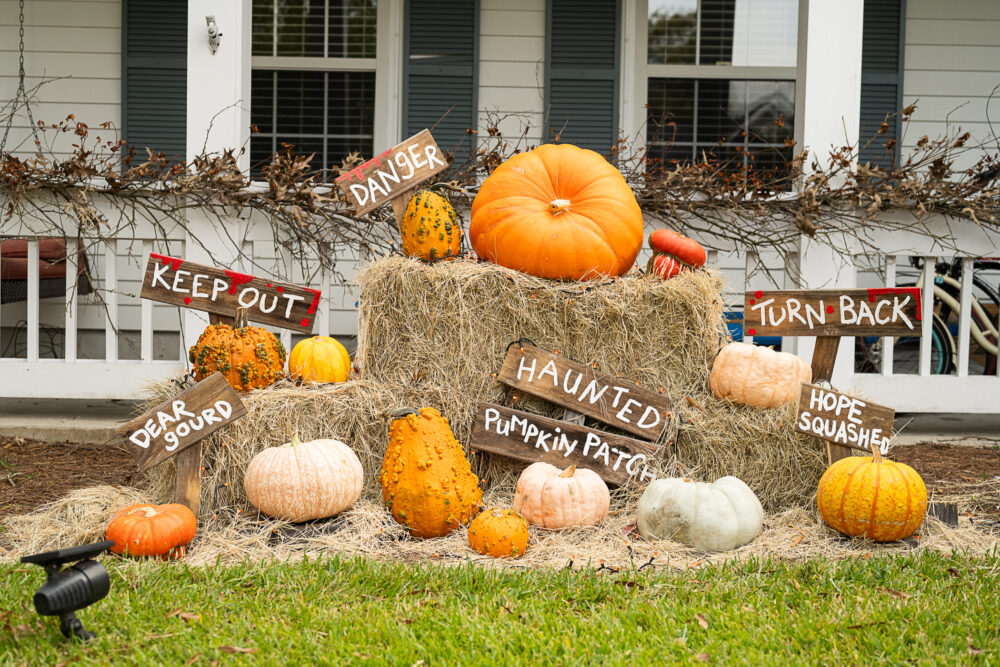
- Arrange your hay bales in a pyramid shape, and test the top bale to ensure it can bear weight without tipping over.
- Decide which pumpkin will be the focal point of your haunted pumpkin patch – this was a no-brainer for us. Arrange that pumpkin in the place of honor on the top hay bale. Then add your other pumpkins onto the second tier of hay bales and the ground. Consider the visual flow of the colors and sizes of your pumpkins as you arrange them.
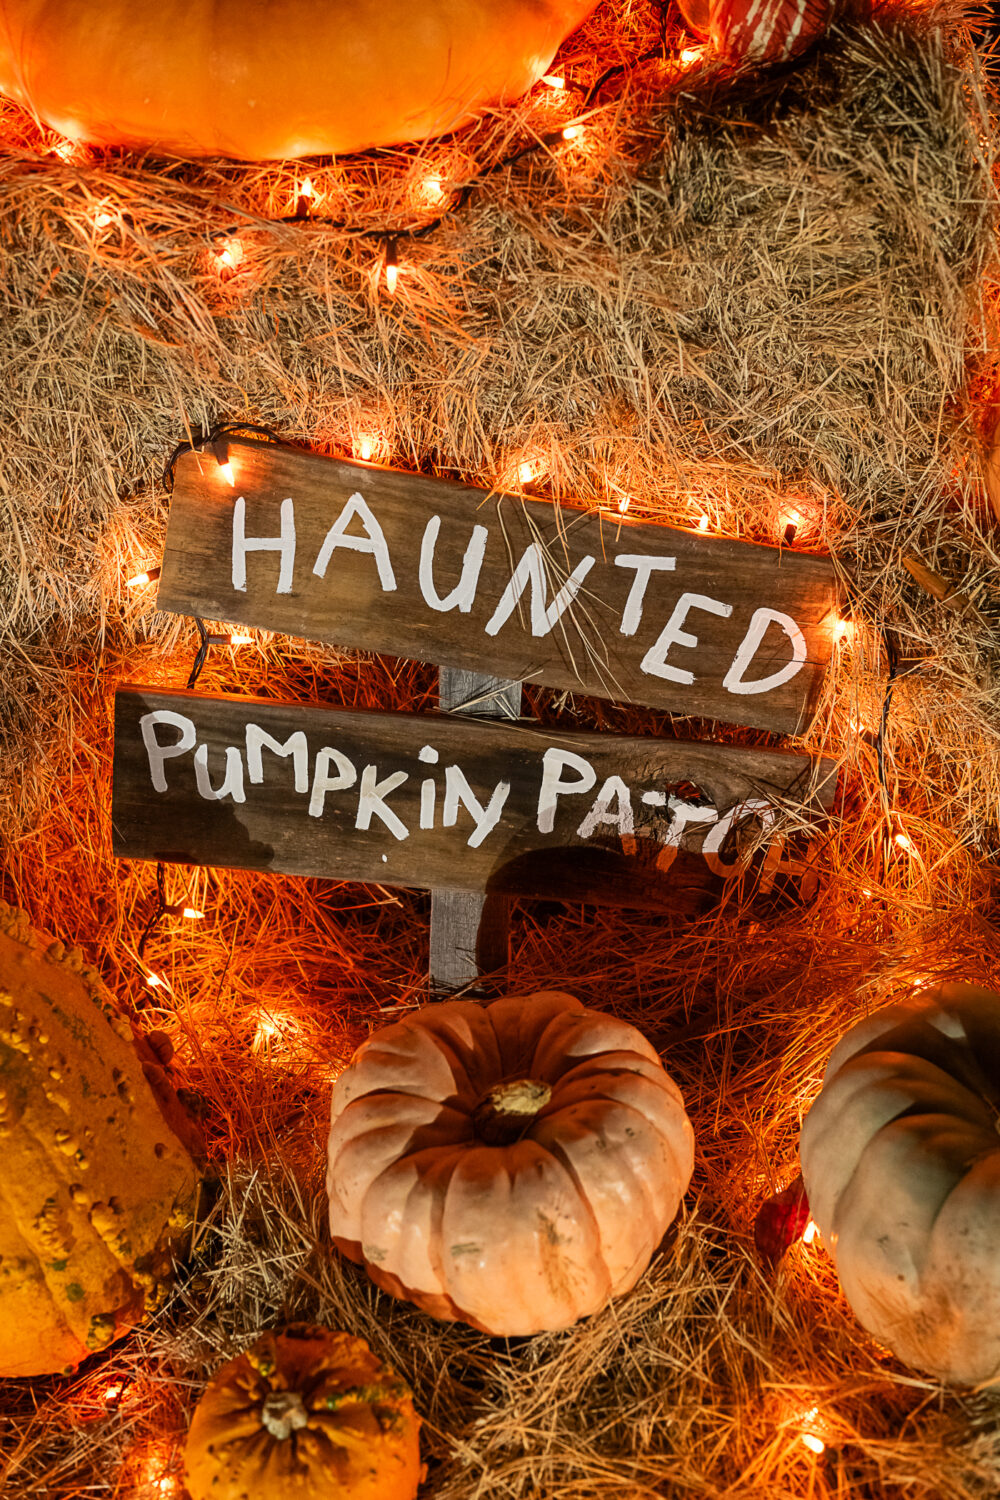
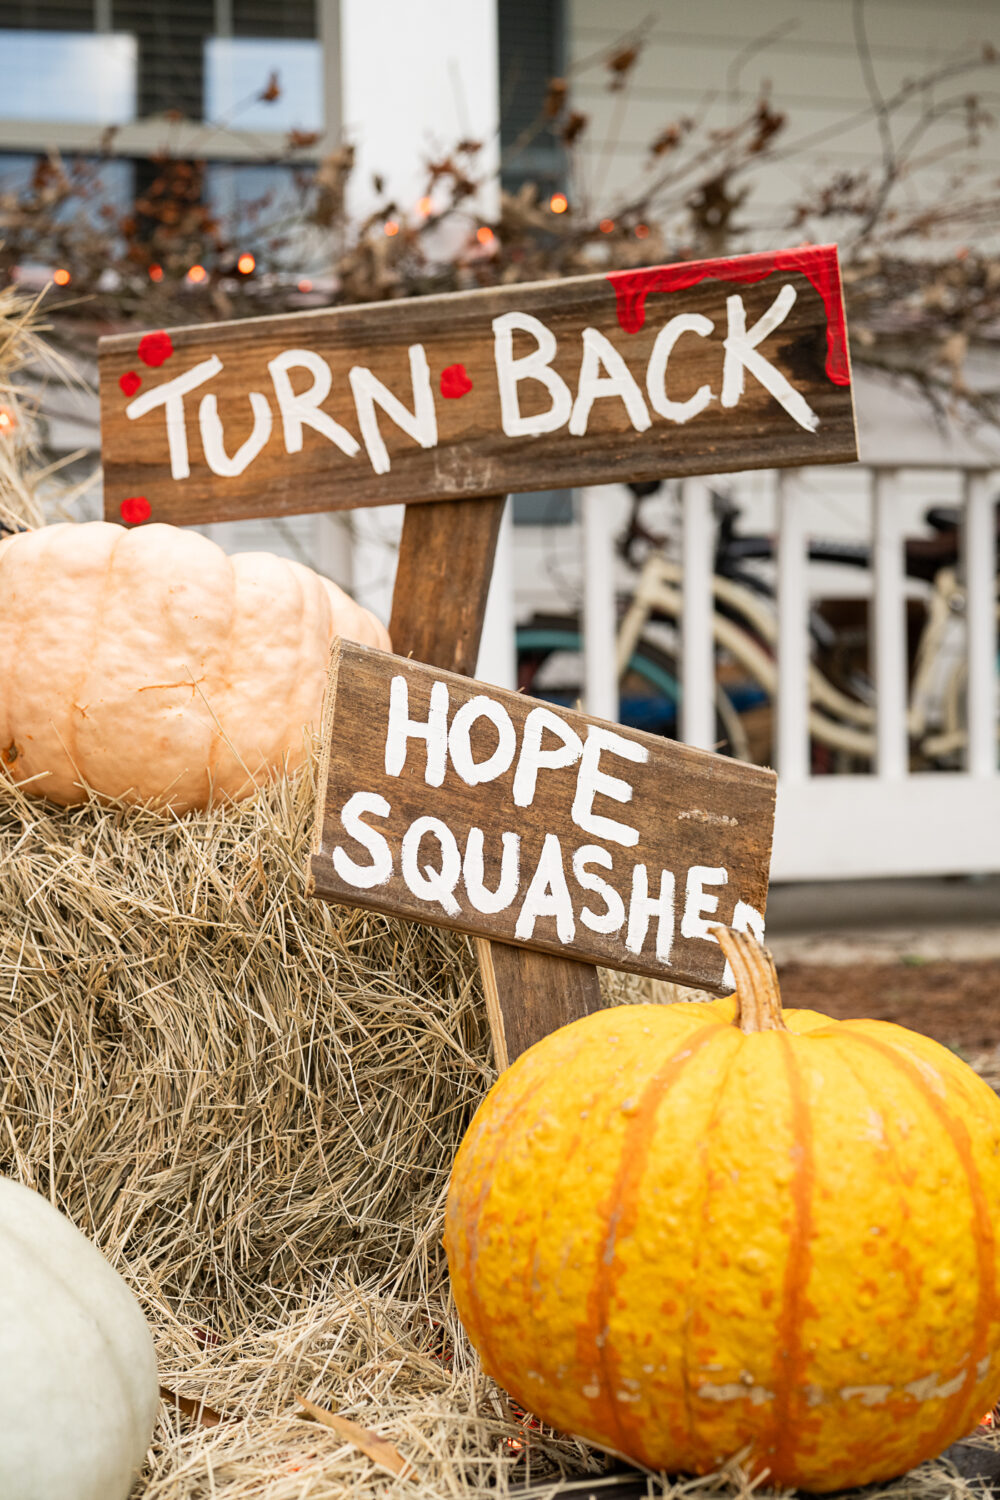
- If you made DIY spooky yard signs, add those between the pumpkins, keeping your “Haunted Pumpkin Patch” sign front and center.
- Use the scrap wood or pallet wood pieces to elevate your pumpkins on the ground. I created little wooden platforms to give the pumpkins more height to be seen from the road and to allow for more airflow underneath the pumpkins. This will help keep rot at bay so we can enjoy them throughout November, as well.
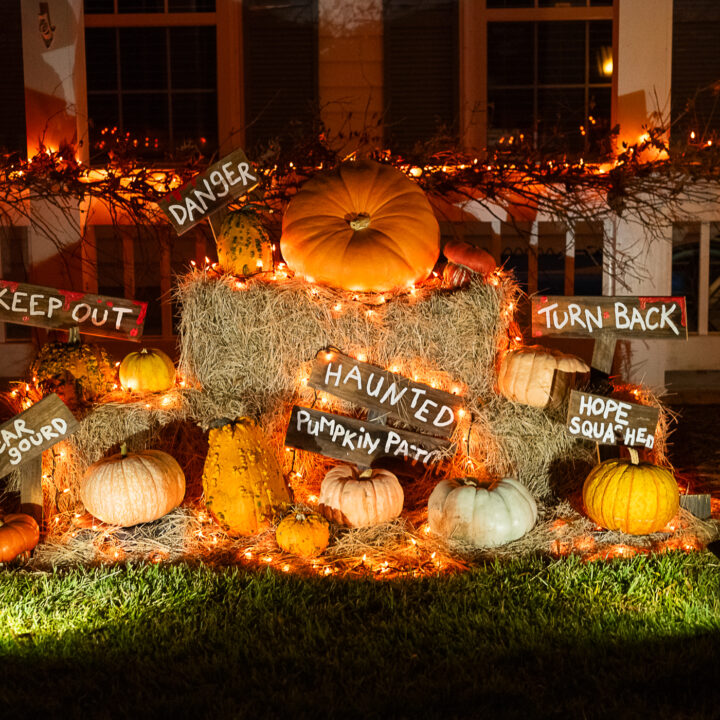
- Position your solar-powered spotlights to illuminate the hay bales and pumpkins.
- Work your strands of string lights through the pumpkin display. If desired, hide the cords by sprinkling additional hay around the cords and the wooden pumpkin platforms.
- If you’re adding a DIY compostable twig garland (check out our DIY instructions here), or other Halloween decor (optional), add that to your already ghostly display!
How to Dispose of Your DIY Haunted Pumpkin Patch Responsibly
- Restyle your hay bales and pumpkins for Thanksgiving.
- Compost, donate, or recycle your pumpkins responsibly.
- Compost your hay bales or incorporate them into your landscaping. If your hay bales were protected from the elements (thus avoiding mold or mildew from rain or dew), you may be able to donate them to a farm or animal sanctuary.
- Upcycle your yard signs for the next holiday by repainting them. Alternatively, you can sand off the paint, remove the screws, and compost the wood.
- Compost your wooden platforms or use the wood for another project.
- Position your solar-powered spotlights to highlight your landscaping.
- Compost your twig garland and twine, or use the twigs and branches in your next bonfire. Remember that wood ash can also be used in your garden after the fire is over!
All photos via Reese Moore Photography
If You Enjoyed DIY Haunted Pumpkin Patch for Sustainable Halloween Yard Decorations, You May Also Enjoy:
Pumpkin Recycling | 10 Sustainable Ways To Dispose of Pumpkins After Halloween
20 Zero Waste Halloween Decoration Ideas
9 Sustainable Halloween Projects For Kids
About the Author

Reese Moore
Reese Moore is a photographer, content creator, and pickle connoisseur who divides time between Charleston and Lake Lure. When she’s not behind the lens shooting stunning images for Reese Moore Photography, Reese loves to spend her time wandering the woods with her dog Gatsby or adventuring with her husband Logan in their Airstream Basecamp.
DIY Haunted Pumpkin Patch
Are you looking for sustainable Halloween decorations for your outdoor space? This DIY haunted pumpkin patch features eco-friendly Halloween decorations that you can pop into your compost heap after Halloween is over!
Materials
- An assortment of 10-15 medium-to-large pumpkins
- 4 hay bales, such as those sold at Tractor Supply
- Solar-powered spotlights or garden lights (We relocated our landscaping lights to highlight our seasonal decor.)
- Scrap wood or pieces from a wood pallet
- 1-2 strings of lights
Instructions
- Game plan where you’ll put your haunted pumpkin patch. Factors to consider when selecting the ideal location include whether or not your patch can be seen from the road, if will kill the grass beneath it, if it will interfere with mowing the lawn, and how much sun your pumpkins will be able to tolerate, especially if you live in a warmer climate.
- Arrange your hay bales in a pyramid shape, and test the top bale to ensure it can bear weight without tipping over.
- Decide which pumpkin will be the focal point of your haunted pumpkin patch - this was a no-brainer for us. Arrange that pumpkin in the place of honor on the top hay bale. Then add your other pumpkins onto the second tier of hay bales and the ground. Consider the visual flow of the colors and sizes of your pumpkins as you arrange them.
- If you made DIY spooky yard signs, add those between the pumpkins, keeping your “Haunted Pumpkin Patch” sign front and center.
- Use the scrap wood or pallet wood pieces to elevate your pumpkins on the ground. I created little wooden platforms to give the pumpkins more height to be seen from the road and to allow for more airflow underneath the pumpkins. This will help keep rot at bay so we can enjoy them throughout November, as well.
- Position your solar-powered spotlights to illuminate the hay bales and pumpkins.
- Work your strands of string lights through the pumpkin display. If desired, hide the cords by sprinkling additional hay around the cords and the wooden pumpkin platforms.
- If you’re adding a DIY compostable twig garland (check out our DIY instructions here), or other Halloween decor (optional), add that to your already ghostly display!