Sustainable Craft: 4th of July Tablescape with DIY Firecrackers
Are you looking for a cute, affordable 4th of July tablescape idea? Are you looking for a sustainable craft to make DIY decorative firecrackers? Read on for how to easily use items from your pantry and recycling bin to build a bright, colorful 4th of July tablescape!
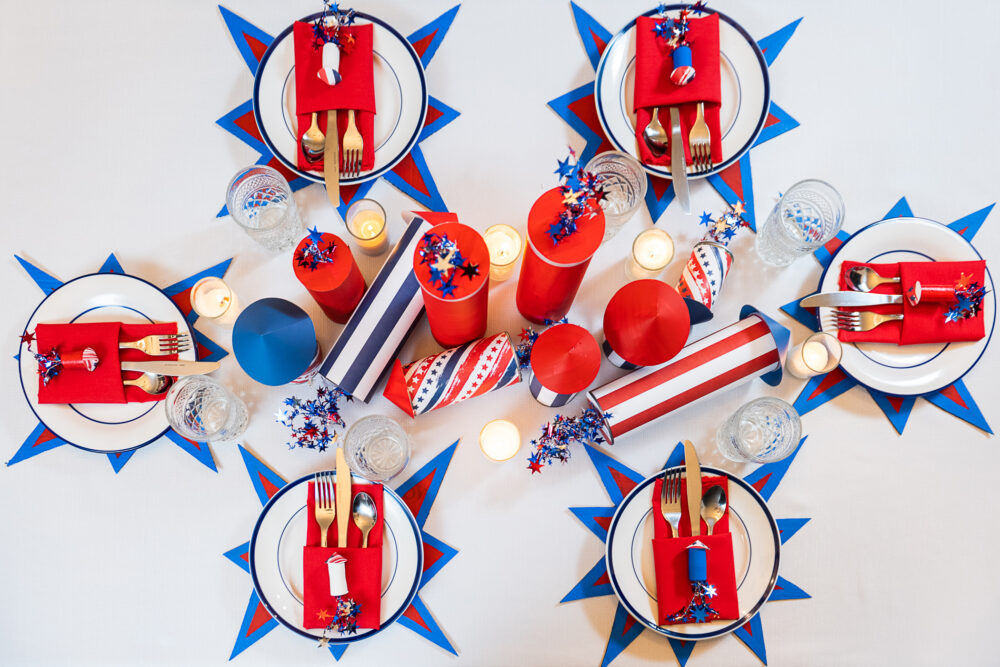
I love a seasonal tablescape, especially one that’s easy on the wallet and the planet. What if I told you almost everything you need for this vibrant DIY 4th of July Tablescape is in your pantry or recycling bin?!
When I committed to a more eco-friendly lifestyle, I was initially pretty bummed because crafting and decorating for holidays are two of my great loves, but they can generate tons of trash and contribute to the broken consumerist systems that drive climate change and plastic pollution. I was worried a sustainable lifestyle was going to be, well, boring.
Fortunately, there are a million greener ways to explore your creative side and indulge in holiday festivities!

My 4th of July Tablescape with DIY Firecrackers offers a more sustainable approach to your Independence Day plans by:
- Using reusable cloth table linens.
- Featuring plates from the thrift store.
- Showcasing a DIY cardboard charger.
- Using DIY Upcycled Cork Firecrackers on each place setting.
- Starring DIY Decorative Firecrackers made from cans and food canisters from your pantry.
The big, bold decor makes this a fun 4th of July Tablescape for a backyard BBQ, kids’ party, or adult soiree. This DIY is also really versatile and offers plenty of opportunities to put your own spin or style on my version!
And, if your food packaging is full of unused products like mine are here, you can put them back in the pantry as-is for a really exciting game of “what on earth is this” each time your husband goes to make a recipe.
Let’s do this.
Note: Did you catch the DIY Upcycled Cork Firecracker article? The concept for making the corks is pretty much the same for decorating your cans and canisters. Giving it a quick read will help you fly through this 4th of July Tablescape.

Suggested Materials for 4th of July Tablescape with DIY Firecrackers
For the table:
- Reusable fabric tablecloth
- Cloth napkins
- Silverware
- Red, white, and/or blue plates (mine came from the thrift store for $5 total)
- Glasses (again, mine are thrifted vintage pieces for $0.50 each)
- Votives and votive holders (or Oui yogurt jars)

For the chargers:
- Cardboard boxes or heavy cardstock boxes, such as a cereal box (I used cardboard wine crates from a neighboring business). You’ll be using only the largest panels of each box, so you’ll likely need 3 boxes for 6 place settings.
- Pencil
- Heavy-duty scissors or box cutter
- Red, white, and blue acrylic paint
- Paintbrushes
- Scrap cardboard as a protective painting surface
Note: Are you in a hurry? It will save you a lot of time to do your chargers in one solid color.

For the DIY decorative firecrackers:
- Decorative patriotic paper or colorful construction paper in a mix of 12”x12” and 8”x10” sheets
- Glue gun
- Scissors
- Sharpie marker (optional)
- Various cans, food canisters, or cylinders, such as Pringles cans, tomato paste cans, tea canisters, etc. Your firecrackers will look cuter with longer, more narrow objects than short, squatty cans.
- Several bowls or circular Tupperware containers that are larger than the diameter of your cans and canisters to use as templates for the DIY decorative firecracker tops
- Red, white, and blue star foil garland (mine came from the thrift store)
Optional: For the DIY upcycled cork firecrackers:
- Please see Sustainable Craft: Upcycle Corks into DIY 4th of July Decorations for the in-depth DIY, which is similar to the process we’ll use with the food canisters and cans below.
- Used wine corks, red, white, and blue acrylic paint, a hot glue gun, decorative paper, scissors, a pencil, a drill, and a ruler.

How to Make DIY Explosion Chargers
- Break down your boxes, cutting free and reserving the largest panels, and taking care not to crease them.
- Trace a starburst “explosion” shape on the cardboard panels. A quick Google search of “cartoon explosion vectors” may be helpful.
- Cut out your starbursts with scissors or the boxcutter. Erase any visible tracing lines.
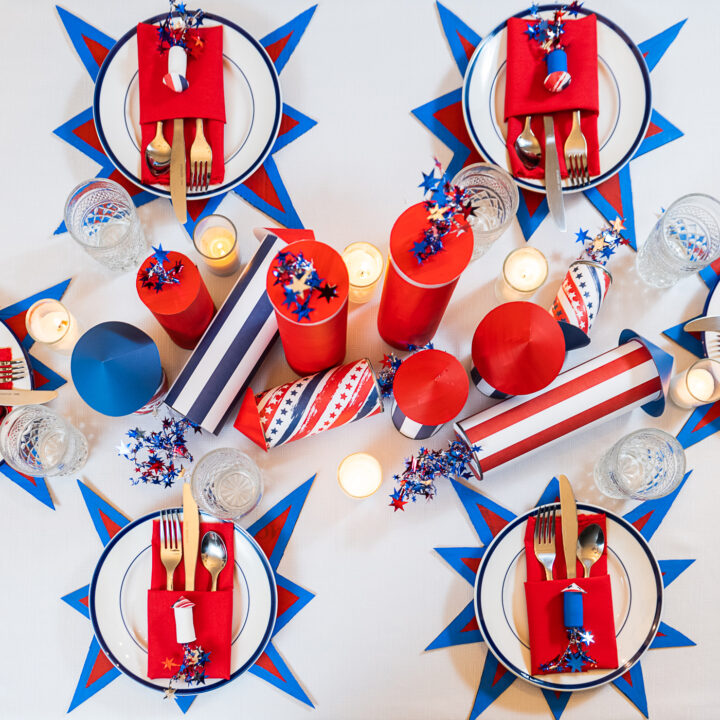
- Paint the plain or “raw” cardboard side of your chargers as desired, remembering it will be much faster to paint each one a solid color than to do a two-tone design as pictured. Let them dry thoroughly before putting them on your table, but this won’t take long.
Start Assembling Your Upcycled 4th of July Tablescape with DIY Firecrackers
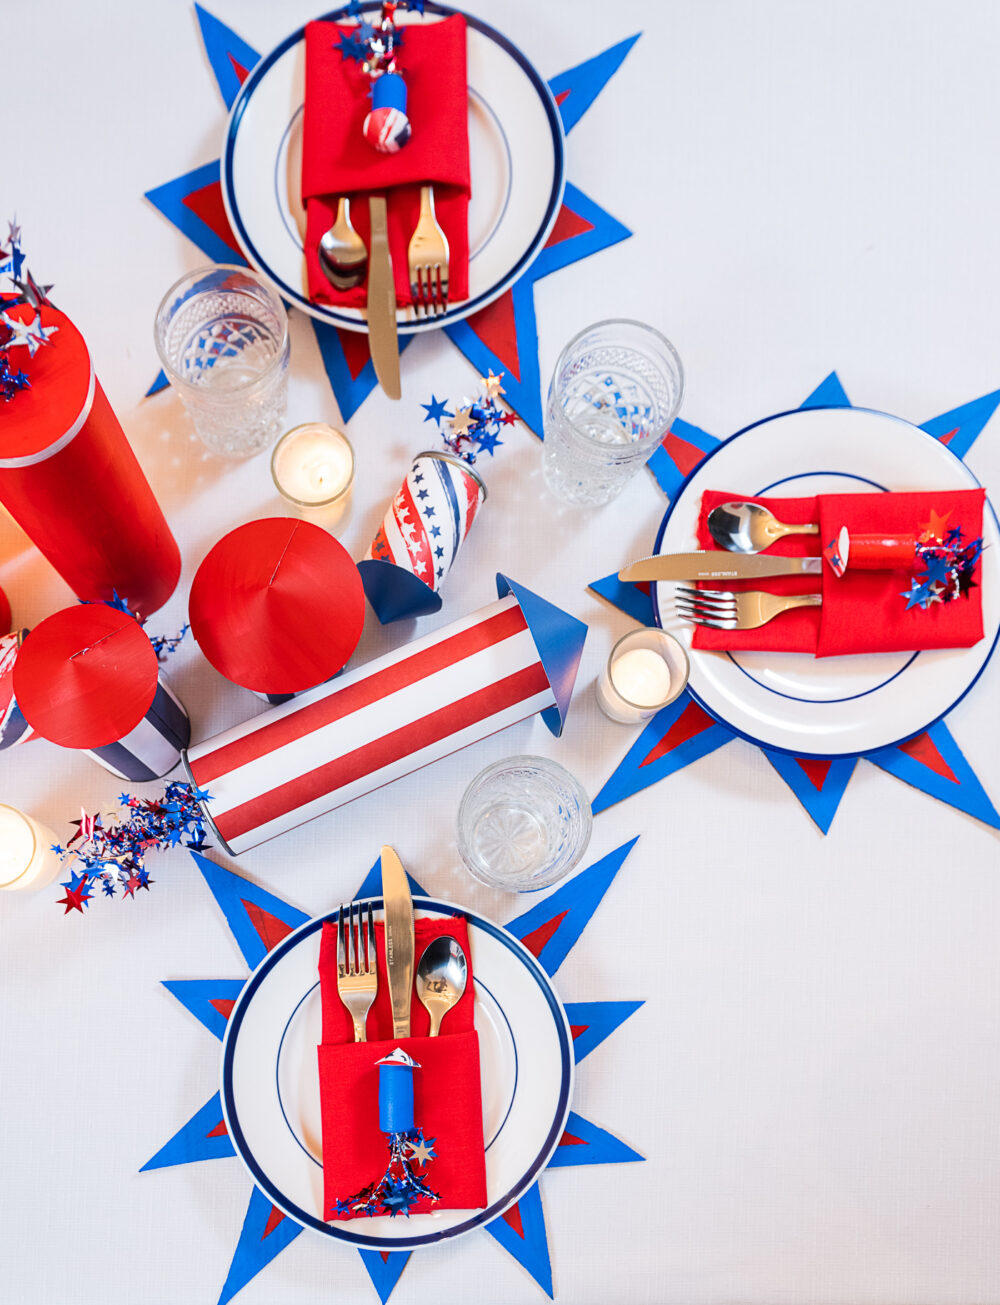
- Iron any wrinkles from your tablecloth and napkins, and lay the napkins flat.
- Set your table with the chargers, plates, and glasses.
- Add your napkins. I love to use napkins as a decorative element, so I did a single pocket fold with mine.
- Add your silverware.
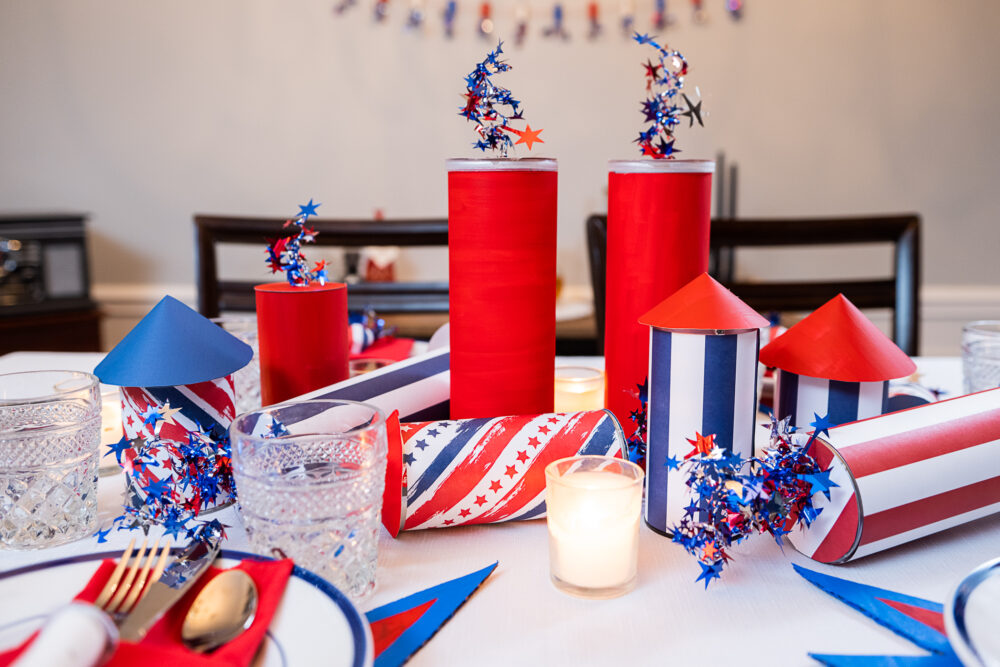
- Add your unaltered cans and food canisters to the center of your table, and find an arrangement that’s visually appealing to you. I like to keep most of the height of my centerpieces in the middle. Remember that anything standing straight up will be a firecracker with a fuse or an “unlit” firecracker. The ones lying down will have sparkling tails.
- If desired, plan which canister will have which color of decorative paper and label your cans with the Sharpie marker. I hate to have too many items with the same pattern next to each other, and I also wanted my upright Pringles cans to be red firecrackers with lit fuses, not the kind with the conical hats. This step can help you stay organized. Taking a picture of your arrangement may also be helpful.
- Make your DIY decorative firecrackers!


Make your DIY Firecrackers
- Plug in your glue gun.
- Measure the length of your can or canister where you would like the paper to cover, remembering that the paper cones will cover some of the edges. I left some of the silver ridges of my cans visible because I liked the effect.
- Mark off your paper to cover the can and cut it to size. Wrap the paper around the can to ensure accurate placement, then run a thin line of hot glue along the length-wise edge of your paper, wrap it tightly around the can or canister, and seal it with another line of hot glue on the underside of the end of the decorative paper.
- For the firecrackers where the top or bottom will be visible without a paper cone to cover, such as the “dynamite” style firecrackers or those lying down, trace the bottom end of your canister on matching or complementary decorative paper. Cut out your circle and hot glue it to the visible end.
- Make your paper cones by tracing a circle that’s about 50% larger than the top of your firecracker, cutting it free, and using the ruler to mark the center of the circle. Then cut a straight line from the edge of the circle to the center dot and slide one cut end of the circle over the other until it forms your desired cone shape. Secure the shape with dots of hot glue under the top edge of your decorative paper.
- Glue your cone to the firecracker by applying 3-4 dots of glue along the edge of the can, hoovering your cone to center it, and quickly but gently pressing into the hot glue.
- Add your firecracker tails and fuses by twirling the wire star garland around your finger to curl and cutting it about a half inch longer than the desired length. (I used about 3-4 inches for the tails and 2-3 inches for the fuses.) For the firecracker tails, you may want to add two separate tail pieces for extra pizzazz.
- Fold a flat edge at the end of your curled wire, run a line of hot glue along that edge, and place it in the center of your can. Hold it in place until secure.
- Arrange your decorated cans and canisters as desired and add in your votives, taking care that your decorative paper is a safe distance from the candles. (Please do not burn your house down, y’all.)
- Add your decorative upcycled cork firecrackers to each place setting, scatter them along the center, or string them as a garland to set off your 4th of July tablescape.
- Get your party on! Enjoy a meal with family and friends.


I hope you have a wonderful 4th of July! Did you try this tablescape? Did you build on these ideas? Tell us about it in the comments below.
All photos via Reese Moore Photography
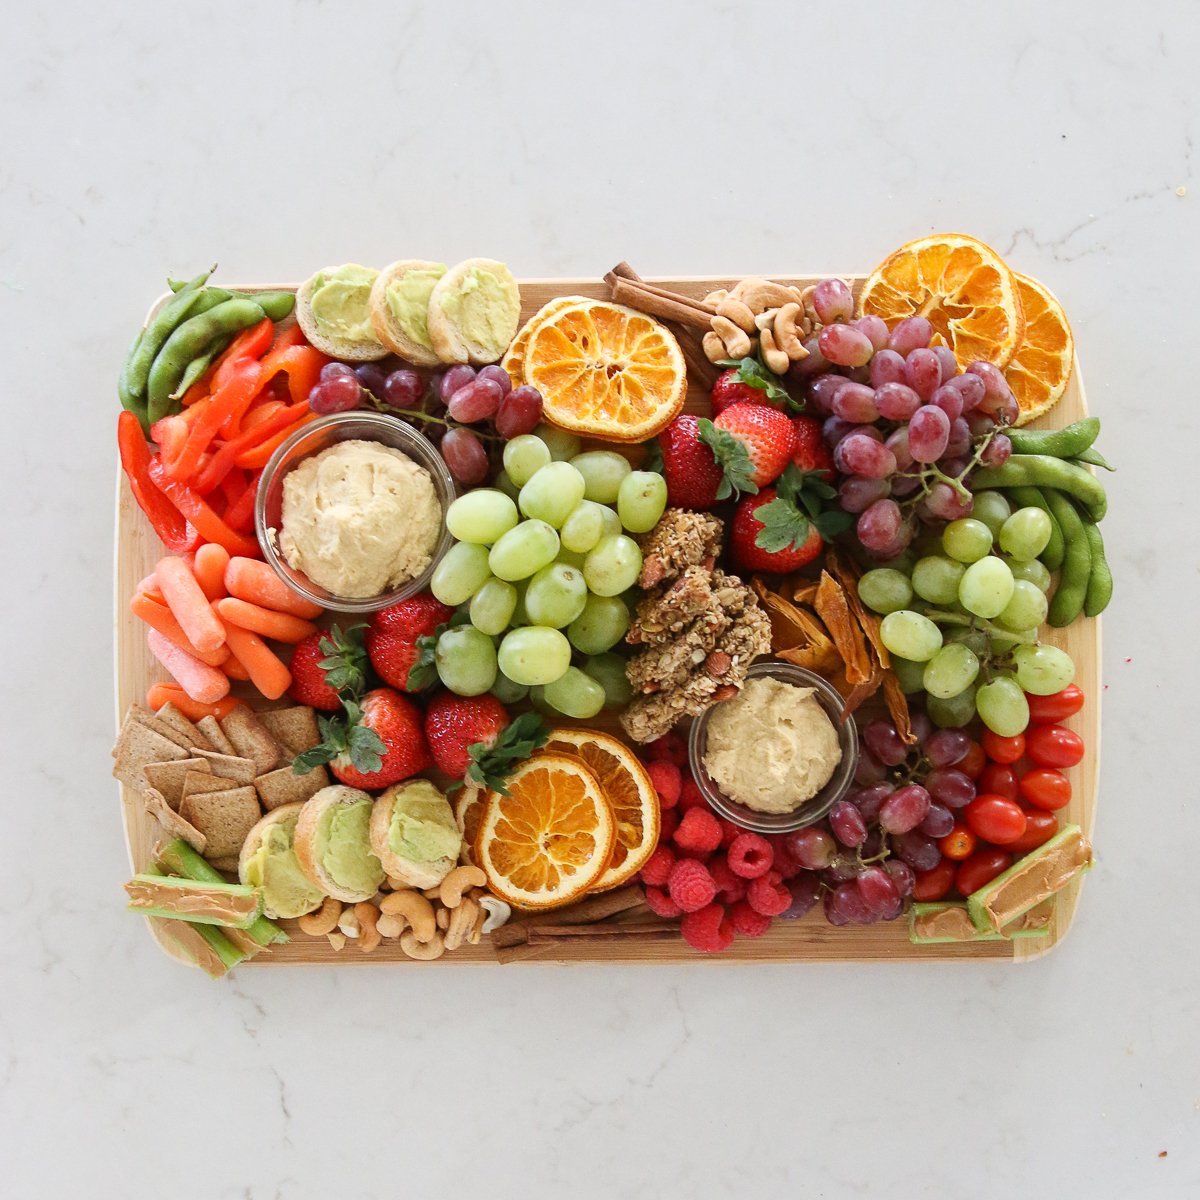
If you enjoyed Sustainable Craft: 4th of July Tablescape with DIY Firecrackers, you may also enjoy:
Sustainable Craft: Uncle Sam-inspired 4th of July Tablescape
8 Simple Tips to Manage a Countertop Compost Bin in the Summer
Fun & Affordable Upcycling Ideas for Boho Garden Decor
About the Author

Reese Moore
Reese Moore is a photographer, content creator, and pickle connoisseur who divides time between Charleston and Lake Lure. When she’s not behind the lens shooting stunning images for Reese Moore Photography, Reese loves to spend her time wandering the woods with her dog Gatsby or adventuring with her husband Logan in their Airstream Basecamp.
4th of July Tablescape
Materials
- Reusable fabric tablecloth
- Cloth napkins
- Silverware
- Red, white, and/or blue plates (mine came from the thrift store for $5 total)
- Glasses (again, mine are thrifted vintage pieces for $0.50 each)
- Votives and votive holders (or Oui yogurt jars)
- Cardboard boxes or heavy cardstock boxes, such as a cereal box (I used cardboard wine crates from a neighboring business). You’ll be using only the largest panels of each box, so you’ll likely need 3 boxes for 6 place settings.
- Red, white, and blue acrylic paint
- Decorative patriotic paper or colorful construction paper in a mix of 12”x12” and 8”x10” sheets
- Various cans, food canisters, or cylinders, such as Pringles cans, tomato paste cans, tea canisters, etc. Your firecrackers will look cuter with longer, more narrow objects than short, squatty cans.
- Red, white, and blue star foil garland (mine came from the thrift store)
Tools
- Pencil
- Heavy-duty scissors or box cutter
- Paintbrushes
- Scrap cardboard as a protective painting surface
- Glue gun
- Scissors
- Sharpie marker (optional)
- Several bowls or circular Tupperware containers that are larger than the diameter of your cans and canisters to use as templates for the DIY decorative firecracker tops
Instructions
- Break down your boxes, cutting free and reserving the largest panels, and taking care not to crease them.
- Trace a starburst “explosion” shape on the cardboard panels. A quick Google search of “cartoon explosion vectors” may be helpful.
- Cut out your starbursts with scissors or the boxcutter. Erase any visible tracing lines.
- Paint the plain or “raw” cardboard side of your chargers as desired, remembering it will be much faster to paint each one a solid color than to do a two-tone design as pictured. Let them dry thoroughly before putting them on your table, but this won’t take long.
- Iron any wrinkles from your tablecloth and napkins, and lay the napkins flat.
- Set your table with the chargers, plates, and glasses.
- Add your napkins. I love to use napkins as a decorative element, so I did a single pocket fold with mine.
- Add your silverware.
- Add your unaltered cans and food canisters to the center of your table, and find an arrangement that’s visually appealing to you. I like to keep most of the height of my centerpieces in the middle. Remember that anything standing straight up will be a firecracker with a fuse or an “unlit” firecracker. The ones lying down will have sparkling tails.
- If desired, plan which canister will have which color of decorative paper and label your cans with the Sharpie marker. I hate to have too many items with the same pattern next to each other, and I also wanted my upright Pringles cans to be red firecrackers with lit fuses, not the kind with the conical hats. This step can help you stay organized. Taking a picture of your arrangement may also be helpful.
- Make your DIY decorative firecrackers!
- Plug in your glue gun.
- Measure the length of your can or canister where you would like the paper to cover, remembering that the paper cones will cover some of the edges. I left some of the silver ridges of my cans visible because I liked the effect.
- Mark off your paper to cover the can and cut it to size. Wrap the paper around the can to ensure accurate placement, then run a thin line of hot glue along the length-wise edge of your paper, wrap it tightly around the can or canister, and seal it with another line of hot glue on the underside of the end of the decorative paper.
- For the firecrackers where the top or bottom will be visible without a paper cone to cover, such as the “dynamite” style firecrackers or those lying down, trace the bottom end of your canister on matching or complementary decorative paper. Cut out your circle and hot glue it to the visible end.
- Make your paper cones by tracing a circle that’s about 50% larger than the top of your firecracker, cutting it free, and use the ruler to mark the center of the circle. Then cut a straight line from the edge of the circle to the center dot and slide one cut end of the circle over the other until it forms your desired cone shape. Secure the shape with dots of hot glue under the top edge of your decorative paper.
- Glue your cone to the firecracker by applying 3-4 dots of glue along the edge of the can, hoovering your cone to center it, and quickly but gently pressing into the hot glue.
- Add your firecracker tails and fuses by twirling the wire star garland around your finger to curl and cutting it about a half inch longer than the desired length. (I used about 3-4 inches for the tails and 2-3 inches for the fuses.) For the firecracker tails, you may want to add two separate tail pieces for extra pizzazz.
- Fold a flat edge at the end of your curled wire, run a line of hot glue along that edge, and place it in the center of your can. Hold it in place until secure.
- Arrange your decorated cans and canisters as desired and add in your votives, taking care that your decorative paper is a safe distance from the candles. (Please do not burn your house down, y’all.)
- Add your decorative upcycled cork firecrackers to each place setting, scatter them along the center, or string them as a garland to set off your 4th of July tablescape.
- Get your party on! Enjoy a meal with family and friends.