How to Make a Thrifted Gallery Wall for Family Photos
Looking to make a family gallery wall on a budget? Try making a thrifted gallery wall for family photos with frames that are free or inexpensive!

I love a good creative project, but I’m notoriously slow when it comes to getting them done. Projects you might finish in a weekend take me months to gather materials, strategize a plan, set aside a solid chunk of time to complete, and eventually execute. This gallery wall project was no different… (even though I’m sure you could complete it much faster)!
I loved the idea of a gallery wall, and this large wall in our house sat empty for years. When I saw Reese create a thrifted gallery wall with all secondhand frames, I finally had the confidence to go for it. Her tutorial helped me visualize how I could bring it to life.
Related Reading: 15 Beautiful Thrift Store Finds For Your Gallery Wall
On her suggestion, I chose a theme – family travel, building off the thrifted map canvas I scored at Goodwill (now the wall’s central point). I’m a sucker for maps, so this one struck a chord with me.
Over several weeks, I collected all the frames. I got some from thrift shops and others from our Buy Nothing group. If you haven’t seen the shelves at thrift shops, they are loaded with photo frames! I’m convinced we might never need to buy new ones if we use the mountains of frames already out there in the world. If you’re new to thrifting, photo frames are a very safe place to start!

My frames all came with photos or art, so it took a little finagling and a couple of broken panes of glass to empty all the frames and bring this vision to fruition. But let’s dive into how I made this thrifted gallery wall for family photos on a budget.

Materials for a Thrifted Gallery Wall for Family Photos
- thrifted picture frames (number and design up to you)
- printed family photos in sizes to fit in your frames (see Note 1)
- photo mats (optional, see Note 2)
- measuring tape or ruler
- pencil
- drill (or screwdriver)
- nails or picture hooks
- anchors (optional, if pieces are heavy)
- tape
- razor blade (optional)
- level
- cardboard
- screwdriver (or strong tool to pry out frames)
- scissors
Note 1: I had large family photos printed and shipped from Nations Photo Lab. I tried using some other more popular photo printing sites, but they didn’t have the sizes I wanted. National Photo Lab was great, and I would use their services again. I ordered the photos after I had all the frames so I knew what photos were going in each frame and what size to order for each photo.
Note 2: Several frames already had photo mats. Sometimes I used them and sometimes I did not. I wanted to add/replace some of the mats, and I purchased those from Golden State Art.

How to Make a Thrifted Gallery Wall for Family Photos
If you’re thinking this tutorial looks a little long, you’re not wrong. Because I wanted to use our own photos without breaking the bank on new picture frames (especially large ones), there are a few parts of this project. You can do them over time, like I did, or knock them out in a weekend if that’s more your style.
Part 1: Replace photos and art with printed family photos
Many thrift store frames, especially larger frames, already have photos or art in them. Most of the ones I purchased were not designed to have photos changed out frequently, and they were covered in brown paper on the back. Don’t be afraid to cut the brown paper and pry open the back to add your personal touch to the frame. No one will know. It will only be between you, the wall, and the frame!
- Lay the frame flat on the ground, front side facing down. Carefully open the back of the frame. You may need to cut open the brown paper with a razor blade or scissors.
- Carefully lift any metal tabs around the edges of the frame that hold the back support behind the photo. I used a screwdriver and wedged it between the metal tab and the photo backing. But be careful not to press or pry too hard or too quickly. I learned this the hard way and broke two glass panes by not being careful enough.
- Remove the existing art. I recycled it or threw it in the trash if it wasn’t recyclable (but get creative if you can find a way to repurpose it!)
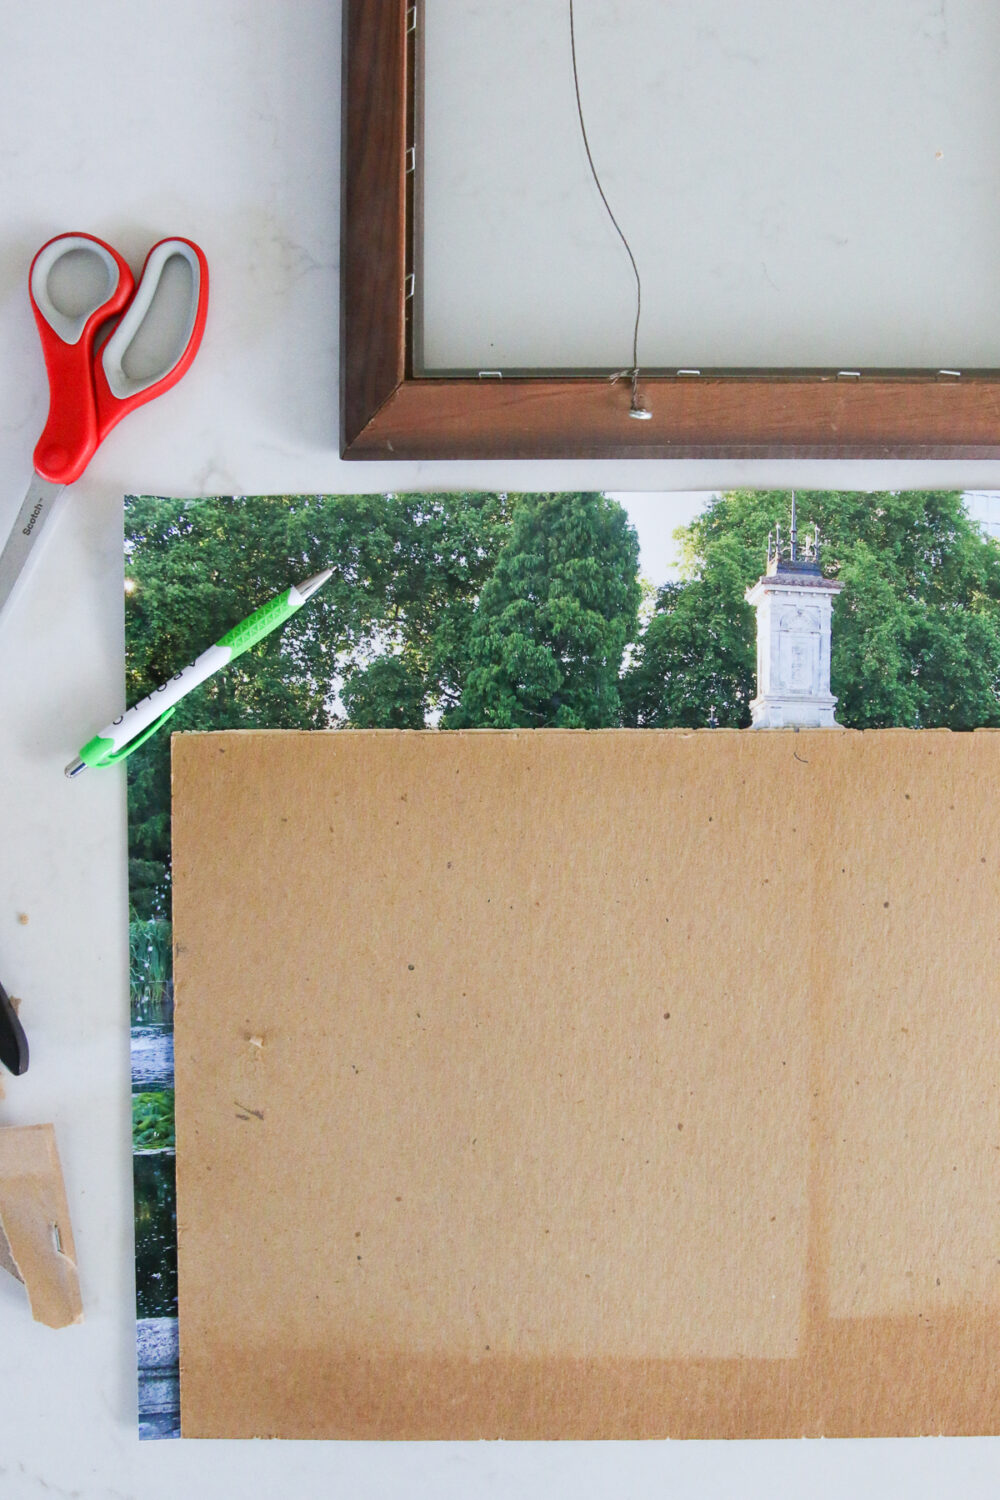
- Measure the glass inside the frame and cut/crop your photo to fit inside the frame. Be sure not to cut it too small or it won’t sit straight and cover all the frame.
- Add a photo mat, if you’d like. Lay the photo mat and the photo on top of the pane of glass. If needed, add a piece of cardboard on top of the photo to help keep the photo tightly held up to the glass inside the frame.
- Replace the back of the frame or fold the metal tabs back over the photo/cardboard, tape the brown paper back over the frame (it doesn’t have to be even close to perfect because you won’t see it).
- Now it’s ready to hang!


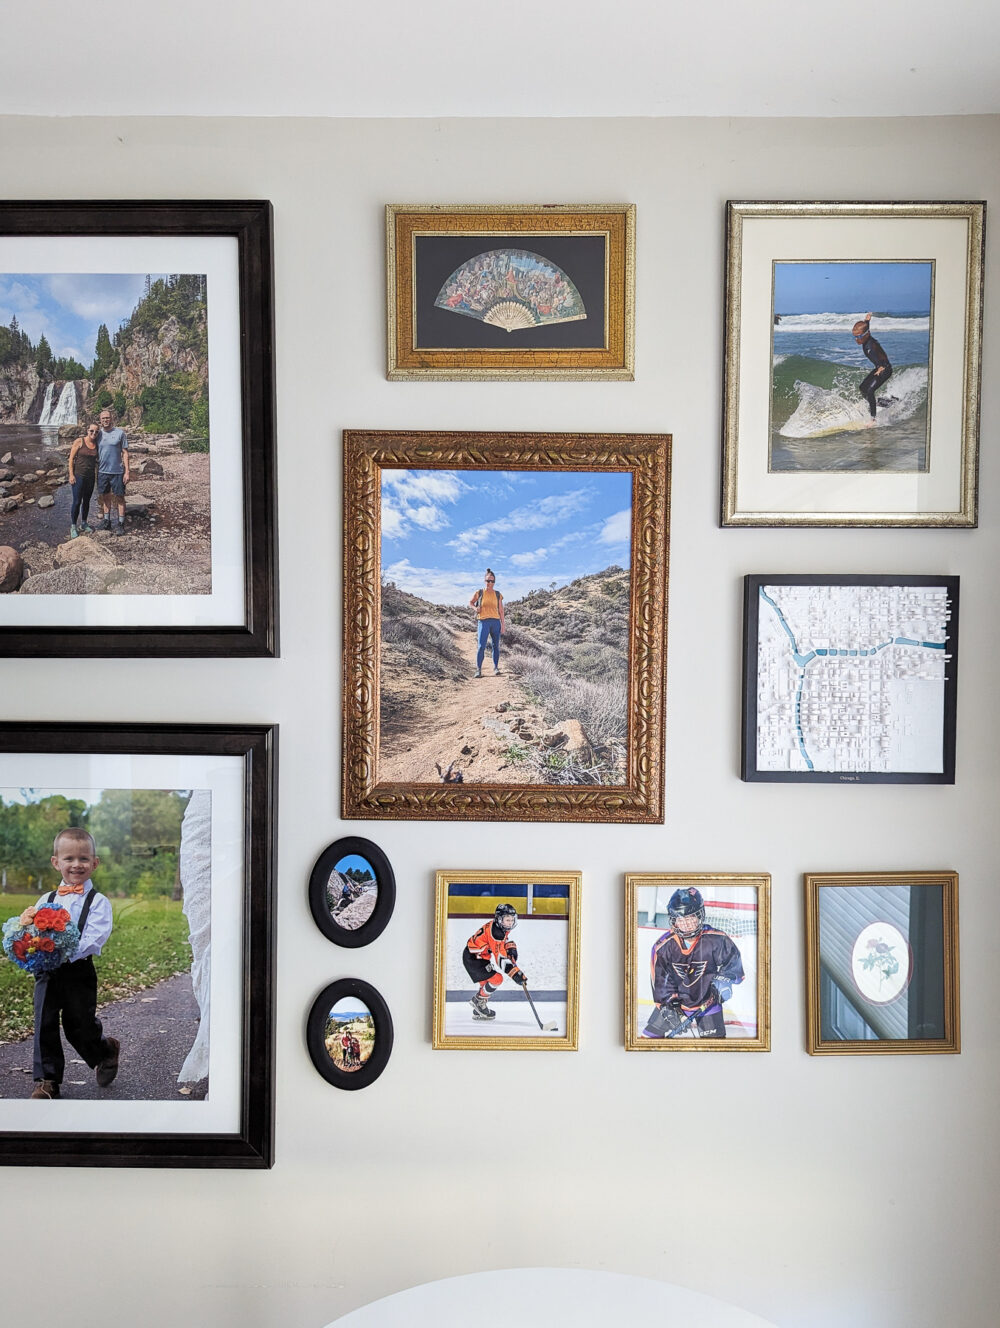
Part 2: Determine a layout for the gallery wall
There are lots of ways to design a photo gallery! If you find frames that are all the same, you could make the gallery very even and symmetrical. This might be hard if you’re thrifting frames, but you never know what you’ll find until you look.
You can look online for all sorts of tricks and tips for aesthetically pleasing gallery wall suggestions. (I won’t pretend to be an expert. I used the web for inspiration.)
I also think it’s fun to add some unique elements of interest with frames and other hanging objects mixed into the wall that aren’t square or rectangular frames. I used dried flowers in a wall basket, antique plates from my grandmother, and a map on a canvas. Here is a list of other ideas for thrifted items you can find for your gallery wall.
- Lay out all your frames with their photos inside of them on the floor as well as any other items you plan to incorporate. Arrange them as you’d like to see them on the wall. (This step is optional but helped me visualize how they would all look.)
- Draw the layout of your gallery wall on a piece of paper or tablet so you can measure the space on the wall and the space that will be in between each of the frames until you have a final plan for hanging the gallery.


Part 3: Hang your framed photos
The best ways to hang each of your frames and items will depend on their unique size, shape, and weight. Whether you’re hanging items on studs or not could influence what types of materials you use to hang things as well. If you’re not sure, trusty search engines can help you figure out the best anchors and tools to hang frames and other items in your specific setting.
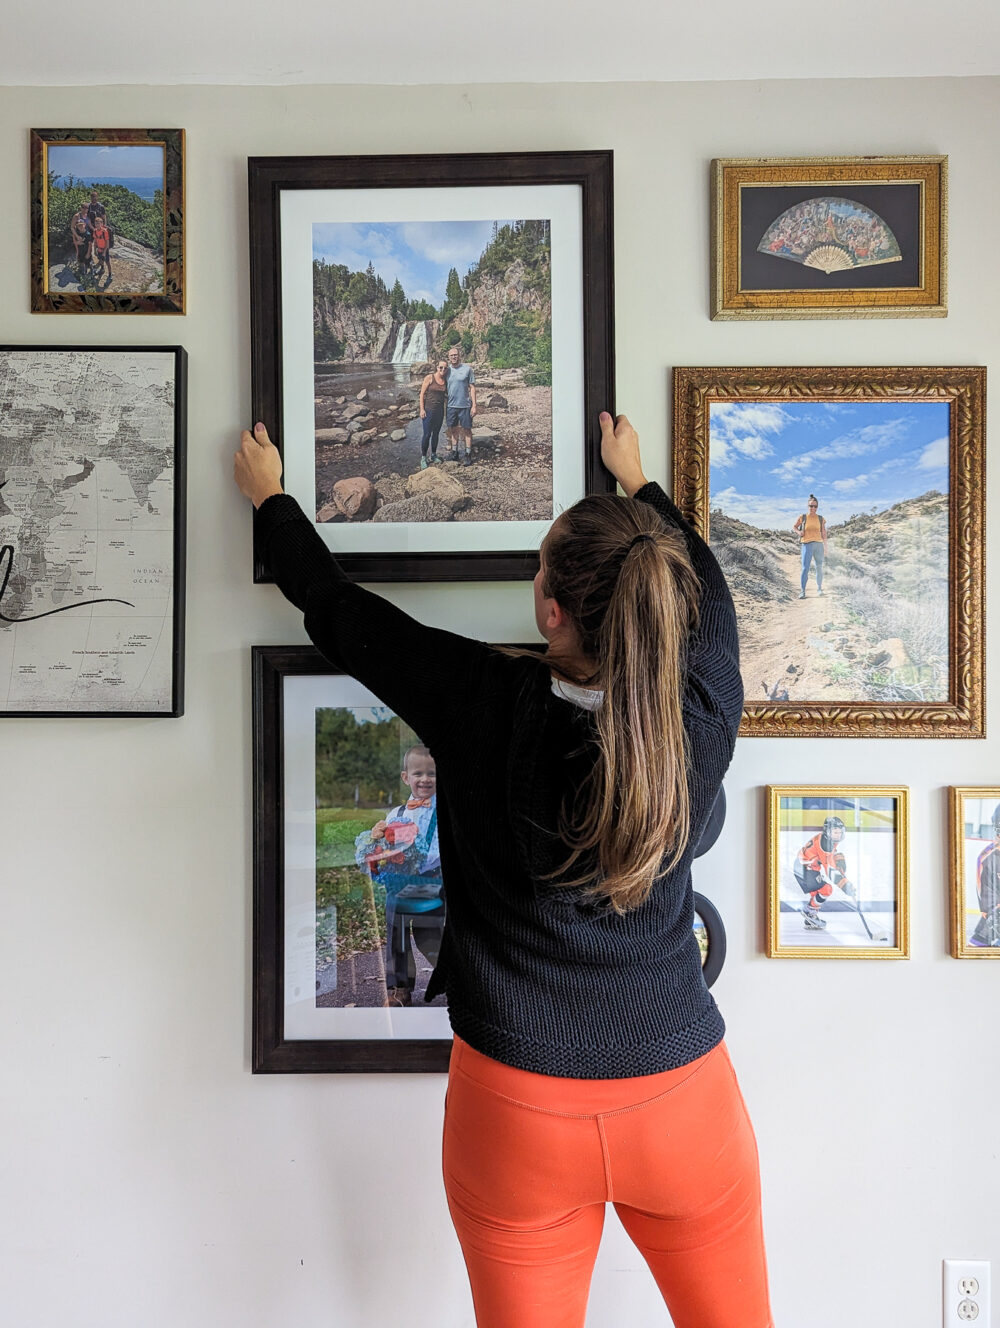
- Start from the center and hang the larger pictures first (so you can fit smaller items around them later).
- Measure the widths between frames as you hang to make sure they match your drawing.
- Be sure to use a level to ensure that each frame is straight. If they start to get crooked, you might end up with an entire wall that’s off-kilter just enough to drive you nuts.
- Stand back and admire once you’re done!


Additional Tips for a Thrifted Gallery Wall for Family Photos
Every gallery wall is unique, so go with your gut and do what feels right in your space. Here are a few tips that I considered as I worked through creating our thrifted gallery wall.
- Not everything has to match. I used a bunch of different types of frames, and I think it turned out just fine. If you want things to match, you could consider painting the frames that are the right shape but don’t fit into your aesthetic perfectly.
- Start by hanging just one or two frames at a time and assess the overall vision. Measure for the next couple of frames and repeat. Stop along the way to ensure that frames are straight, you have the space you expect, and things are turning out as planned (before you do the whole wall and find out it’s awry).
- Be patient finding frames, and you’ll save tons of money (not to mention how many frames you’ll save from ending up in the landfill). You can even put a request on Buy Nothing. Some of the largest and nicest frames I included came from our Buy Nothing group.
- Incorporate some items that are different shapes and textures, aside from square and rectangular photo frames. It can add a bit of extra interest.
What other tips would you add? Are you convinced yet that there are secondhand options available that look as good as new (or even better when they are unique and creative)?

If you liked a thrifted gallery wall for family photos, you might also like
15 Beautiful Thrift Store Finds For Your Gallery Wall
How to Make Simple DIY Cloth Napkins from Thrifted Tablecloths
New Life for Thrifted Jeans with DIY Visible Mending

Jen Panaro
Jen Panaro, founder and editor-in-chief of Honestly Modern, is a self-proclaimed composting nerd and advocate for sustainable living for modern families. To find her latest work, subscribe to her newsletter, Sage Neighbor.
In her spare time, she’s a serial library book borrower, a messy gardener, and a mom of two boys who spends a lot of time in hockey rinks and on baseball fields.