Wood Pallet Christmas Crafts: Sustainable DIY Christmas Decorations
Are you looking for sustainable DIY outdoor Christmas decorations or a fun pallet Christmas craft? You’ll love this larger-than-life Christmas present!
This post contains affiliate links.
When it comes to holiday decorations, I want you to be able to see my house from space.
I want NASA to call and tell me to turn the dang lights down.
I want neighbors to stop in the street in awe. (I’m pretty sure that if you shake my family tree hard enough, Clark Griswold will fall out.)
How on earth does this fit in with my environmental goals, you ask, when the majority of holiday decorations are composed of cheaply made plastic that usually falls apart in a year or so? Honestly, it’s a bit of a challenge, and this year I decided, “Challenge accepted!”
Instead of treating myself to another holiday inflatable, I dove deep into the world of DIY outdoor Christmas decorations. There are tons of great pallet Christmas crafts out there, but I wanted something larger-than-life, show-stopping, and that wouldn’t require a lot of expertise with a saw or power tools. It’s also important to me that our DIY outdoor Christmas decorations would be visible both by day and night, so I wanted something that would light up.

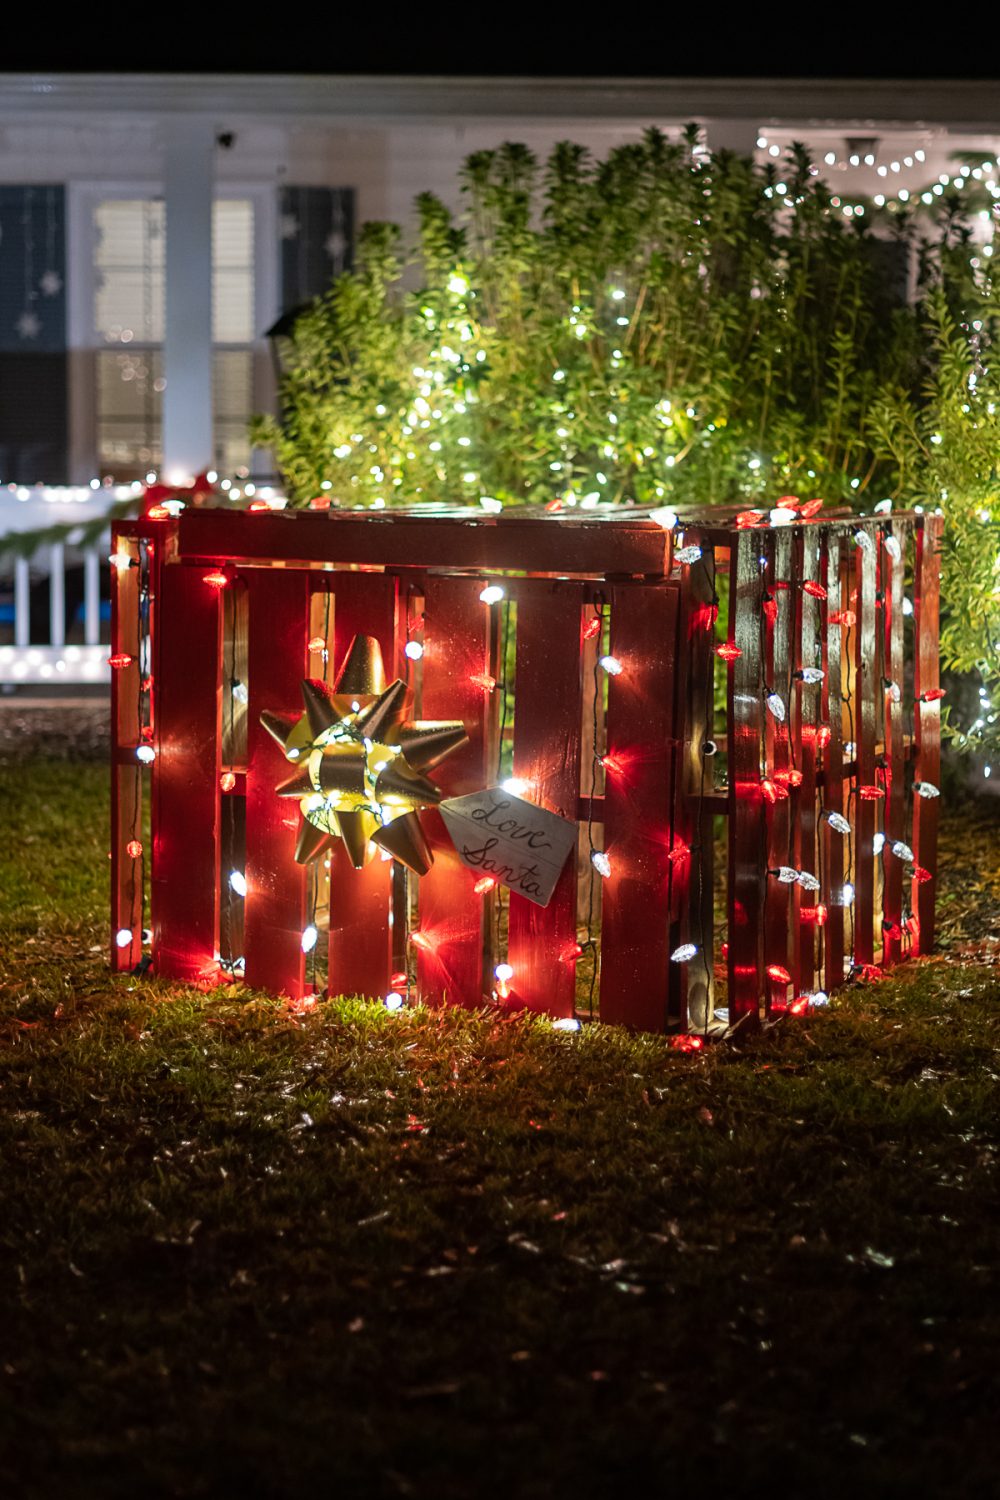
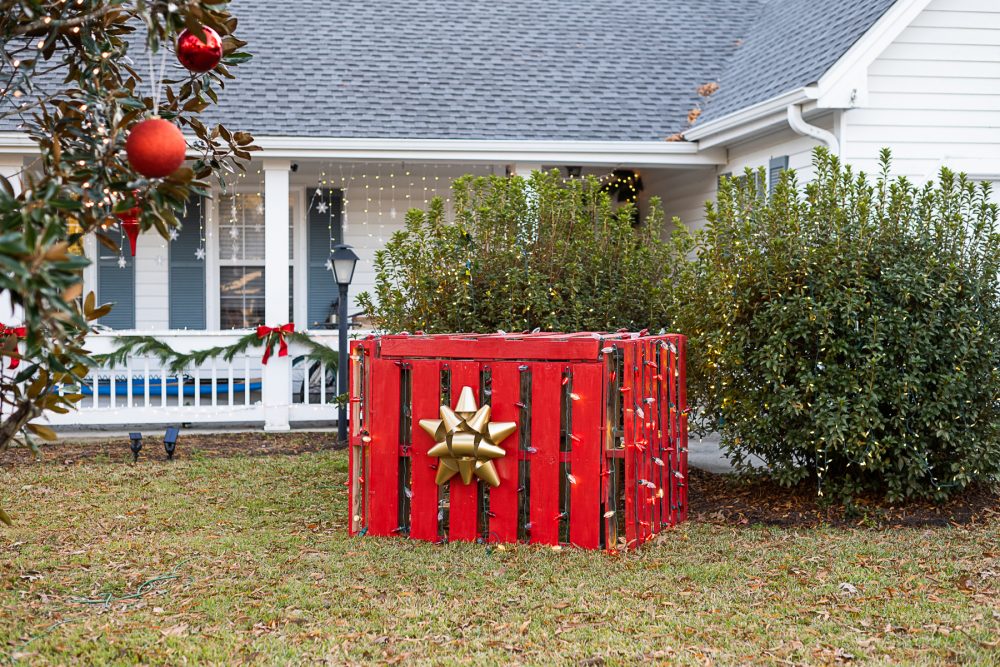
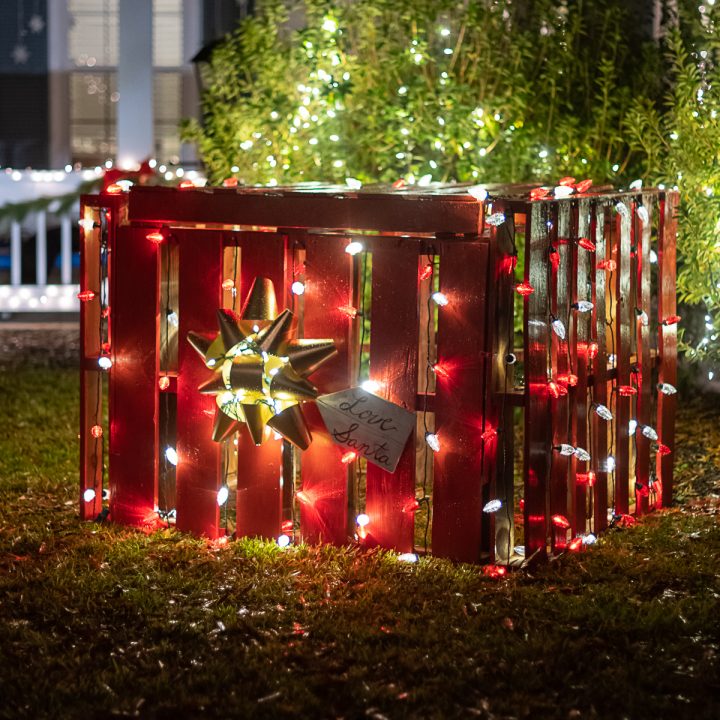
Thus, my idea for an enormous, light-up wood pallet present was born!
Why wood pallets? According to the EPA, “Pallets are estimated to account for over 90 percent of total wood packaging,” and “In 2018, landfills received 12.2 million tons of wood.”
Circular Supply Chain adds, “Do you realize that we produce about 500 million pallets a year in the US alone to replace the worn pallets that we discard each year? The number of pallets out there is truly staggering. Nearly 2 billion wooden pallets are currently in circulation in the US, with a majority of them replaced each year.”
So, where do you get free wood pallets?
Some of them are “spoken for” by businesses that will reuse them, so don’t just grab any pallet and run. A lap around the neighborhood the night before trash pickup will likely yield a few, but I got mine from someone on a Buy Nothing Facebook group, and a small local business called the Coastal Cupboard, which sells kitchen wares. Unlike Lowes, Petco, or Home Depot, they do not reuse their pallets.
Buckle up and join me on this wild crafting sleigh ride, y’all!
Materials for DIY Outdoor Christmas Decorations: Wood Pallet Present
Notes: This craft is really flexible, so remember to rifle through your garage and see what you have that may work before purchasing items. Remember that places like Habitat for Humanity or Goodwill may have supplies like paint, screws, and holiday lights, and your local Buy Nothing group is always a great zero-waste resource. Additionally, most people are also happy to let you borrow their power tools.
Pallets also come in a mind-blowing number of shapes and sizes, so there are absolutely other combinations of pallet sizes that you can use to execute this craft. Your best bet is to mock up your present by creating your box before even getting started to ensure you’ve got the right combination of sizes that still have the slats going in the same direction.
Finally, you will likely need an able-bodied partner-in-cheer to help you assemble this beautiful beast of a pallet Christmas craft in the final stages.
Basics for your DIY pallet wood present:
- For the short ends of your present: 2 wood pallets measuring approximately 48 inches x 39 inches (the 48-inch side will be the long side)
- For the front and back of your present: 2 wood pallets measuring approximately 47 inches x 36 inches high (the 47-inch side will be the long side)
- For the lid of your present: 1 wood pallet measuring approximately 44 inches x 44 inches
To clean your pallets:
- Hammer to flatten any pokey nails
- Dish soap and a power washer or bucket and scrub brush
To assemble your DIY pallet present:
- Red or green paint (something weather-resistant, like outdoor house paint or furniture/acrylic paint)
- Polyurethane Clear-coat to seal the base coat against the elements and bring out the color
- Medium to wide paint brush so you can work quickly
- 8 metal brackets with accompanying screws (2 per corner around the sides of the present)
- Drill
- Wood screw variety pack
- Miter saw
To style your DIY pallet present:
- For the gift tag: 1 wood pallet of any size or a scrap piece of lumber
- White weather-resistant paint for the gift tag (optional)
- Paint pens or Sharpie markers for the gift tag (optional)
- 4-5 strands of LED Christmas lights (optional)
- Giant fabric bow or metal bow (ours is a metal bow wreath from Home Depot)
- Extension cord
- Gloves (optional, but helpful for threading the Christmas lights through if you have delicate skin on your hands)
How to Make DIY Outdoor Christmas Decorations: Wood Pallet Present
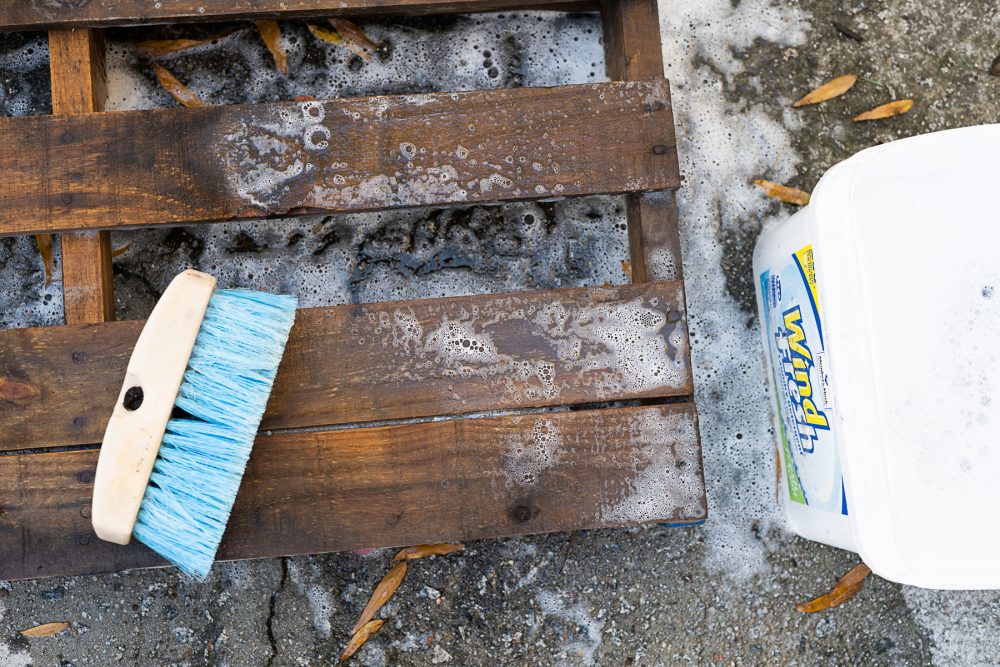
- Wash your pallets with a dilute dish soap and water solution and let them dry overnight.
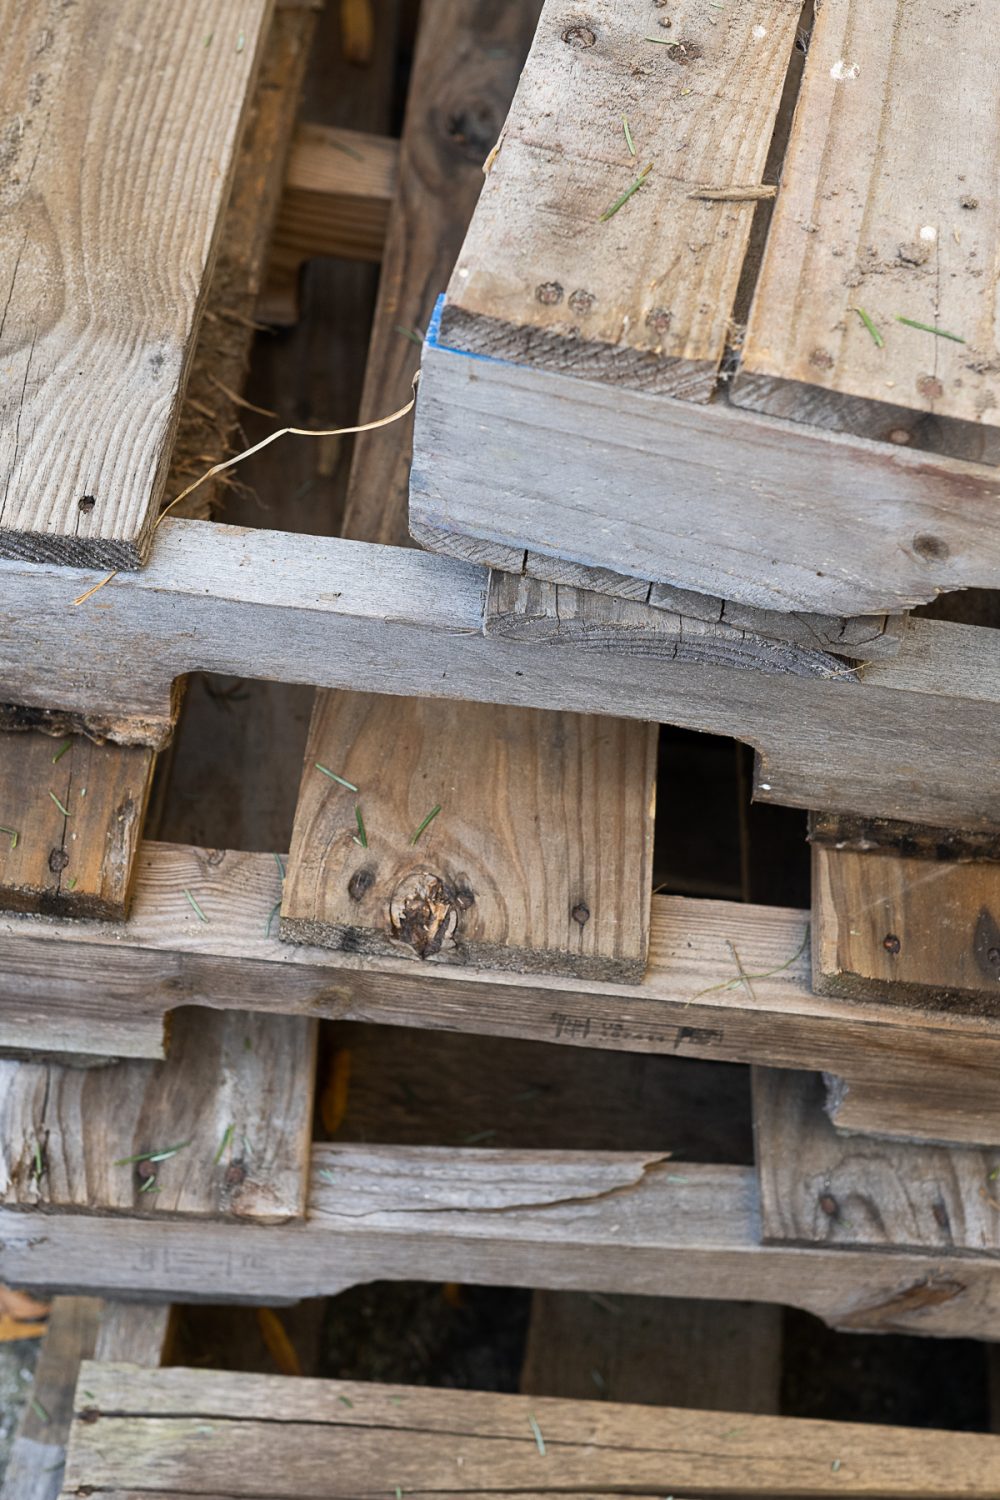
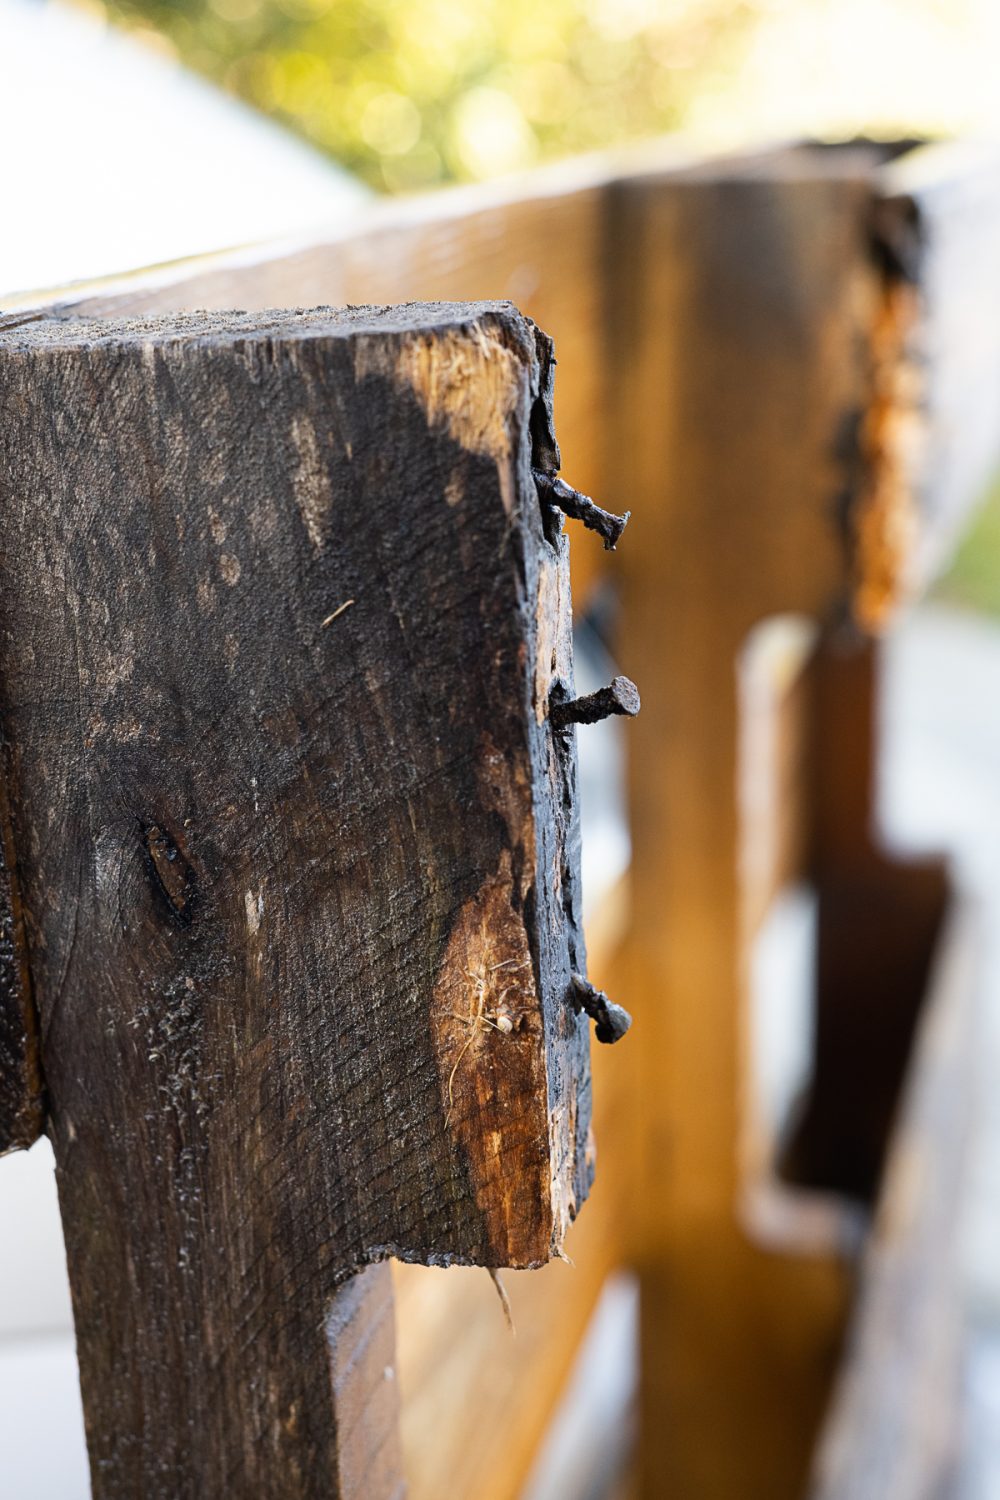
- Inspect your pallets for any projecting nails, and hammer them in before you get started. (Also, stay up to date on your tetanus shots, y’all.)
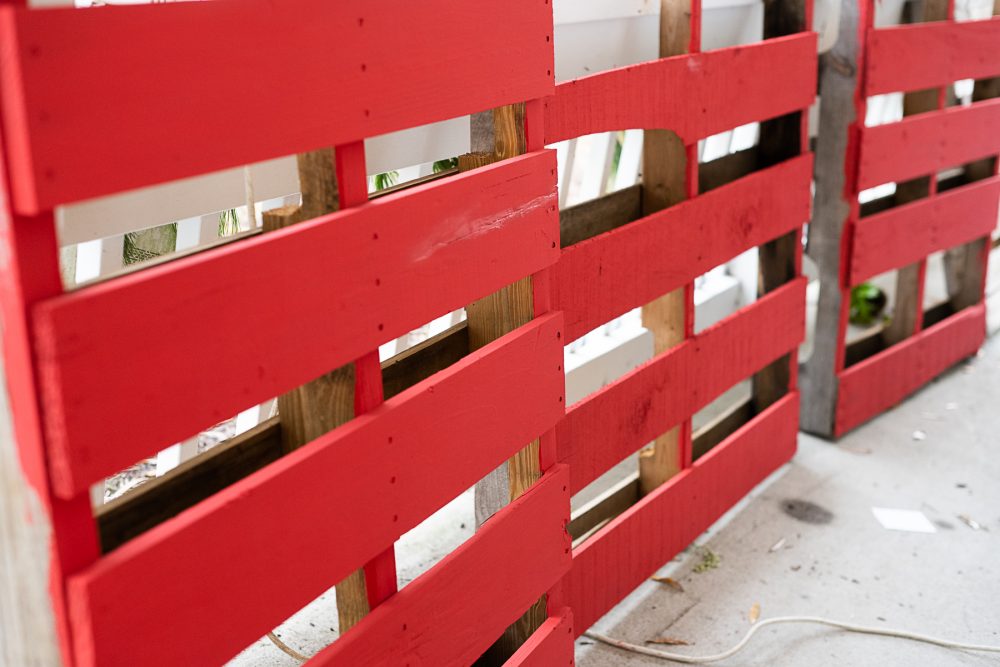
- Decide which pallet(s) will be your present’s forward-facing side(s), and paint them first. Then paint the other pallets (excluding the one for your gift tag; leave that one alone). The first coat will take the longest, so work quickly with a wide brush in a well-ventilated area. I only painted the front set of slats on each pallet (what would ultimately be the exterior side) as I was running lights across the gaps.
- Apply additional coats as needed to get the desired coverage and hue. (I did about 4 on the front pallet and 2 on the others.)
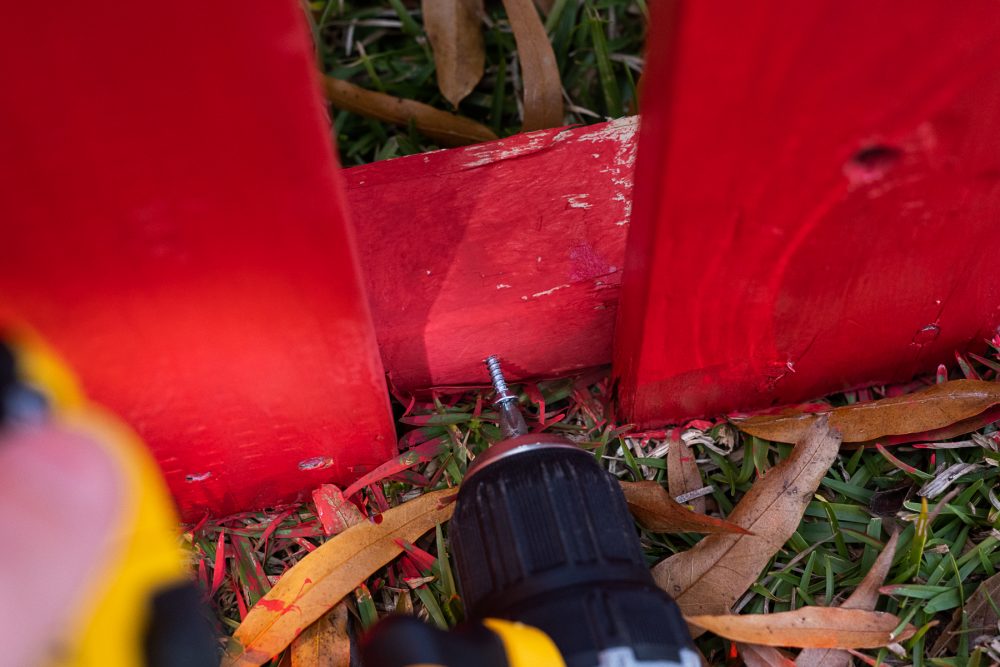
- Assemble your pallet in its final location. The present will likely be too heavy for most people to move once it’s fully assembled. Then, use your metal brackets and screws to attach the sides of the present to each other. I used 2 per corner.
- Rest the “lid” of your present on top of your square “sides”. Since the pallets are so heavy, I didn’t bracket this one in and had no issues.
- Touch up any paint as needed, let it dry, and apply your protective clear coat. This will dry very, very quickly.
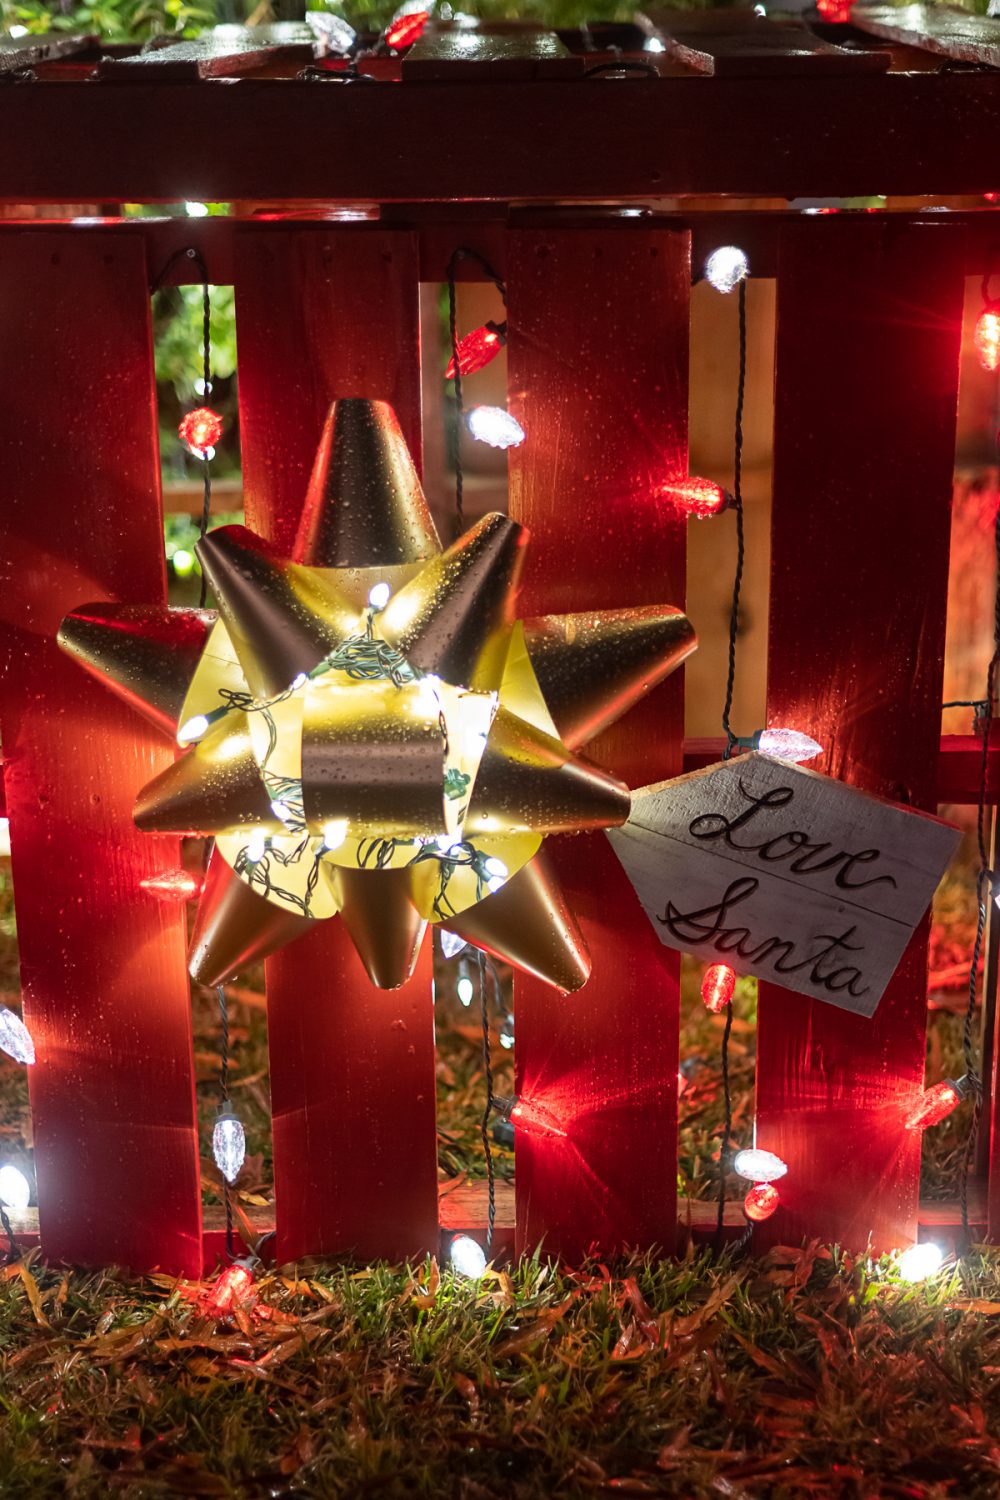
- Hang your bow or wreath in the center of your forward-facing pallet.
YOU CAN ABSOLUTELY STOP HERE! If you’re feeling extra festive, keep going.
To run lights throughout your DIY Christmas present made from wood pallets, follow the instructions below:
- Run an extension cord to one of the back corners of your present. Plug in your first strand of Christmas lights and set them aside.
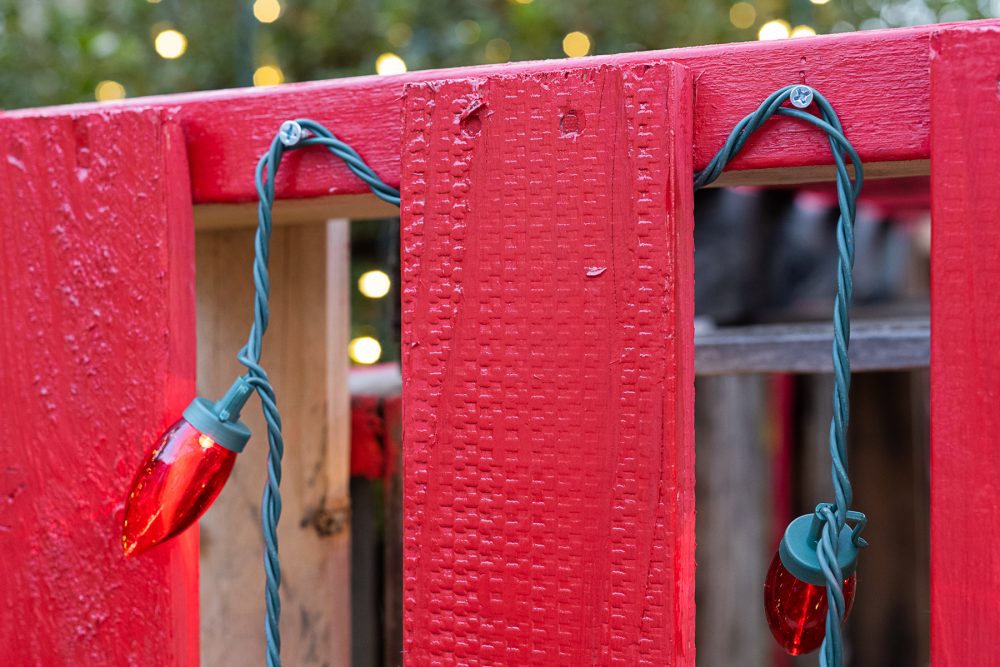
- Eyeball the mid-point of the “gap” between your painted slats, and add a ¾-inch screw at the top and bottom of each gap along your pallet, leaving about ½ inch of your screw’s top end protruding so that you can easily secure your lights in place.
- If you have delicate winter skin, put on those gloves and begin attaching your lights. (I did not wear gloves, and I looked like I lost a fight with the neighbor’s cat.) Take care to thread behind the painted slats for a cleaner aesthetic.
- Repeat along the sides and top of your present, and end by running the “plug” side of your lights along the grass behind your bow.
- If desired, tuck a strand of white lights into your bow to make it really pop. (I highly recommend this!)
YOU CAN ALSO STOP HERE! But if you’re in full-blown Buddy the Elf mode, here’s how to make a gift tag using the spare, unpainted wood pallet:
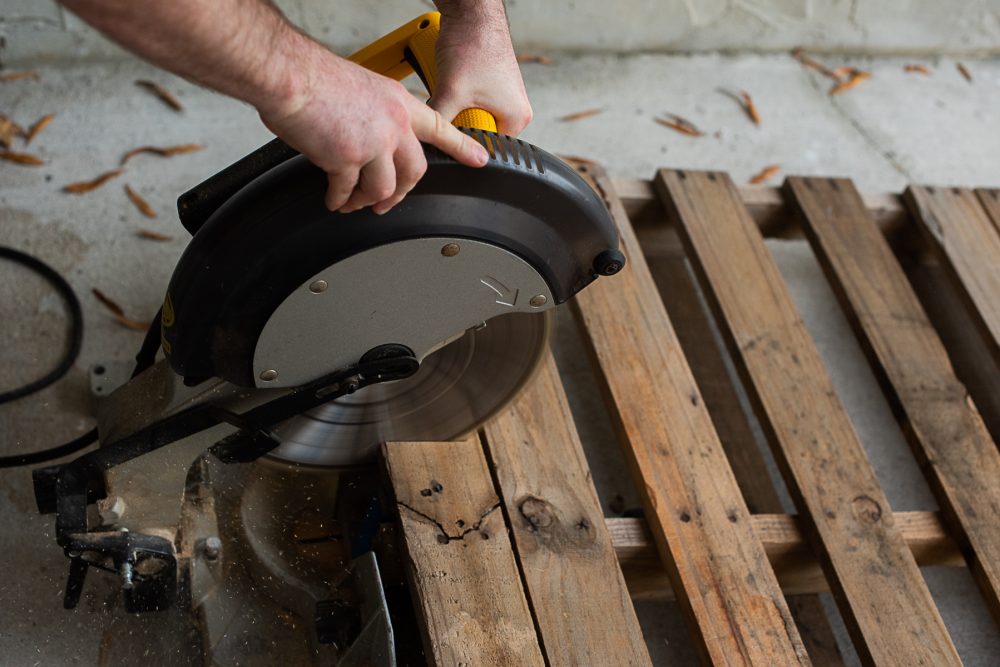
- Use the miter saw to cut two panels from your pallet and trim them to the same length (mine were 11 inches by 3.5 inches). It’s easiest to cut to the inside of the nails on either side. Reserve one small section of waste wood to anchor the tag pieces together, about 4 or 5 inches in length.
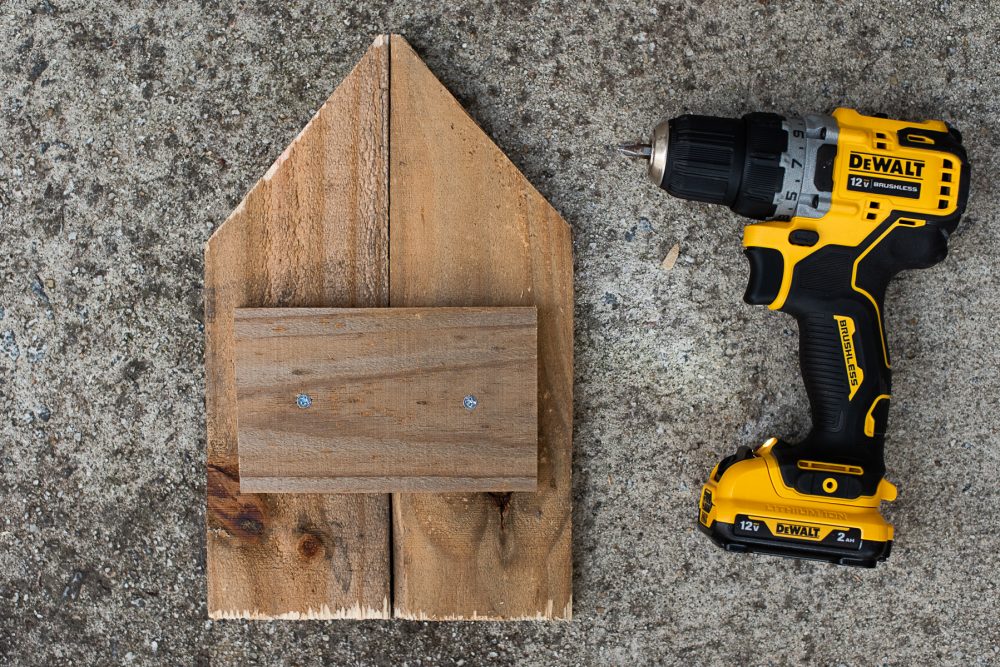
- Using the miter saw, trim one edge of each piece of your future gift tag at a 45-degree angle. Then, place the angled pieces together to form the top of your gift tag. Anchor everything in place by placing the short piece of scrap wood across the gap and screwing it in place with two screws. Select screws that are long enough to go through your anchor piece without protruding through the gift tag pieces.
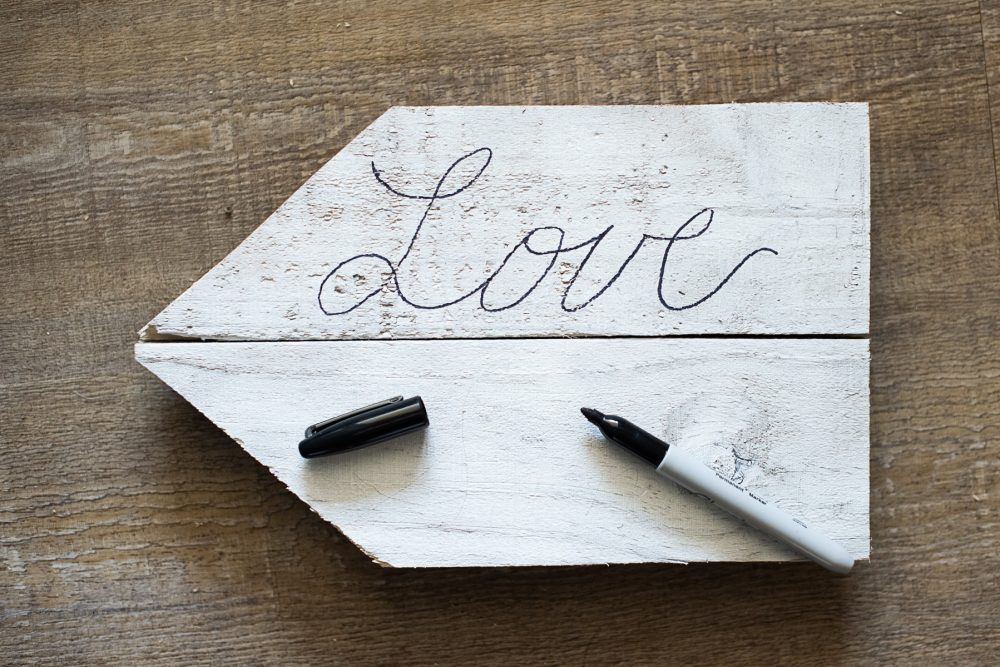
- Flip your gift tag over, paint it white, and let it dry. This won’t take long.
- Once the paint is fully dry, decorate or inscribe your tag as desired with Sharpies, paint, or paint pens. Cover with a clear coat if desired.
- Attach the gift tag to your bow with one last screw (or just rest it against the edge of your bow and the ground). I used a 2-inch wood screw.
- Enjoy being the envy of the neighborhood!
What to do with your DIY Wood Pallet Present after Christmas:
- You can remove the brackets and keep your pallet for another year if so desired.
- Remember that Valentine’s Day, Easter, and Mother’s Day are coming up! You can disassemble your present and use the pallet wood for one of the crafts below to give as a gift:
All photos via Reese Moore Photography
If you enjoyed Wood Pallet Christmas Crafts: Sustainable DIY Christmas Decorations, you may also enjoy:
How to Repurpose Old Christmas Trees into DIY Fire Starters
11 Easy Tips For Sustainable Holiday Cards
Sustainable Gifts for Kids | Sports Edition
About the Author

Reese Moore
Reese Moore is a photographer, content creator, and pickle connoisseur who divides time between Charleston and Lake Lure. When she’s not behind the lens shooting stunning images for Reese Moore Photography, Reese loves to spend her time wandering the woods with her dog Gatsby or adventuring with her husband Logan in their Airstream Basecamp.
DIY Wooden Pallet Christmas Gift
Materials
- For the short ends of your present: 2 wood pallets measuring approximately 48 inches x 39 inches (the 48-inch side will be the long side)
- For the front and back of your present: 2 wood pallets measuring approximately 47 inches x 36 inches high (the 47-inch side will be the long side)
- For the lid of your present: 1 wood pallet measuring approximately 44 inches x 44 inches
- Red or green paint (something weather-resistant, like outdoor house paint or furniture/acrylic paint)
- Polyurethane Clear-coat to seal the base coat against the elements and bring out the color
- Medium to wide paint brush so you can work quickly
- 8 metal brackets with accompanying screws (2 per corner around the sides of the present)
- For the gift tag: 1 wood pallet of any size or a scrap piece of lumber
- White weather-resistant paint for the gift tag (optional)
- Paint pens or Sharpie markers for the gift tag (optional)
- 4-5 strands of LED Christmas lights (optional)
- Giant fabric bow or metal bow (ours is a metal bow wreath from Home Depot)
Tools
- Hammer (to flatten any pokey nails)
- Dish soap and a power washer or bucket and scrub brush
- Drill
- Wood screw variety pack
- Miter saw
- Extension cord
- Gloves (optional, but helpful for threading the Christmas lights through if you have delicate skin on your hands)
Instructions
- Wash your pallets with a dilute dish soap and water solution and let them dry overnight.
- Inspect your pallets for any projecting nails, and hammer them in before you get started. (Also, stay up to date on your tetanus shots, y'all.)
- Decide which pallet(s) will be your present's forward-facing side(s), and paint them first. Then paint the other pallets (excluding the one for your gift tag; leave that one alone). The first coat will take the longest, so work quickly with a wide brush in a well-ventilated area. I only painted the front set of slats on each pallet (what would ultimately be the exterior side) as I was running lights across the gaps.
- Apply additional coats as needed to get the desired coverage and hue. (I did about 4 on the front pallet and 2 on the others.)
- Assemble your pallet in its final location. The present will likely be too heavy for most people to move once it's fully assembled. Then, use your metal brackets and screws to attach the sides of the present to each other. I used 2 per corner.
- Rest the "lid" of your present on top of your square "sides". Since the pallets are so heavy, I didn't bracket this one in and had no issues.
- Touch up any paint as needed, let it dry, and apply your protective clear coat. This will dry very, very quickly.
- Hang your bow or wreath in the center of your forward-facing pallet.
- To Add Lights | Run an extension cord to one of the back corners of your present. Plug in your first strand of Christmas lights and set them aside.
- Eyeball the mid-point of the "gap" between your painted slats, and add a ¾-inch screw at the top and bottom of each gap along your pallet, leaving about ½ inch of your screw's top end protruding so that you can easily secure your lights in place.
- If you have delicate winter skin, put on those gloves and begin attaching your lights. (I did not wear gloves, and I looked like I lost a fight with the neighbor's cat.) Take care to thread behind the painted slats for a cleaner aesthetic.
- Repeat along the sides and top of your present, and end by running the "plug" side of your lights along the grass behind your bow.
- If desired, tuck a strand of white lights into your bow to make it really pop. (I highly recommend this!)
- For the Gift Tag | Use the miter saw to cut two panels from your pallet and trim them to the same length (mine were 11 inches by 3.5 inches). It's easiest to cut to the inside of the nails on either side. Reserve one small section of waste wood to anchor the tag pieces together, about 4 or 5 inches in length.
- Using the miter saw, trim one edge of each piece of your future gift tag at a 45-degree angle. Then, place the angled pieces together to form the top of your gift tag. Anchor everything in place by placing the short piece of scrap wood across the gap and screwing it in place with two screws. Select screws that are long enough to go through your anchor piece without protruding through the gift tag pieces.
- Flip your gift tag over, paint it white, and let it dry. This won't take long.
- Once the paint is fully dry, decorate or inscribe your tag as desired with Sharpies, paint, or paint pens. Cover with a clear coat if desired.
- Attach the gift tag to your bow with one last screw (or just rest it against the edge of your bow and the ground). I used a 2-inch wood screw.
- Enjoy being the envy of the neighborhood!