Sustainable Christmas: DIY Compostable Wrapping Paper
Are you looking for a fun and easy sustainable Christmas craft? Are you ready to try your hand at DIY compostable wrapping paper? This simple and sustainable craft uses a few common kitchen items to create bold, beautiful wrapping paper that you can discard in any backyard composter.
This post contains affiliate links.
“Oh dear God,” my husband gasped, staring at me in shock. “You’re making wrapping paper out of potatoes.”
“Ummm, actually, I’m making the wrapping paper with potatoes,” I delicately corrected him, clutching a gooey potato.
Fortunately, he burst out laughing and left our hot mess of a kitchen, muttering, “Of course. Of course, it’s potatoes this year.”
Listen, trying to go zero waste during the holidays or have a sustainable Christmas is hard, and gift wrapping presents a particular set of problems for the festively inclined. Earth911 estimates that “approximately 4.6 million lbs. of wrapping paper is produced in the U.S. each year, and that about 2.3 million pounds ends its life in landfills.” So, for the past several years, we’ve used brown kraft paper to wrap our gifts.
Two years ago, I hand-stamped snowflakes onto kraft paper with acrylic paint and added baker’s twine and jingle bells. They were gorgeous, but the acrylic paint meant that the DIY wrapping paper, while still a “greener” choice than metallic or glossy traditional wrapping paper, still wound up in the landfill.
Last year, I used plain brown paper and baker’s twine, but added dried baby’s breath and dried orange slices as compostable flourishes. While this wrapping paper was recyclable or compostable, I honestly just missed having some color. I love a simple, blatantly sustainable Christmas every several years, but I also miss the loud, splashy, colorful wrapping paper of my youth.
This got me thinking… was it possible to make DIY compostable wrapping paper? Could I create something bold, whimsical, and colorful while still staying on track with my goals for a sustainable Christmas celebration?
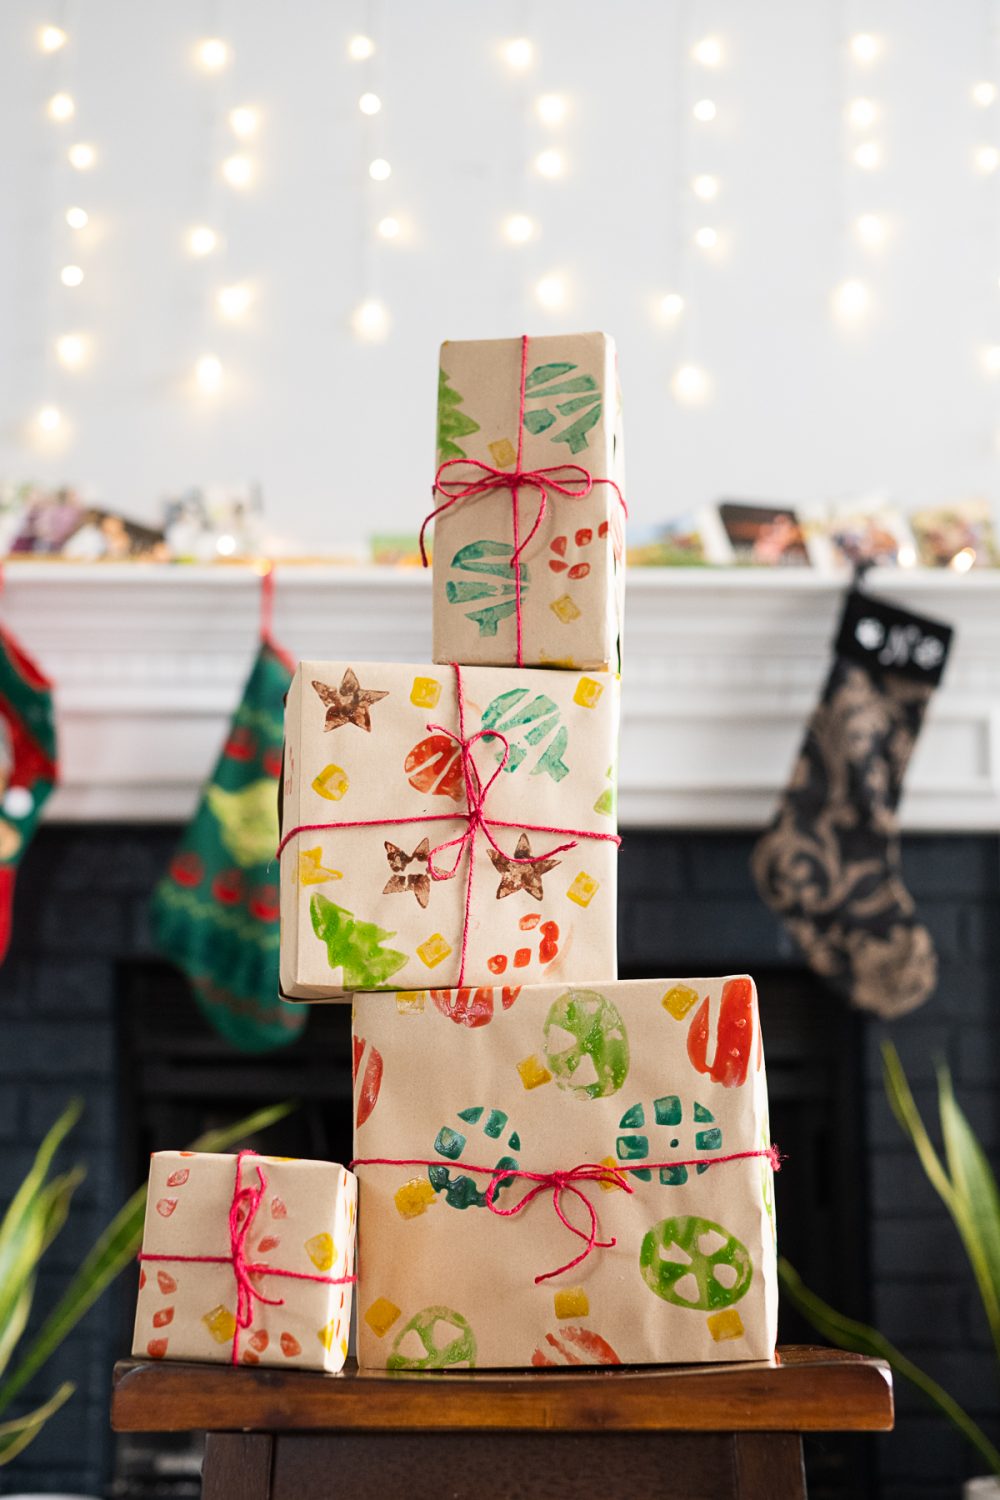
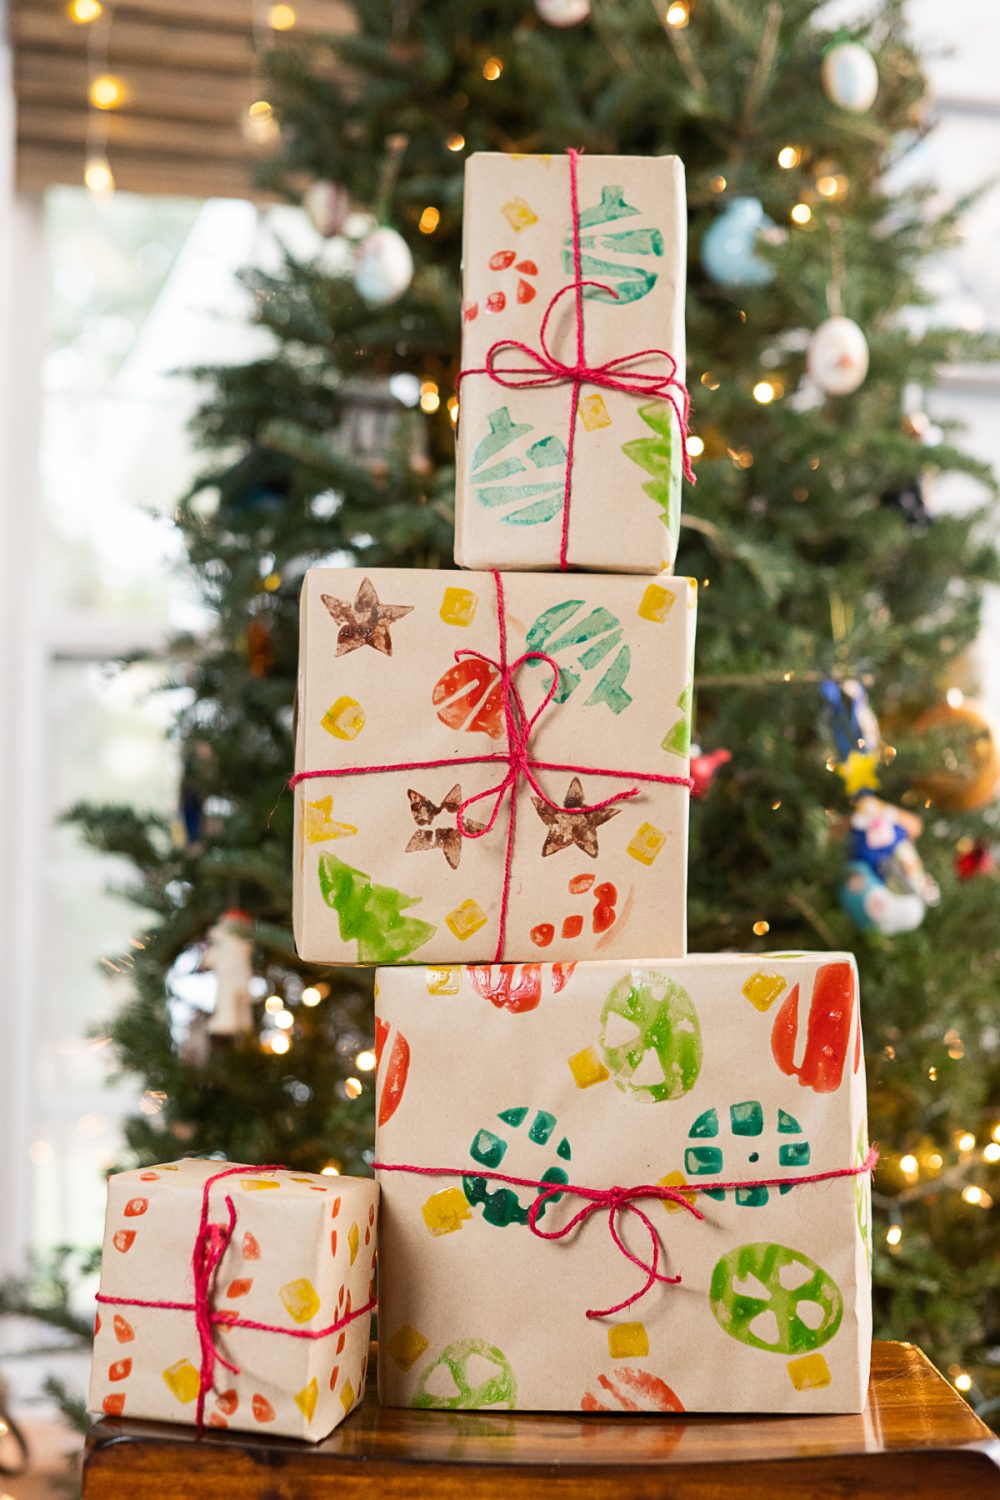
Yes, fellow hippie friends, yes, you can. All you need is a large, flat workspace (preferably in a room with a ceiling fan), a few common pantry and kitchen items, and a roll of brown craft paper.
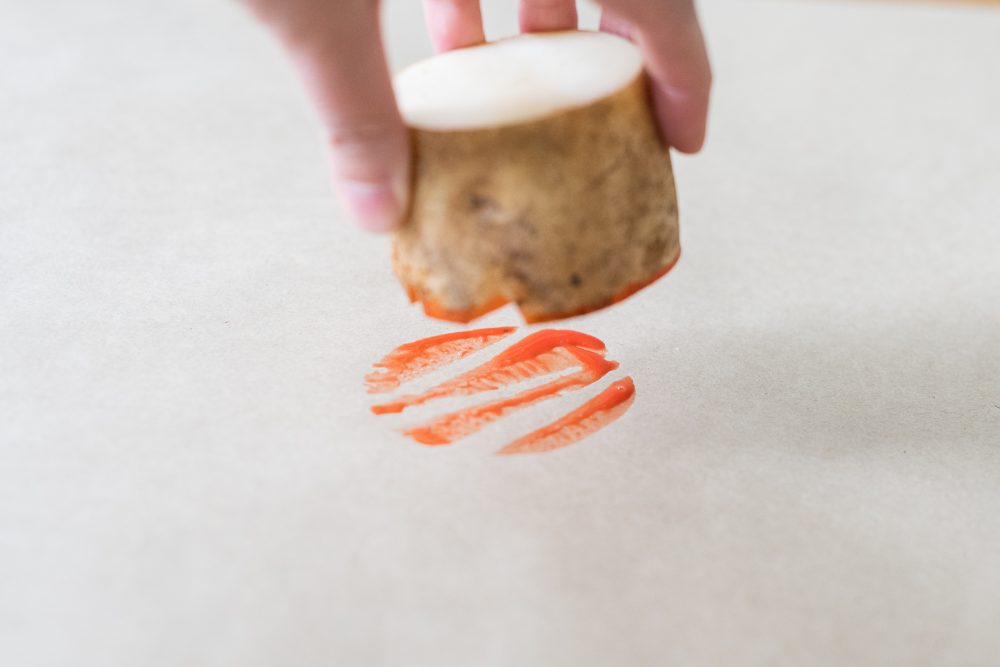
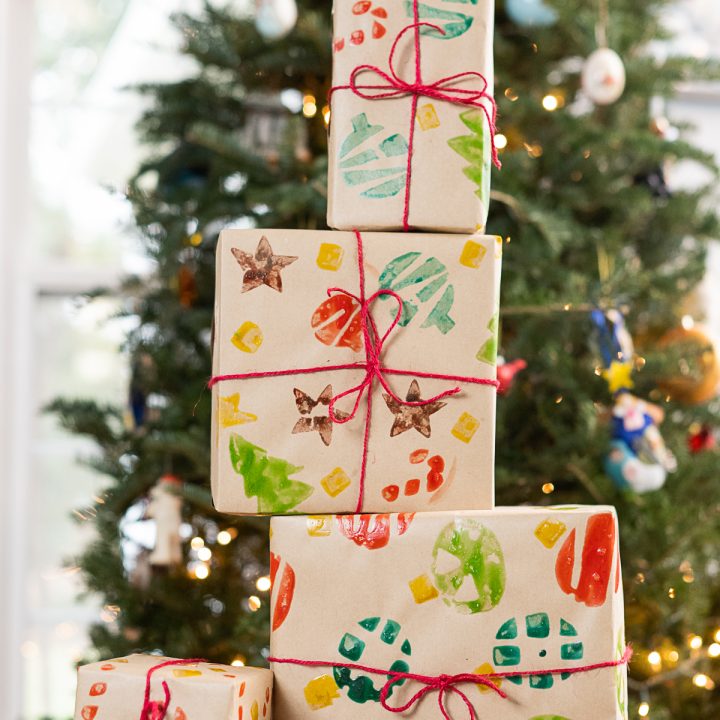
Basically, we’ll be using potato stamps and tempera paint to “woodblock print” the kraft paper. The end effect is bold, colorful, and irreparably charming.

Can you do this craft with kids?
Yes! While I don’t recommend letting kids work with the knives to cut their own potato stamps, they will love the paint-mixing and stamping process. Let them express their creativity, explore color theory, and learn about sustainability playfully. It will also make this wrapping paper even more meaningful for the recipients.
Let’s get started.
What is tempera paint?
Tempera paint, which we’ll be using for this sustainable Christmas craft, is a permanent, relatively fast-drying paint that uses egg yolks as its key binding ingredient.
Examples of tempera paintings still exist today that date back to the first century AD, and they’re even found on early Egyptian sarcophagus decorations.
There are a number of tempera paint recipes, but the primary ingredients are egg yolks, water, and (usually) powdered pigment.
Wikipedia notes that, “Egg tempera is not a flexible paint and requires stiff boards; painting on canvas will cause cracks to form and chips of paint to fall off,” but the recipe we’ll be using has enough of a waxy texture when dry that I had no issue wrapping my gifts without flaking or cracking.
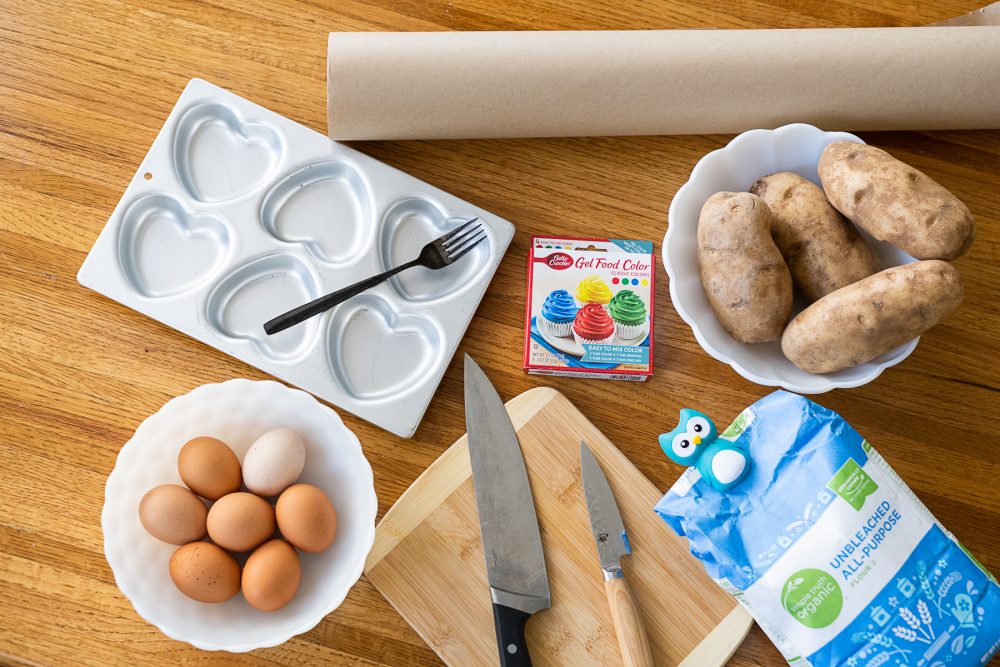

Materials for DIY Compostable Wrapping Paper
1 roll of kraft paper
1 tray of muffin tins
6-12 eggs
3-4 potatoes
Chef’s knife
Paring knife
Small cookie cutters (optional)
Small forks to whisk each color
Food coloring
Flour
Water
Measuring spoons
Cutting Board
Damp cloth towel
Paintbrush (optional)
Note: As I learned the hard way, you’ll want to store your wrapping paper and presents out of reach of mischievous pets. I noticed one of my presents looked a little watery and smeared several days after wrapping it and putting it under the tree. I discovered my 10-year-old Australian Shepherd was stealthily licking all the paint off whenever we weren’t in the room.
Instructions for Making DIY Compostable Wrapping Paper
- Rinse your potatoes and lightly scrub with a washcloth or scrub brush to remove any dirt or debris.
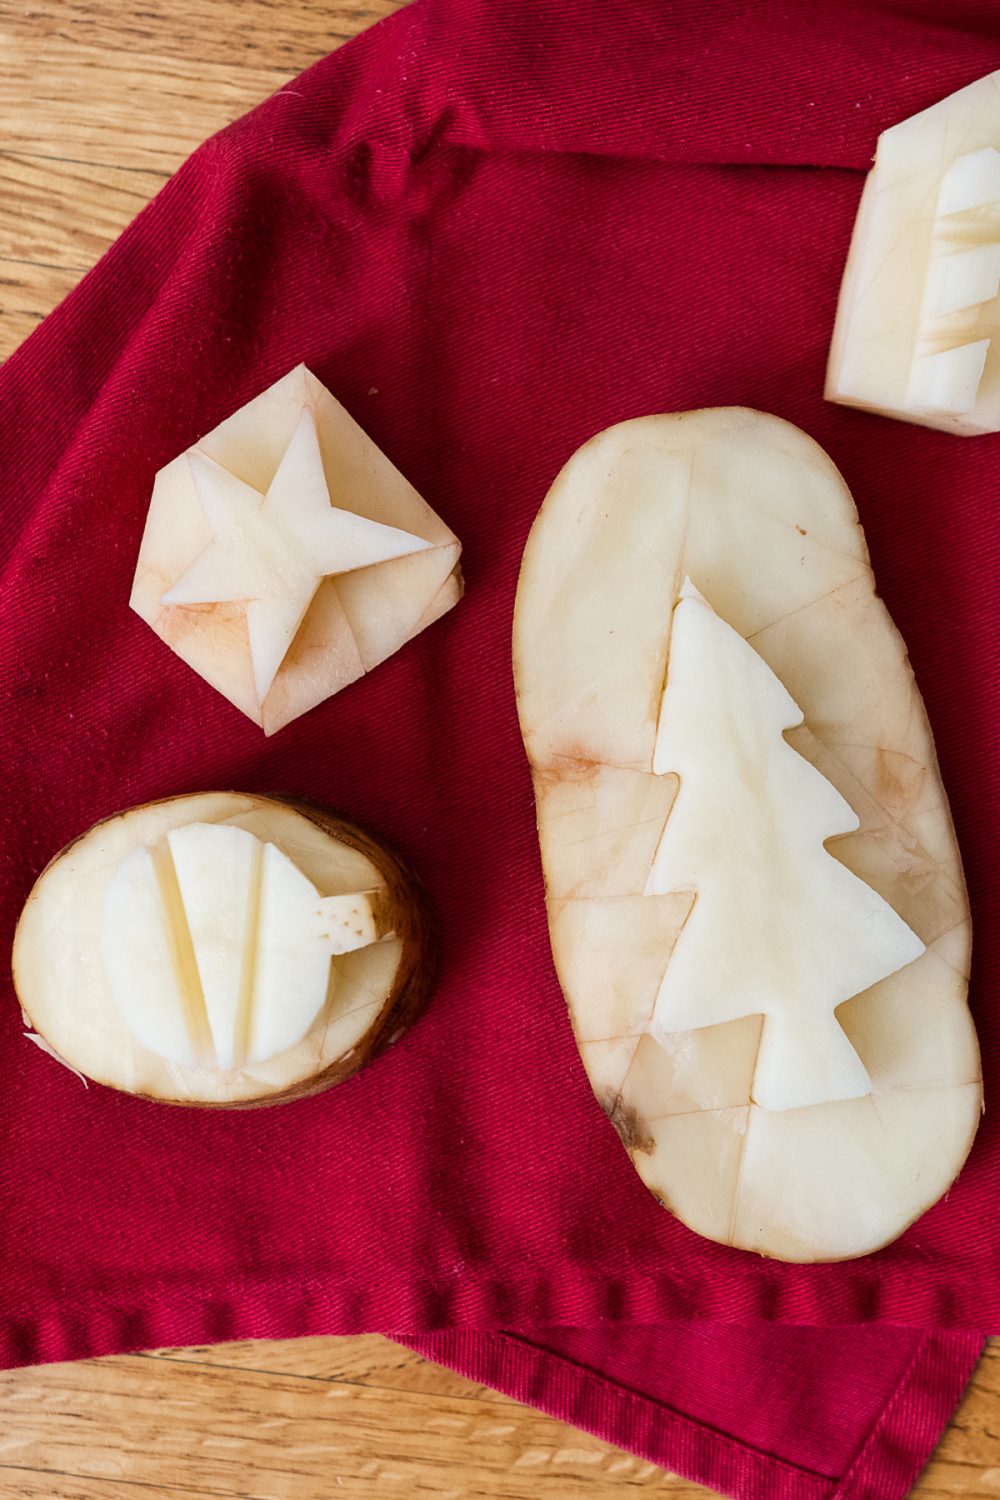
- Slice your potatoes into 2-3 sections. If you’re planning a larger design, slice the potato lengthwise to give yourself more surface area to work with.
- Use the paring knife (carefully!) to create your potato stamp. If you’re working with cookie cutters, press the design into the potato and cut away the excess. If you’re free-handing your design, cut the perimeter of your stamp first. You’ll want the stamp to project about ½ to ¾ of an inch from the part you’ve cut away.
- Set your potatoes aside, with the stamp side down on the wet towel. If the surface of your potato dries out, it can warp your design.
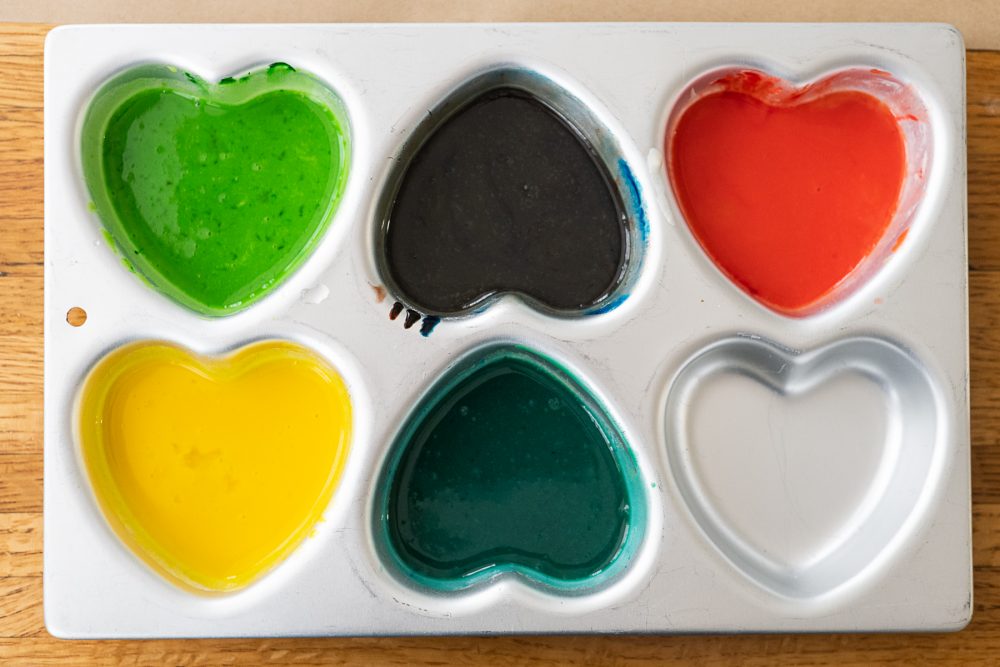
- Mix your tempera paints! Spoon ½ teaspoon of flour into each muffin tin that you’ll be using for a different color of paint. Add 1 teaspoon of water and whisk with a fork until most of the clumps are out. Note: This will take forever if you try to mix the dry flour directly into the egg.
- Separate your egg whites from your egg yolks. I do this by sharply cracking the egg on the edge of a glass bowl, separating the shell into halves, and passing the yolk portion back and forth between the halves until almost no white remains. Reserve the whites in the refrigerator for another use (see the Clean Up section below for recipes). Note: Some tempera paint recipes stress not to get any white in your paint or to pierce the yolk membrane with a needle and let it drain out. If you’re creating a fresco, painting a sarcophagus, or painting the next Mona Lisa, that may be relevant. This, however, is wrapping paper that’s compost-bin-bound, so don’t get too hung up on that. You can always fish any “boogery” parts of the egg out of your paint with a fork if something slips in.
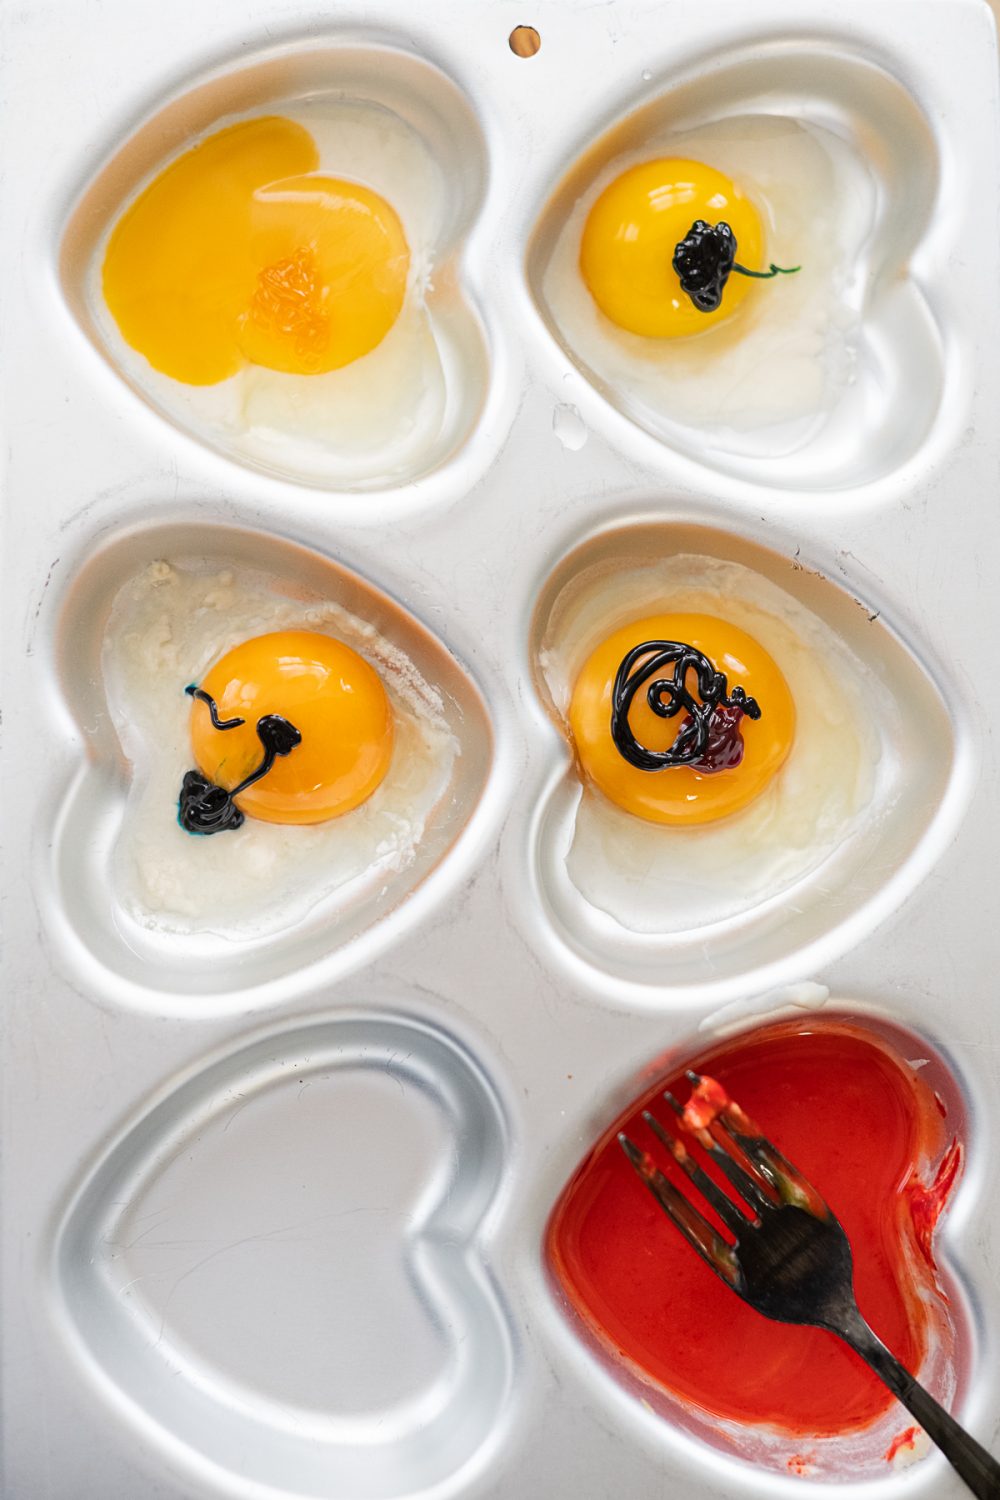
- Add one egg yolk per muffin cup you’ll be using. Squeeze some of your gel food coloring on top of the egg yolk, and whisk the mixture together with a fork. Have fun playing with your colors, but remember that the base is inherently yellow because of the yolk, and you’ll be printing on brown – what I’m trying to say is that a true purple is a lost cause, but still fun to try anyway.
- Roll out a long expanse of kraft paper so that it would curl down if unweighted, and place two or three objects like salt and pepper shakers or small jars on the short ends to anchor the paper while you work. (This is the easier direction to wrap your presents; otherwise, the paper will fight you.)
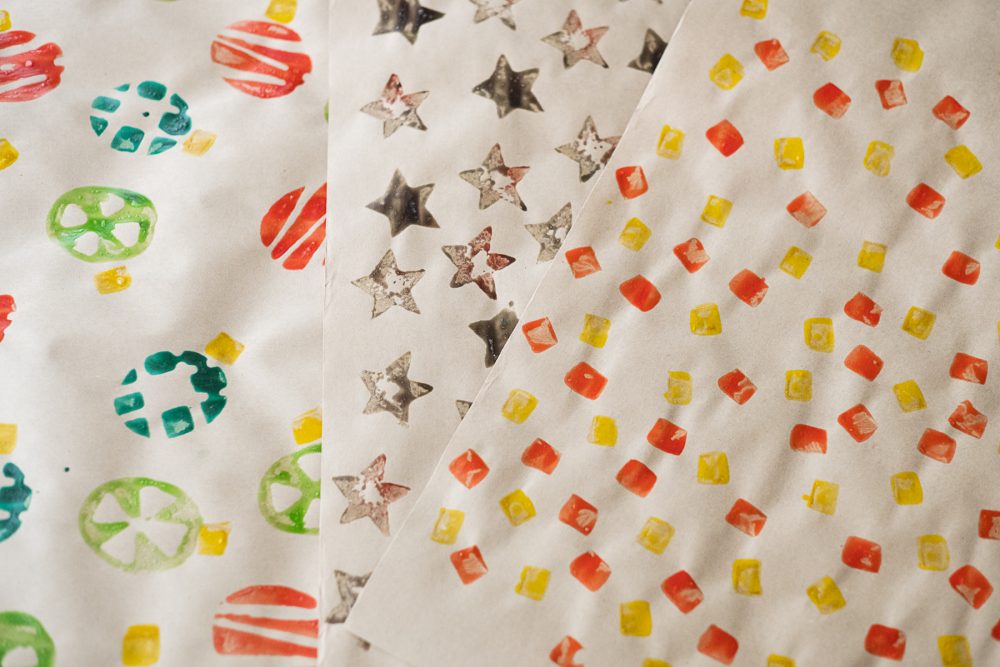
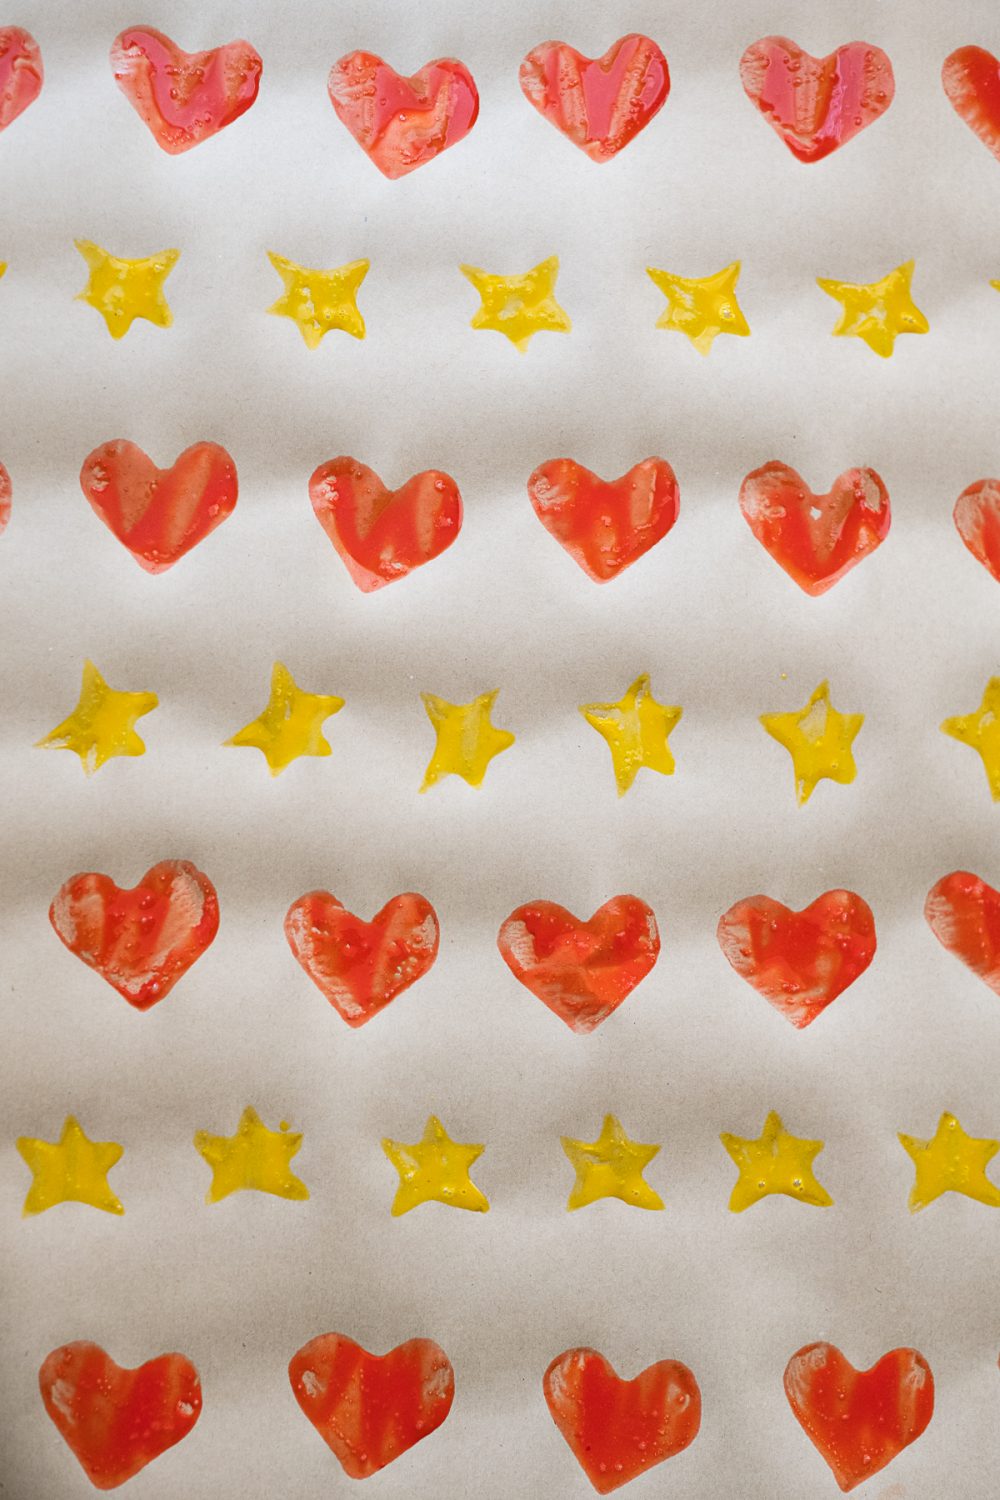
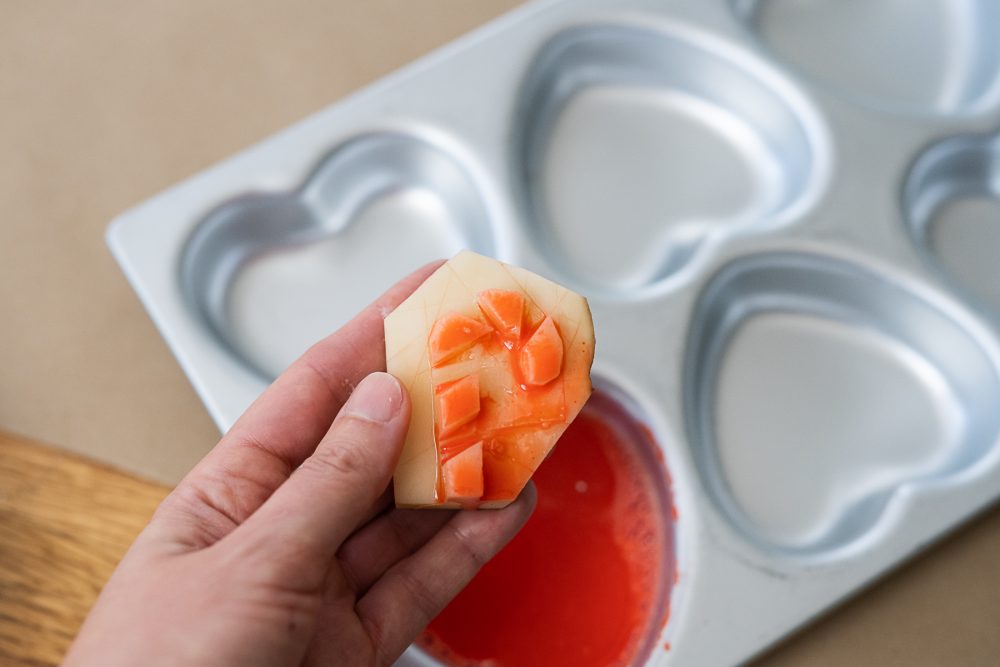
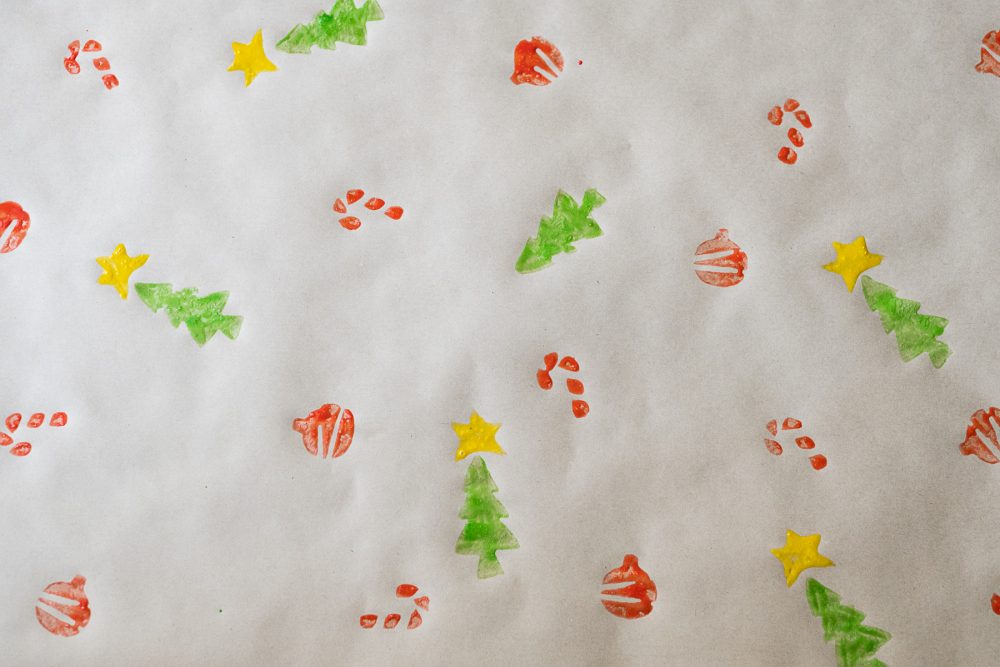
- Dip your potato stamps in the paint, let some excess run off, and have fun! If you get excess drips on the paper, wipe them up immediately with a towel (if they bother you). Is one of your stamps not printing in its entirety? Use the paintbrush to fill in the gaps. Note: Are you wrapping smaller presents? You’ll want to create a sheet where the stamps are tightly spaced to ensure that each gift has a solid dose of color and cheer. Are you wrapping larger presents? A bold print with spaces between the stamps will still read correctly on a large box.
- Set the wet or tacky paper aside, and let it dry overnight. It will dry much faster with a ceiling fan turned on! You may need to touch the paint to see if it’s dried, as this tempera paint has a pretty, glossy sheen to it, and it can be hard to tell if it’s still wet or just shiny.
Clean Up for DIY Compostable Wrapping Paper
- Toss the egg shells, used potatoes, excess paint, and paper scraps directly into the compost.
- Use the reserved egg whites in one of these recipes.
- Wash your muffin tins, forks, and work surface with soap and water.
- After the gifts have been opened, remove any tape and ribbons and discard the paper in the compost bin.
All photos via Reese Moore Photography
If you enjoyed Sustainable Christmas: DIY Compostable Wrapping Paper, you may also enjoy:
Sustainable Gifts for Kids | Young Artist Edition
Wood Pallet Christmas Crafts: Sustainable DIY Christmas Decorations
Everything to Know about Making Aromatic Homemade Fire Starters
About the Author

Reese Moore
Reese Moore is a photographer, content creator, and pickle connoisseur who divides time between Charleston and Lake Lure. When she’s not behind the lens shooting stunning images for Reese Moore Photography, Reese loves to spend her time wandering the woods with her dog Gatsby or adventuring with her husband Logan in their Airstream Basecamp.
How to Make Colorful DIY Compostable Wrapping Paper
Try this project to make easy and colorful compostable wrapping for any holiday or special occasion. You can personalize this paper in so many ways to suit your desires.
Materials
- 1 roll of kraft paper
- 6-12 eggs
- 3-4 potatoes
- Food coloring
- Flour
- Water
Tools
- 1 tray of muffin tins
- Chef’s knife
- Paring knife
- Small cookie cutters (optional)
- Small forks to whisk each color
- Measuring spoons
- Cutting Board
- Damp cloth towel
- Paintbrush (optional)
Instructions
- Rinse your potatoes and lightly scrub with a washcloth or scrub brush to remove any dirt or debris.
- Slice your potatoes into 2-3 sections. If you’re planning a larger design, slice the potato lengthwise to give yourself more surface area to work with.
- Use the paring knife (carefully!) to create your potato stamp. If you’re working with cookie cutters, press the design into the potato and cut away the excess. If you’re free-handing your design, cut the perimeter of your stamp first. You’ll want the stamp to project about ½ to ¾ of an inch from the part you’ve cut away.
- Set your potatoes aside, with the stamp side down on the wet towel. If the surface of your potato dries out, it can warp your design.
- Mix your tempera paints! Spoon ½ teaspoon of flour into each muffin tin that you’ll be using for a different color of paint. Add 1 teaspoon of water and whisk with a fork until most of the clumps are out. Note: This will take forever if you try to mix the dry flour directly into the egg.
- Separate your egg whites from your egg yolks. I do this by sharply cracking the egg on the edge of a glass bowl, separating the shell into halves, and passing the yolk portion back and forth between the halves until almost no white remains. Reserve the whites in the refrigerator for another use (see the Clean Up section below for recipes). Note: Some tempera paint recipes stress not to get any white in your paint or to pierce the yolk membrane with a needle and let it drain out. If you’re creating a fresco, painting a sarcophagus, or painting the next Mona Lisa, that may be relevant. This, however, is wrapping paper that’s compost-bin-bound, so don’t get too hung up on that. You can always fish any “boogery” parts of the egg out of your paint with a fork if something slips in.
- Add one egg yolk per muffin cup you’ll be using. Squeeze some of your gel food coloring on top of the egg yolk, and whisk the mixture together with a fork. Have fun playing with your colors, but remember that the base is inherently yellow because of the yolk, and you’ll be printing on brown - what I’m trying to say is that a true purple is a lost cause, but still fun to try anyway.
- Roll out a long expanse of kraft paper so that it would curl down if unweighted, and place two or three objects like salt and pepper shakers or small jars on the short ends to anchor the paper while you work. (This is the easier direction to wrap your presents; otherwise, the paper will fight you.)
- Dip your potato stamps in the paint, let some excess run off, and have fun! If you get excess drips on the paper, wipe them up immediately with a towel (if they bother you). Is one of your stamps not printing in its entirety? Use the paintbrush to fill in the gaps. Note: Are you wrapping smaller presents? You’ll want to create a sheet where the stamps are tightly spaced to ensure that each gift has a solid dose of color and cheer. Are you wrapping larger presents? A bold print with spaces between the stamps will still read correctly on a large box.
- Set the wet or tacky paper aside, and let it dry overnight. It will dry much faster with a ceiling fan turned on! You may need to touch the paint to see if it’s dried, as this tempera paint has a pretty, glossy sheen to it, and it can be hard to tell if it’s still wet or just shiny.