DIY Photo Booth | Reuse Gift Bags
Ready for an amazing DIY photo booth made with materials you probably already have at home? Check out this homemade photobooth made with reused gift bags that’s perfect for a small party, a large gathering, or just a day of fun at home.

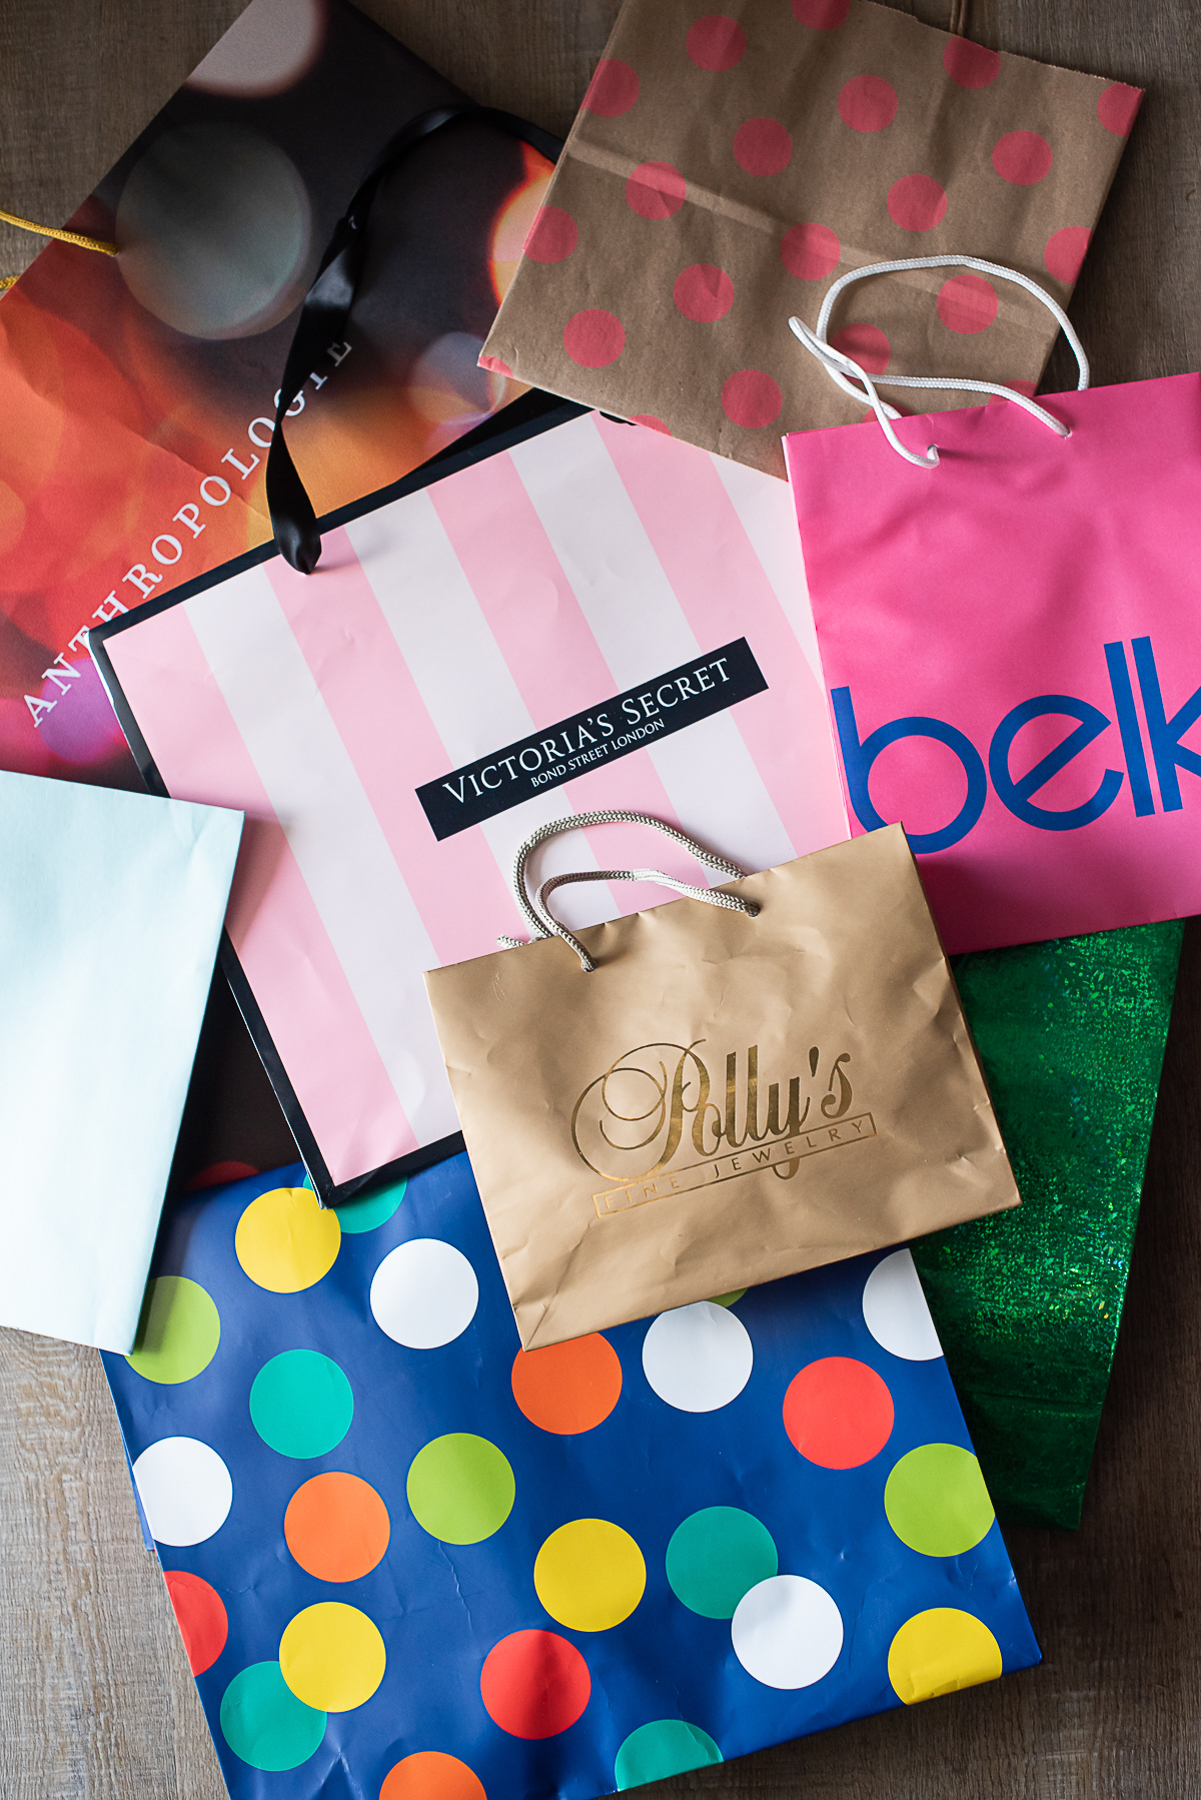
Are you swimming in a pile of logo-branded shopping bags? Is there a heap of “to-be-reused” gift boxes in your garage or attic? Are you slowly realizing that trying to go zero waste may land you on an episode of Hoarders?
It’s time to think outside the (gift) box. Read on for an easy, fun DIY that reuses gift bags, will reduce your post-holiday gift wrapping clutter, and leave you with an adorable homemade photo booth, just in time for your NYE party!
I happen to be creating this DIY photo booth tutorial in time for New Year’s Eve, but it would also be adorable for a baby shower, birthday party, or graduation party.
How to Reuse Gift Bags to Make a Homemade Photo Booth
Let’s get down to business and make a DIY photo booth and props while simultaneously reusing gift bags and wrapping paper.
Why Reuse Gift Bags
According to Stanford University, “Americans throw away 25% more trash during the Thanksgiving to New Year’s holiday period than any other time of year. The extra waste amounts to 25 million tons of garbage or about 1 million extra tons per week!” That’s a lot of garbage.
While we do our best as a family to use recycled brown paper as gift wrap along with compostable “wrapping flourishes” like dried oranges, baby’s breath, or rosemary sprigs, somehow every holiday season we’re the unwilling recipient of shopping bags, gift wrap, and even more gift boxes.
We have two enormous bundles of “to reuse” gift bags and boxes in our garage, which frankly is about two too many. But what’s a girl to do with gift boxes that are too shabby to use again or logo-branded gift bags? While I’m all about recycling and reusing, most of those gift bags aren’t recyclable. And there’s something uncomfortable about giving my brother-in-law a Victoria’s Secret bag this Christmas.
Don’t let some wrinkles or awkward logos keep you from reusing that gift bag! Today we’re going to turn one holiday’s waste into your next party’s most Instagrammable feature.
This post contains affiliate links. If you make a purchase, Honestly Modern earns a small commission that does not impact your purchase price. Thanks for supporting Honestly Modern.
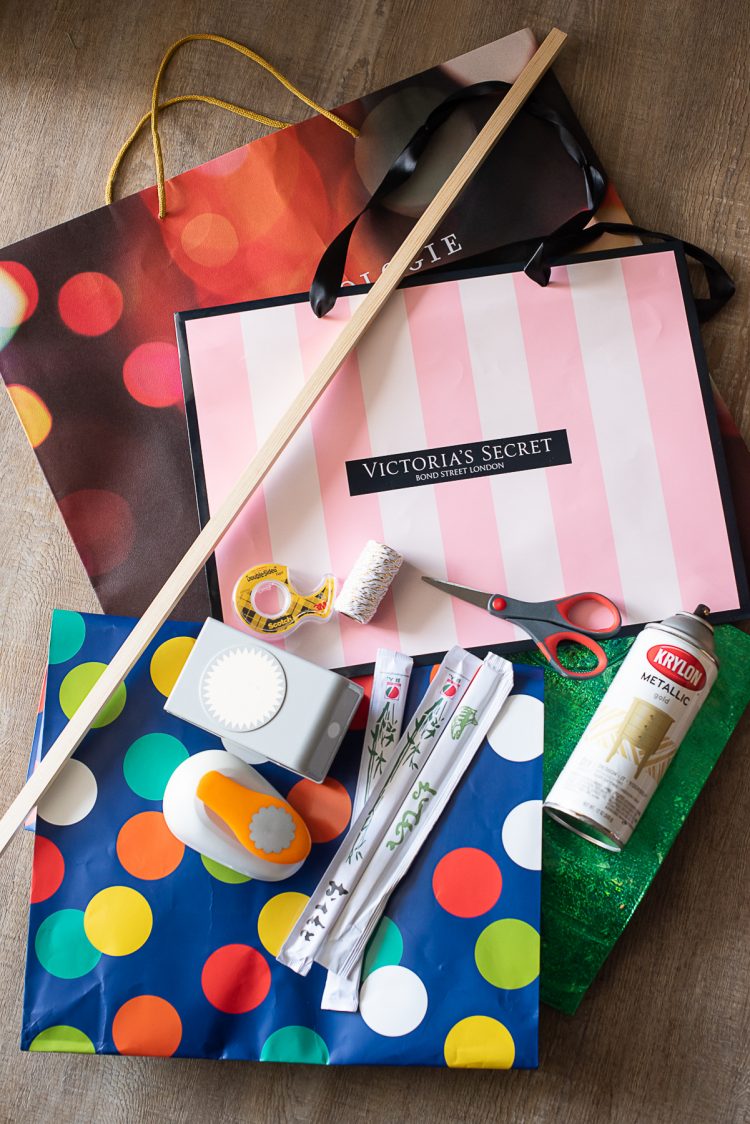
Materials For a DIY Photo Booth from Repurposed Gift Bags
- Wooden rod, PVC pipe, or bamboo stalk measuring approximately 6 feet (Note: I used two wooden rods each measuring 3 feet from Hobby Lobby and simply hung next to each other because I wanted to reuse one half of my backdrop for another purpose… which you’ll read about later.)
- Assorted gift bags and used gift boxes (As a reference point, I used 6 gift bags and 4 boxes in this DIY.)
- Decorative twine, such as bakers twine, fishing line, or fine twine
- Metallic spray paint (optional)
- Large decorative hole punch (here are several punches, and this matches what I used)
- Double-sided tape (buy in bulk with applicators, or without plastic applicators)
- Hot glue gun (this mini glue gun is great)
- Scissors
- To-go Chopsticks, bamboo grilling skewers, or possibly popsicle sticks
- Measuring tape
- Pen for measuring
- Camera phone with self-timer (optional)
- Ring light (optional) – Splurge // Spend // Save alternatives
Homemade Photo Booth Instructions
After you’ve gathered your materials, follow these instructions to make a homemade photo booth. This is simple enough that tweens and teens could probably do this themselves.
Game plan your homemade photo booth
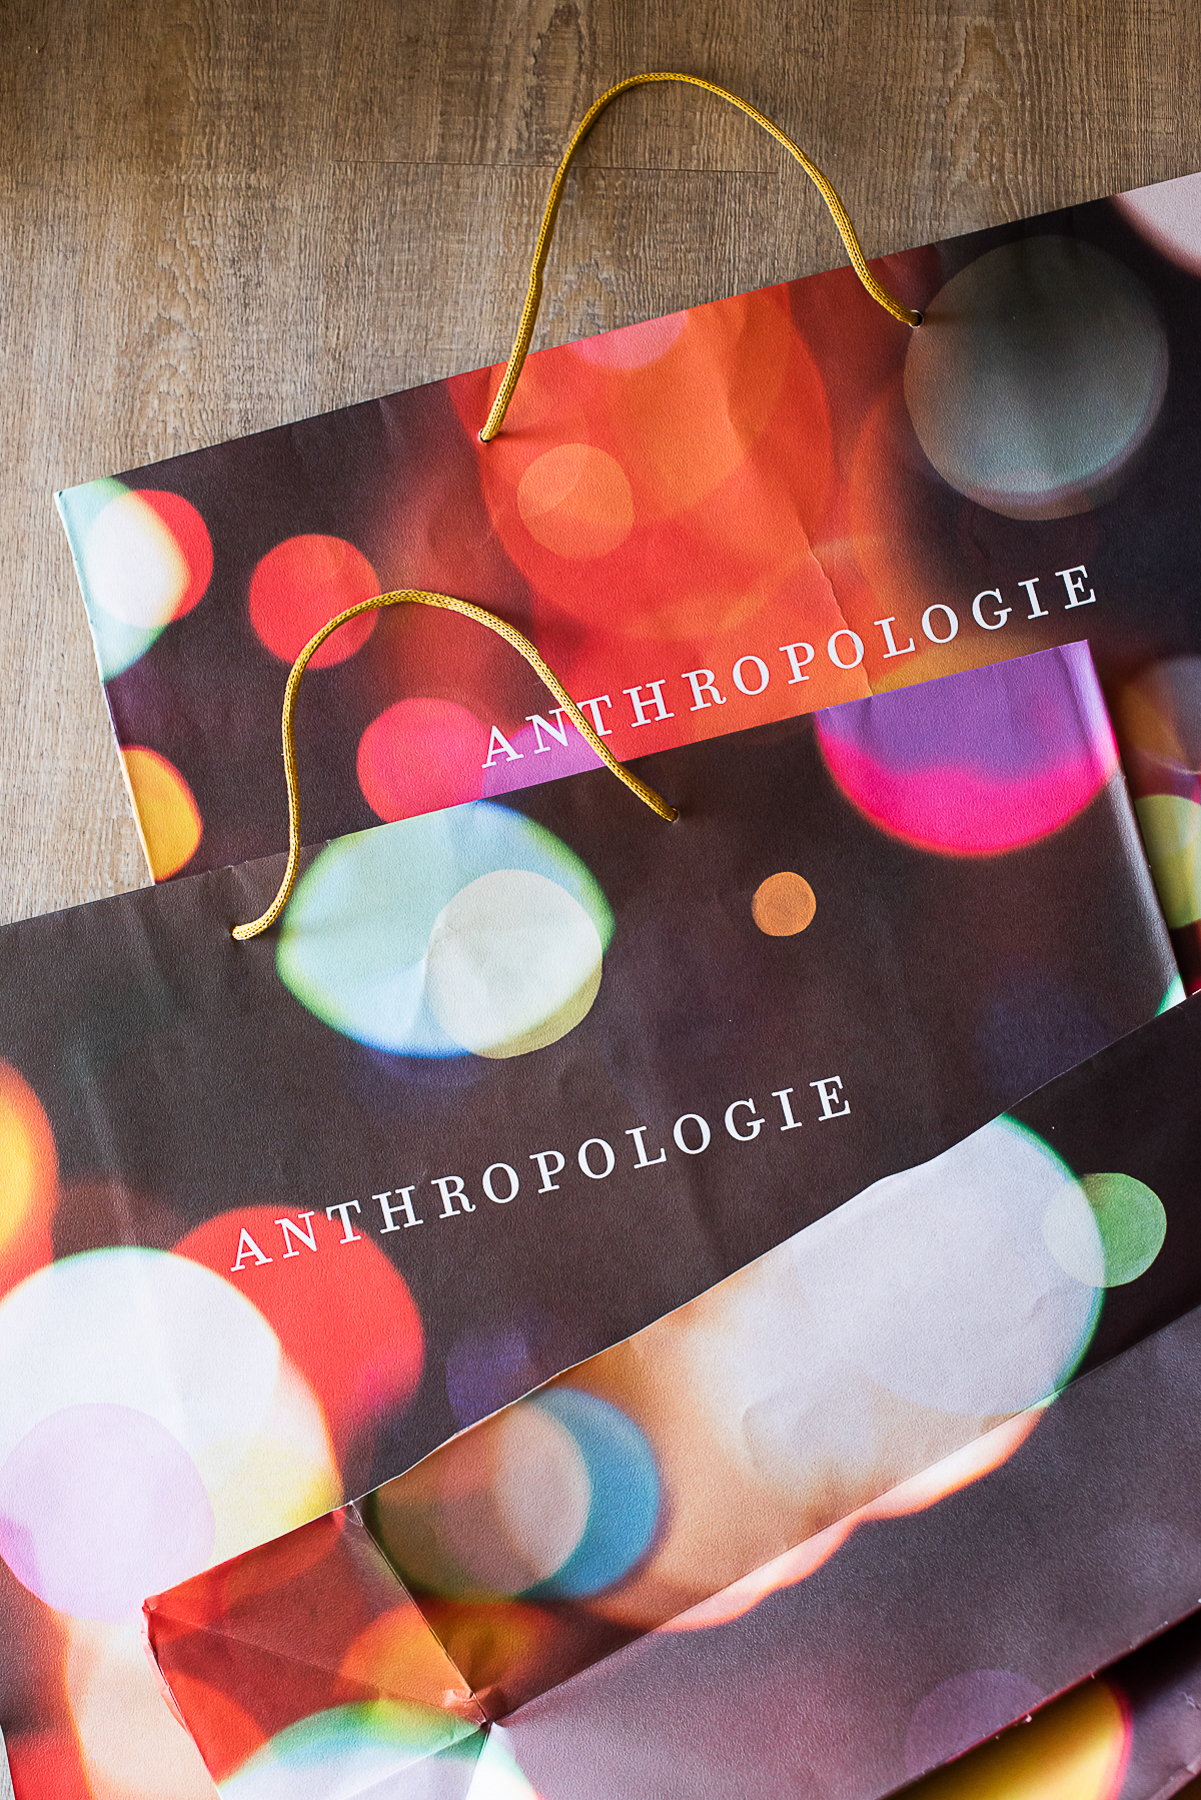
Lay out your gift bags and decide what you’d like the color palette of your backdrop to be. I had a stunning giant Anthropologie bag made from recycled paper (added bonus!) covered with festive abstract forms, and I knew I wanted to pair that with some metallic gold.
Decide on DIY photo props
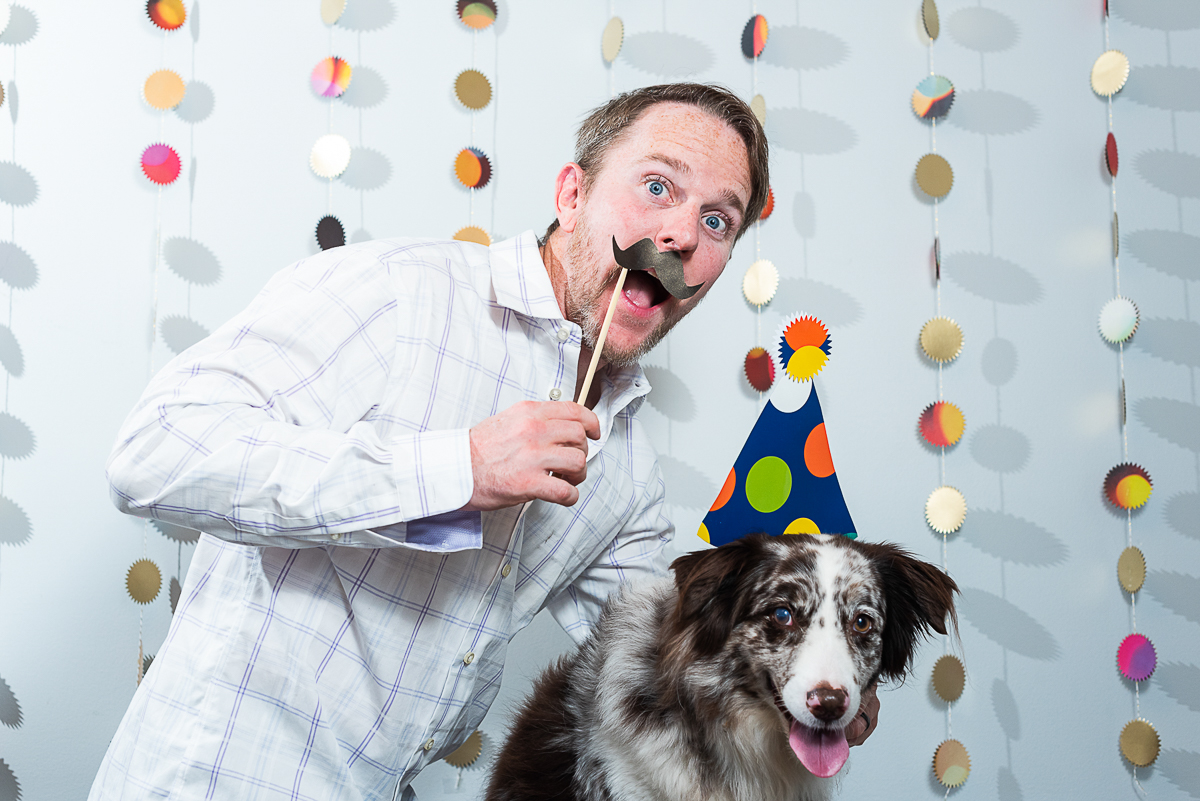
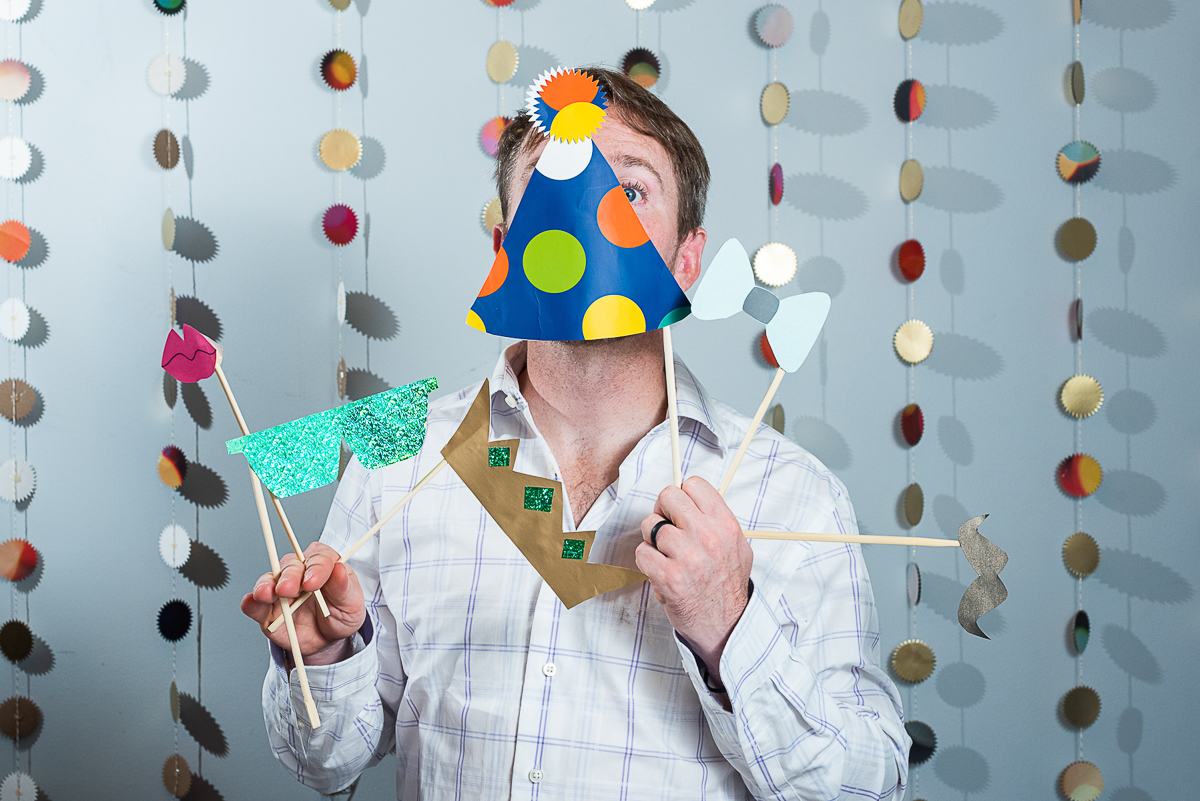
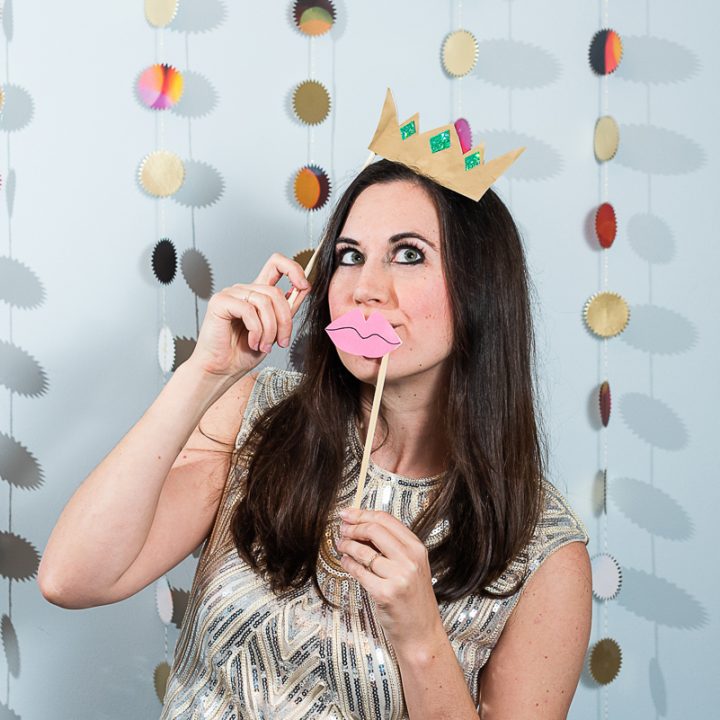
Next, consider how many photo booth props you’d like to make (I did 6) and what bags make the most sense for each of those based on color. Bow ties, lips, glasses, mustaches, crowns, hats, and polaroid forms are all super easy to cut out and very kid-friendly in a photo booth.
Start your backdrop
To make a backdrop, I paired cutouts from gift boxes with a hanging rod. You could even use a twig if you don’t have a rod available.
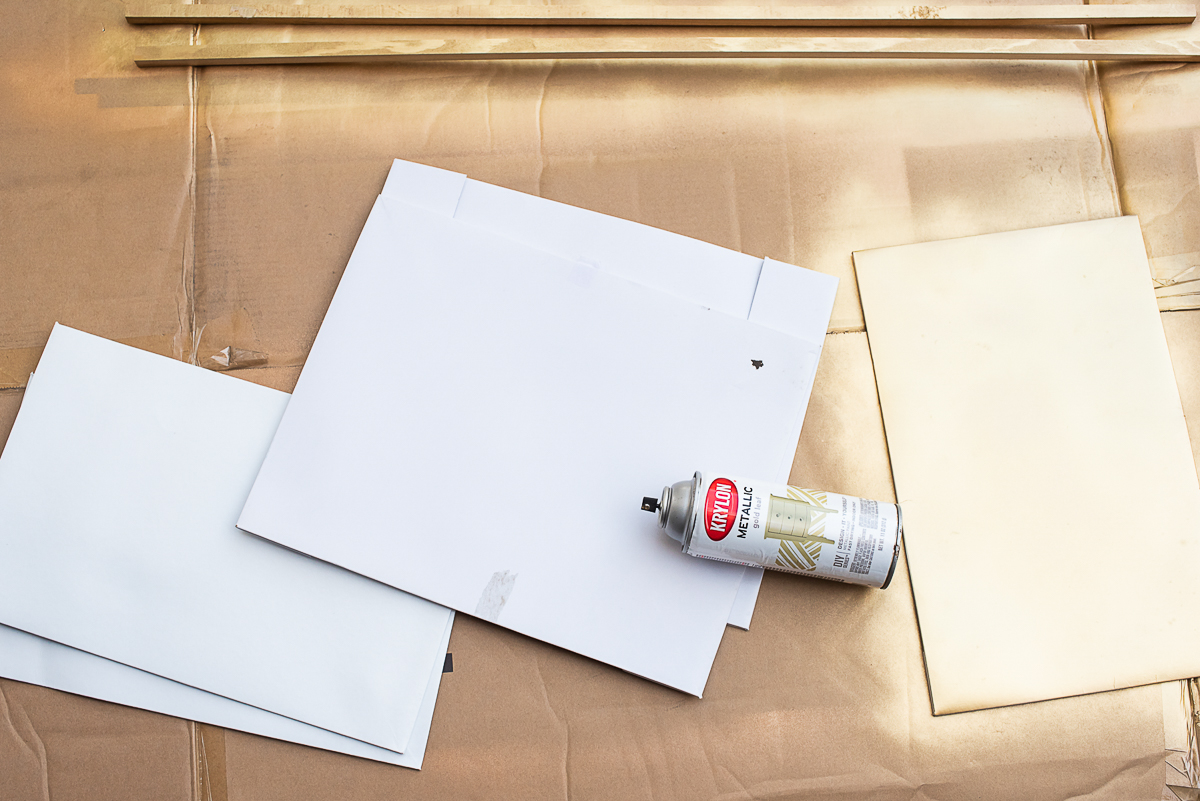
If desired, spray paint your hanging rod and gift boxes. While they are drying, measure out the decorative twine. I used 5 separate 4-foot long strands per rod, so 10 total, for a half-body photo booth backdrop. Adjust your length as desired.
Prepare the gift bags for prop-making
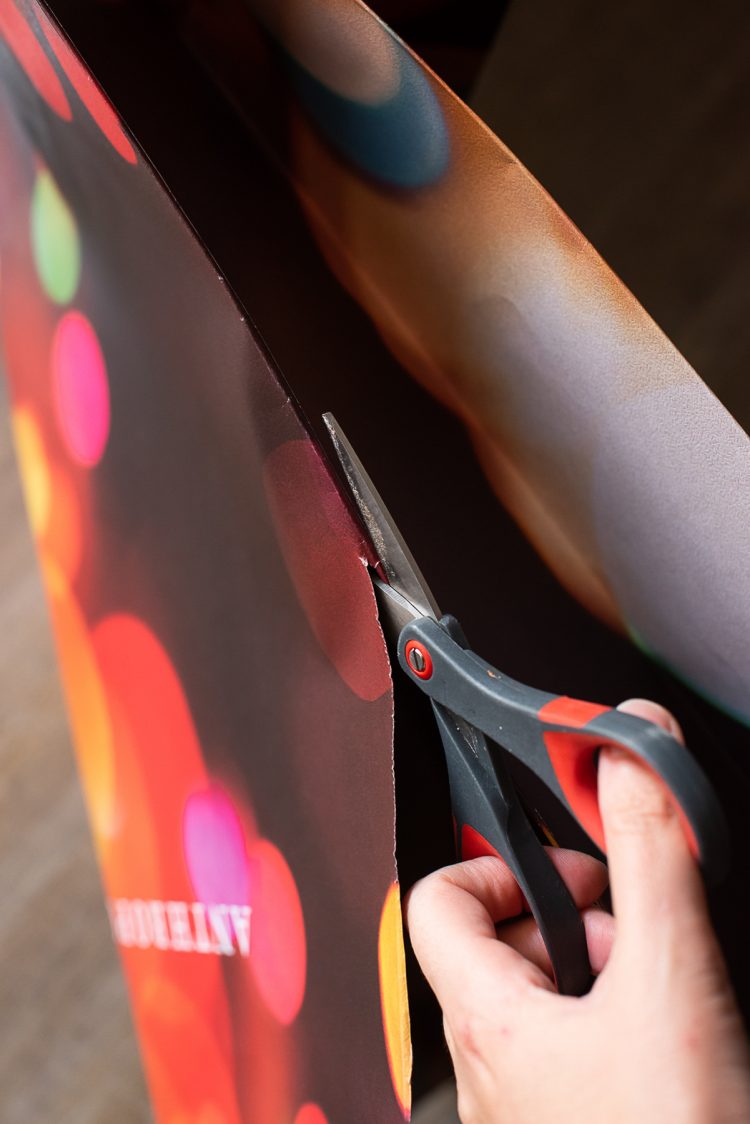
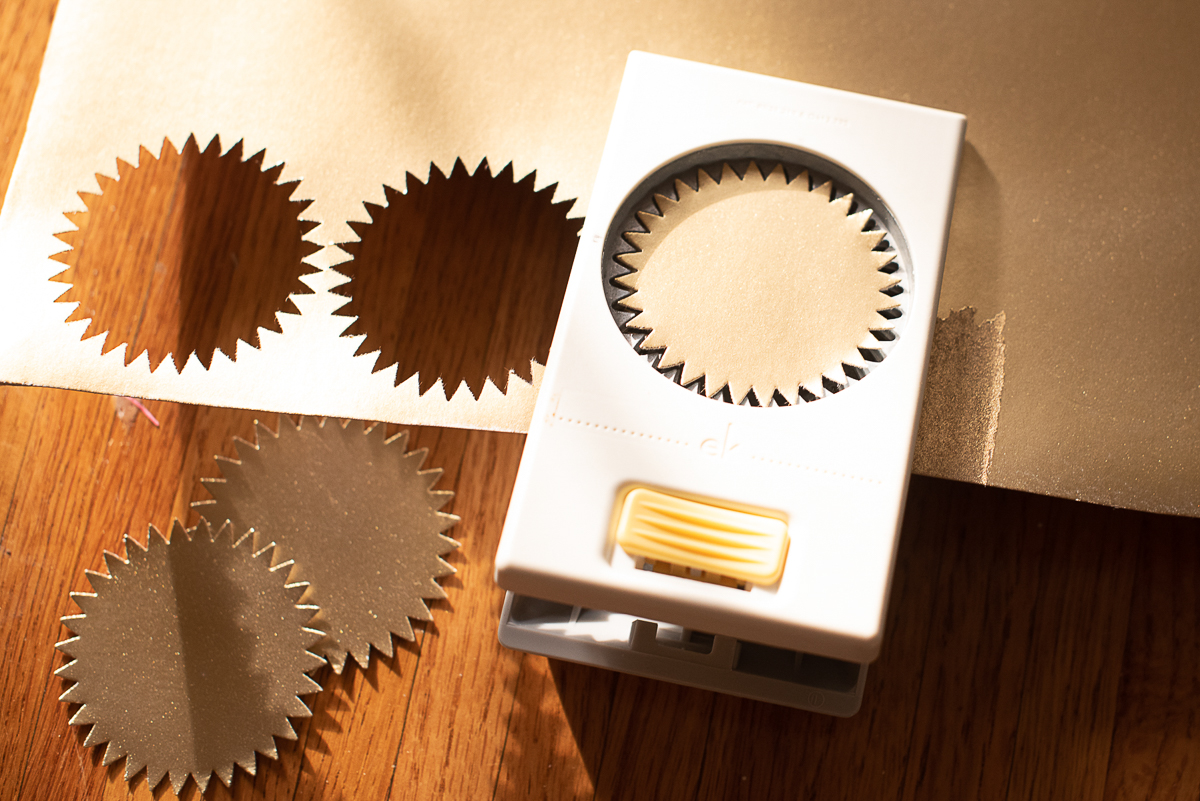
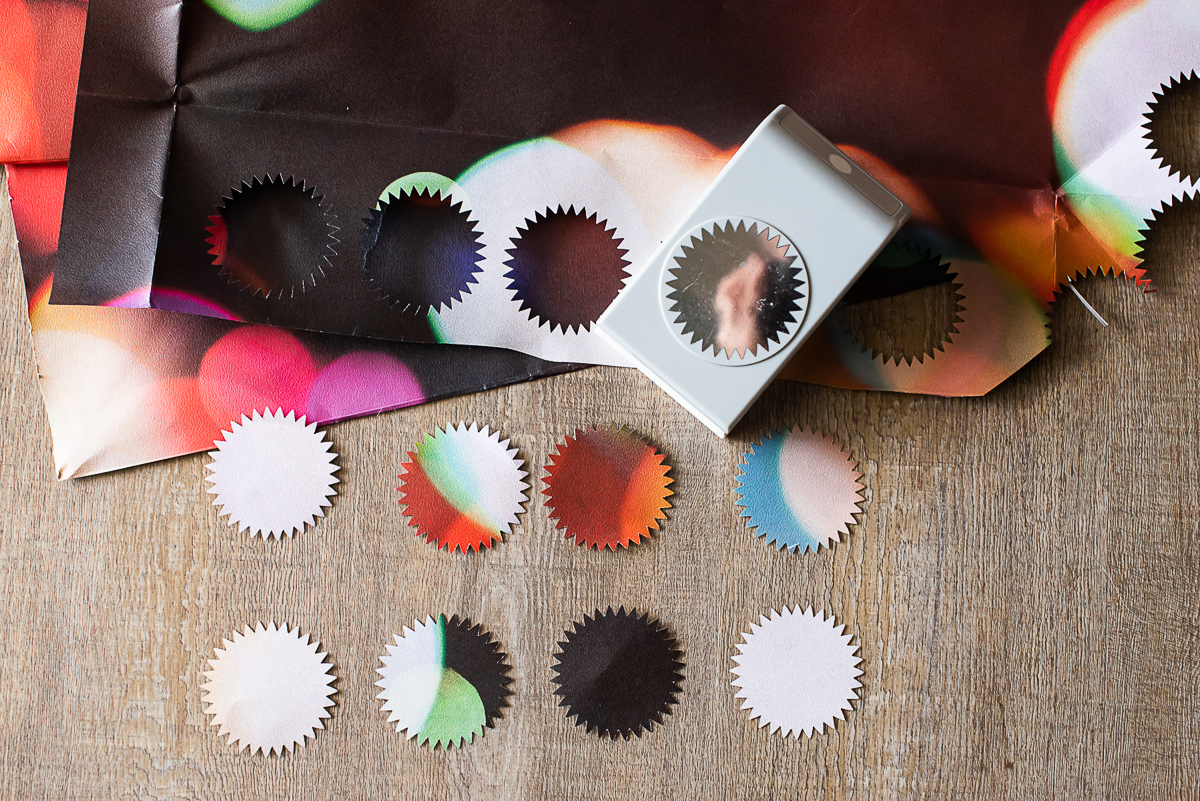
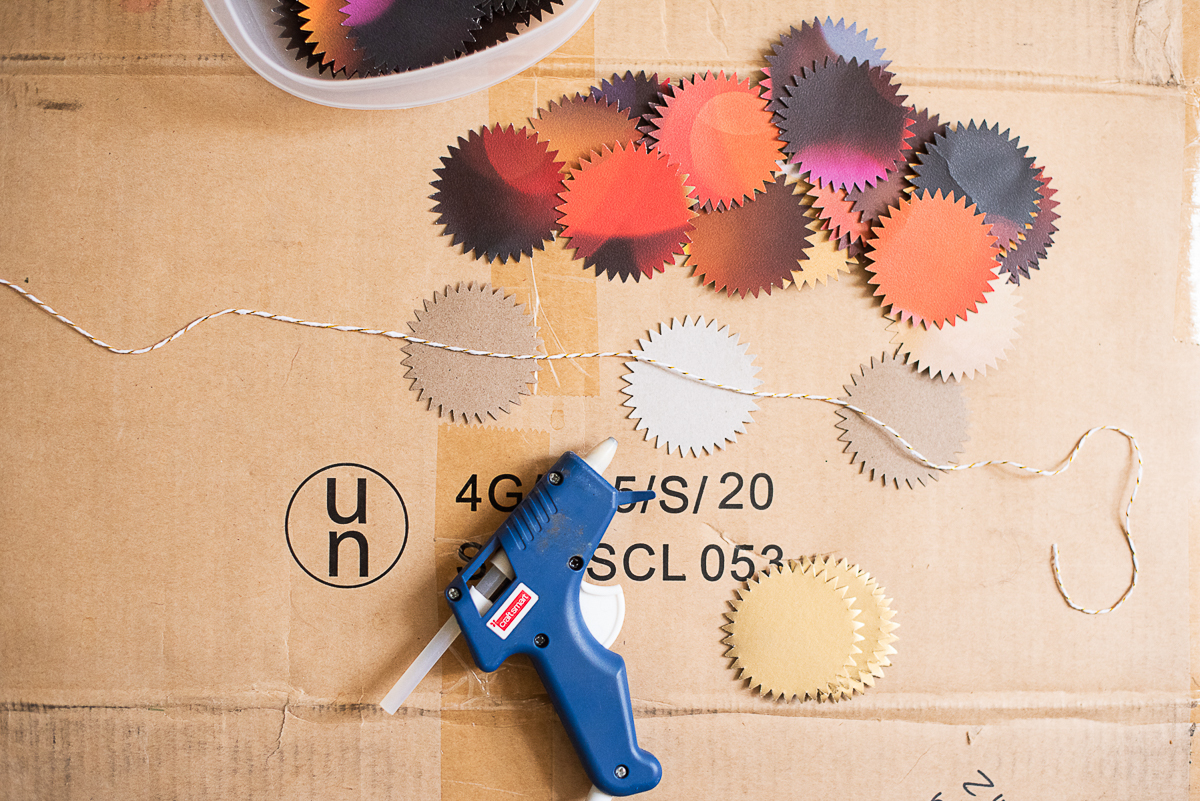
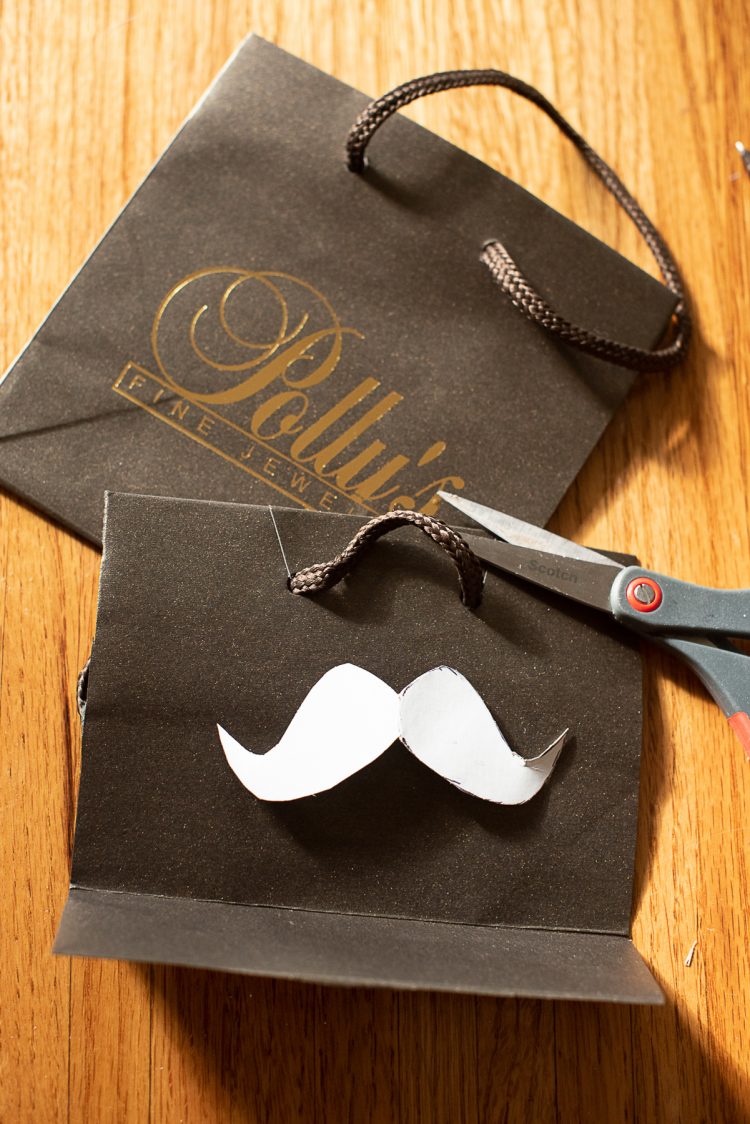
Using a sharp pair of scissors or box cutter, slice down the seams of your gift bag to form separate sheets with clean edges. Remove and discard the handles. Then use your large decorative hole punch to cut out the shapes for your backdrop.
Keep in mind that you’ll want to have the decorative paper on both sides of the string, so be sure you cut out enough shapes for the backdrop. Repeat with your gold-painted gift boxes, optional.
Arrange shapes on string for backdrop
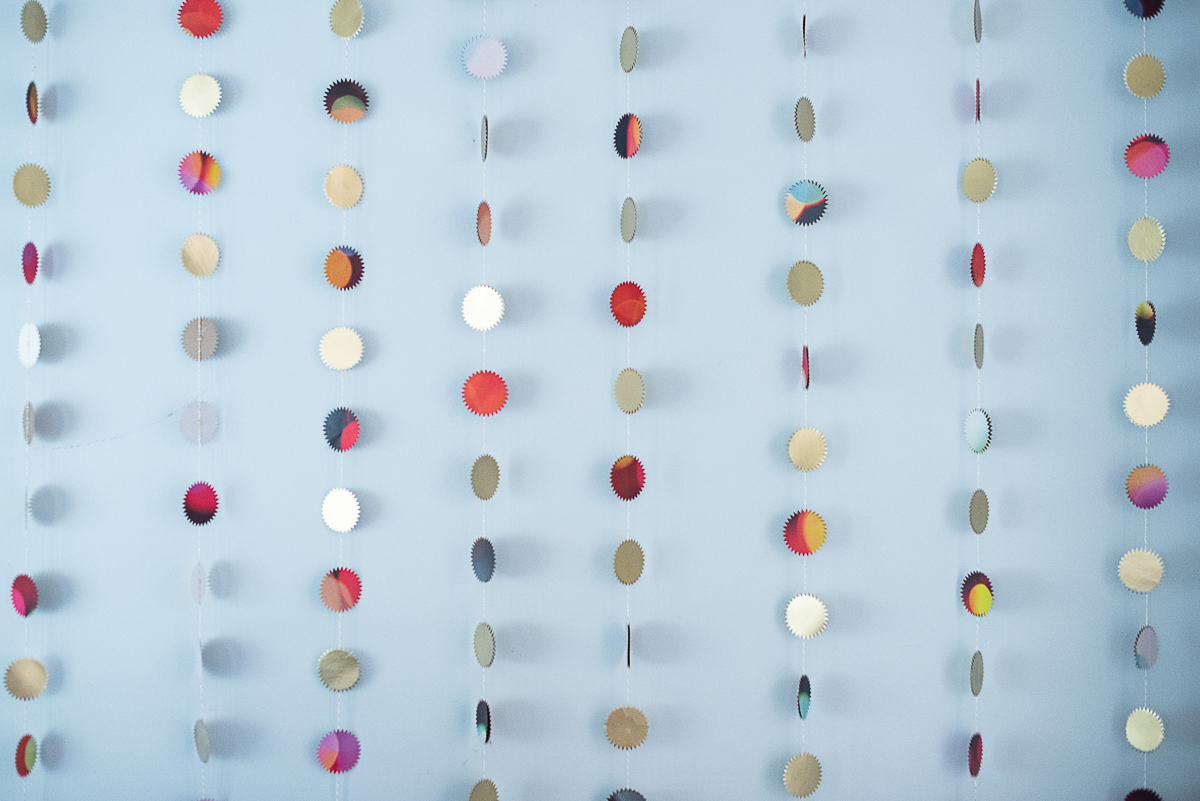
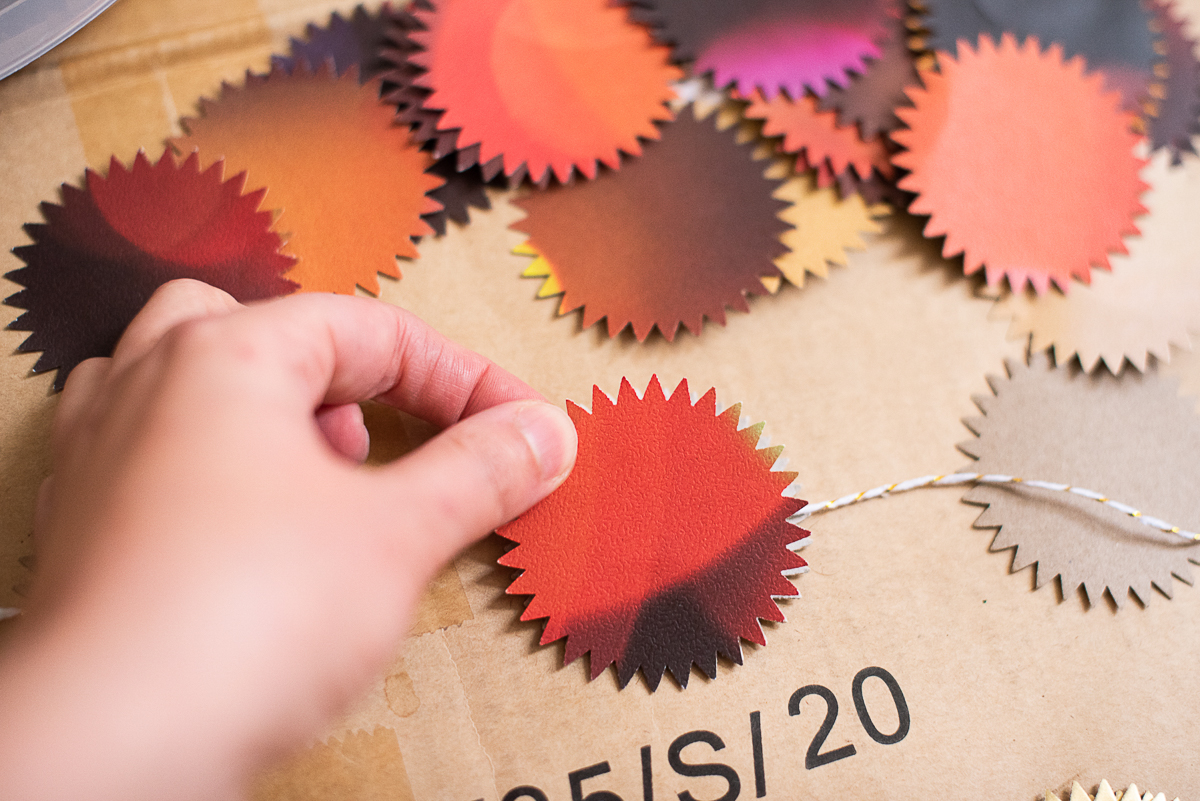
Working on newspaper or a cardboard box, lay your string out and arrange your paper shapes along the length by tucking them under the string with the pretty side facing down. I spaced mine two inches apart.
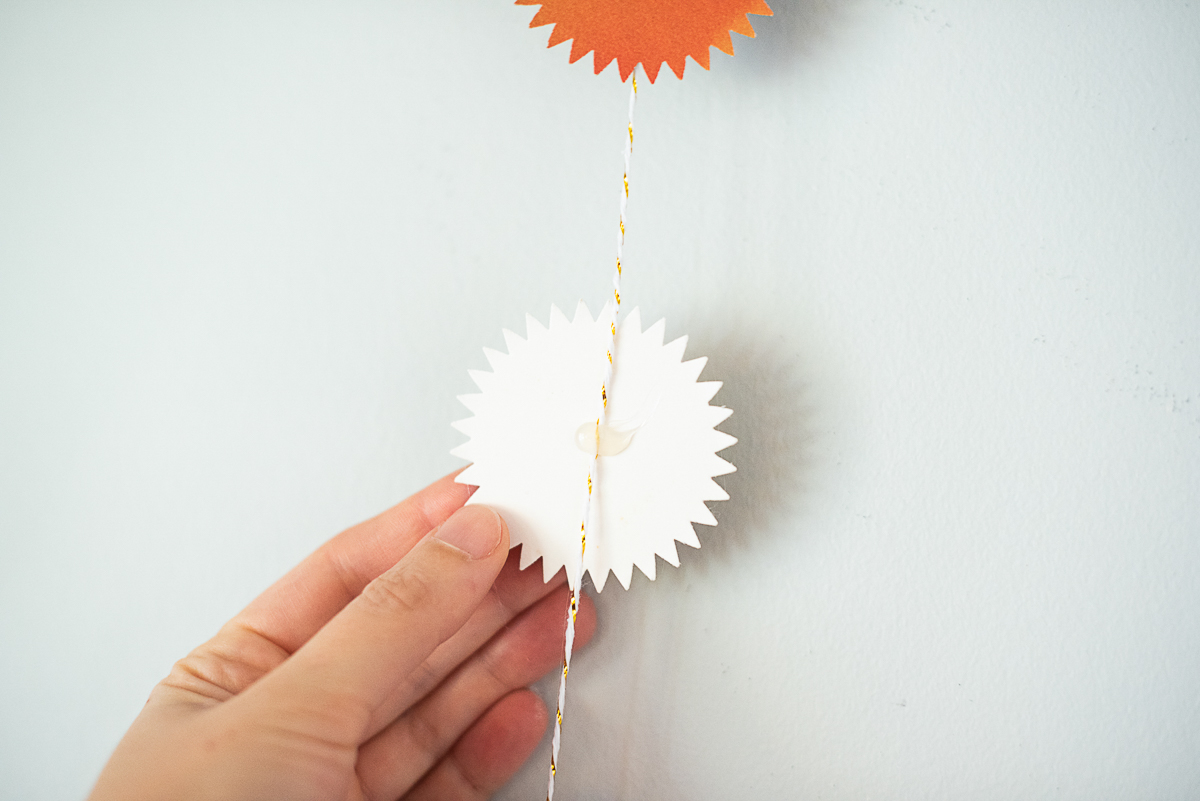
Then, working one piece at a time, add a dab of hot glue in the center of each paper shape and lay the string into the glue. Press a matching paper shape on top of the string, aligning the edges with the decorative paper facing outward, as pictured.
Repeat along the length of each string, then use your hot glue gun to attach each string garland to your hanging rod from a paper shape – or alternately, add a paper shape to hide the hot glue.
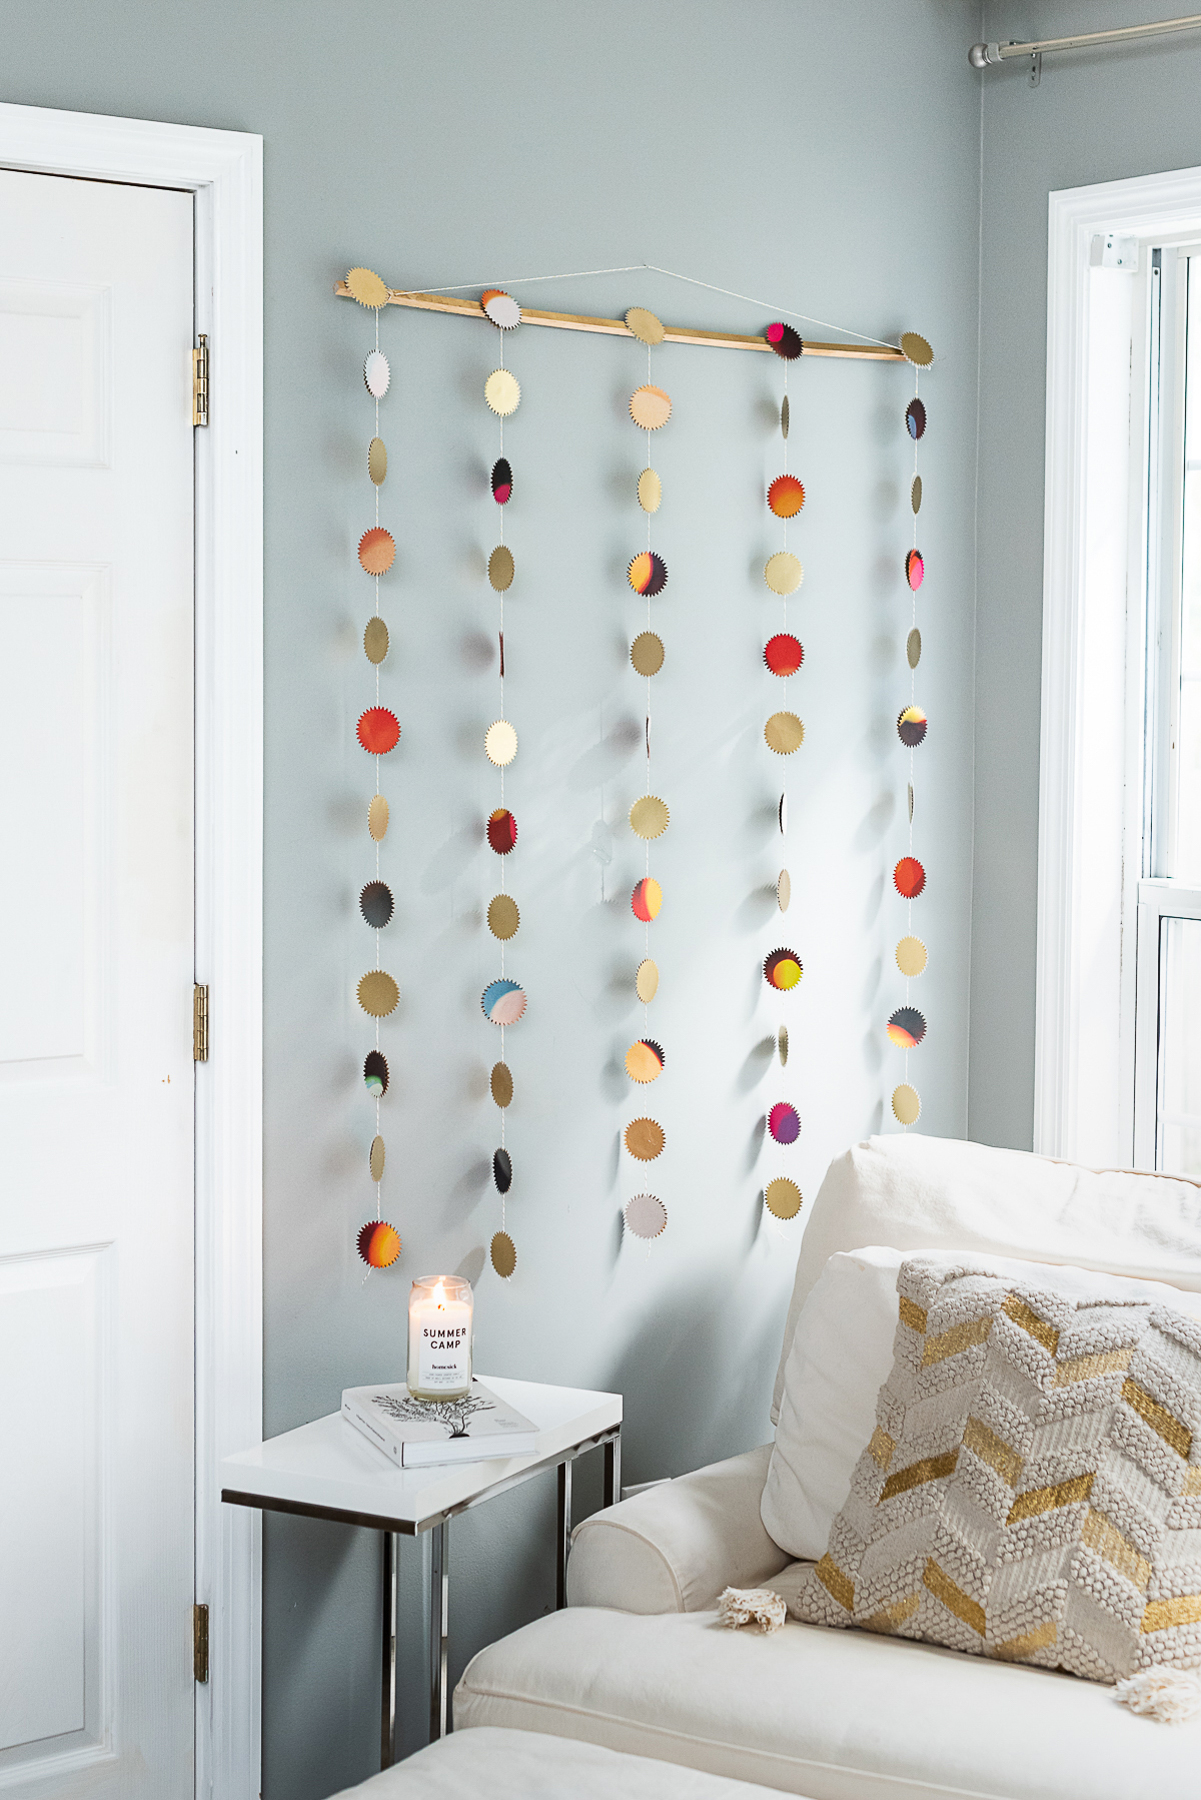
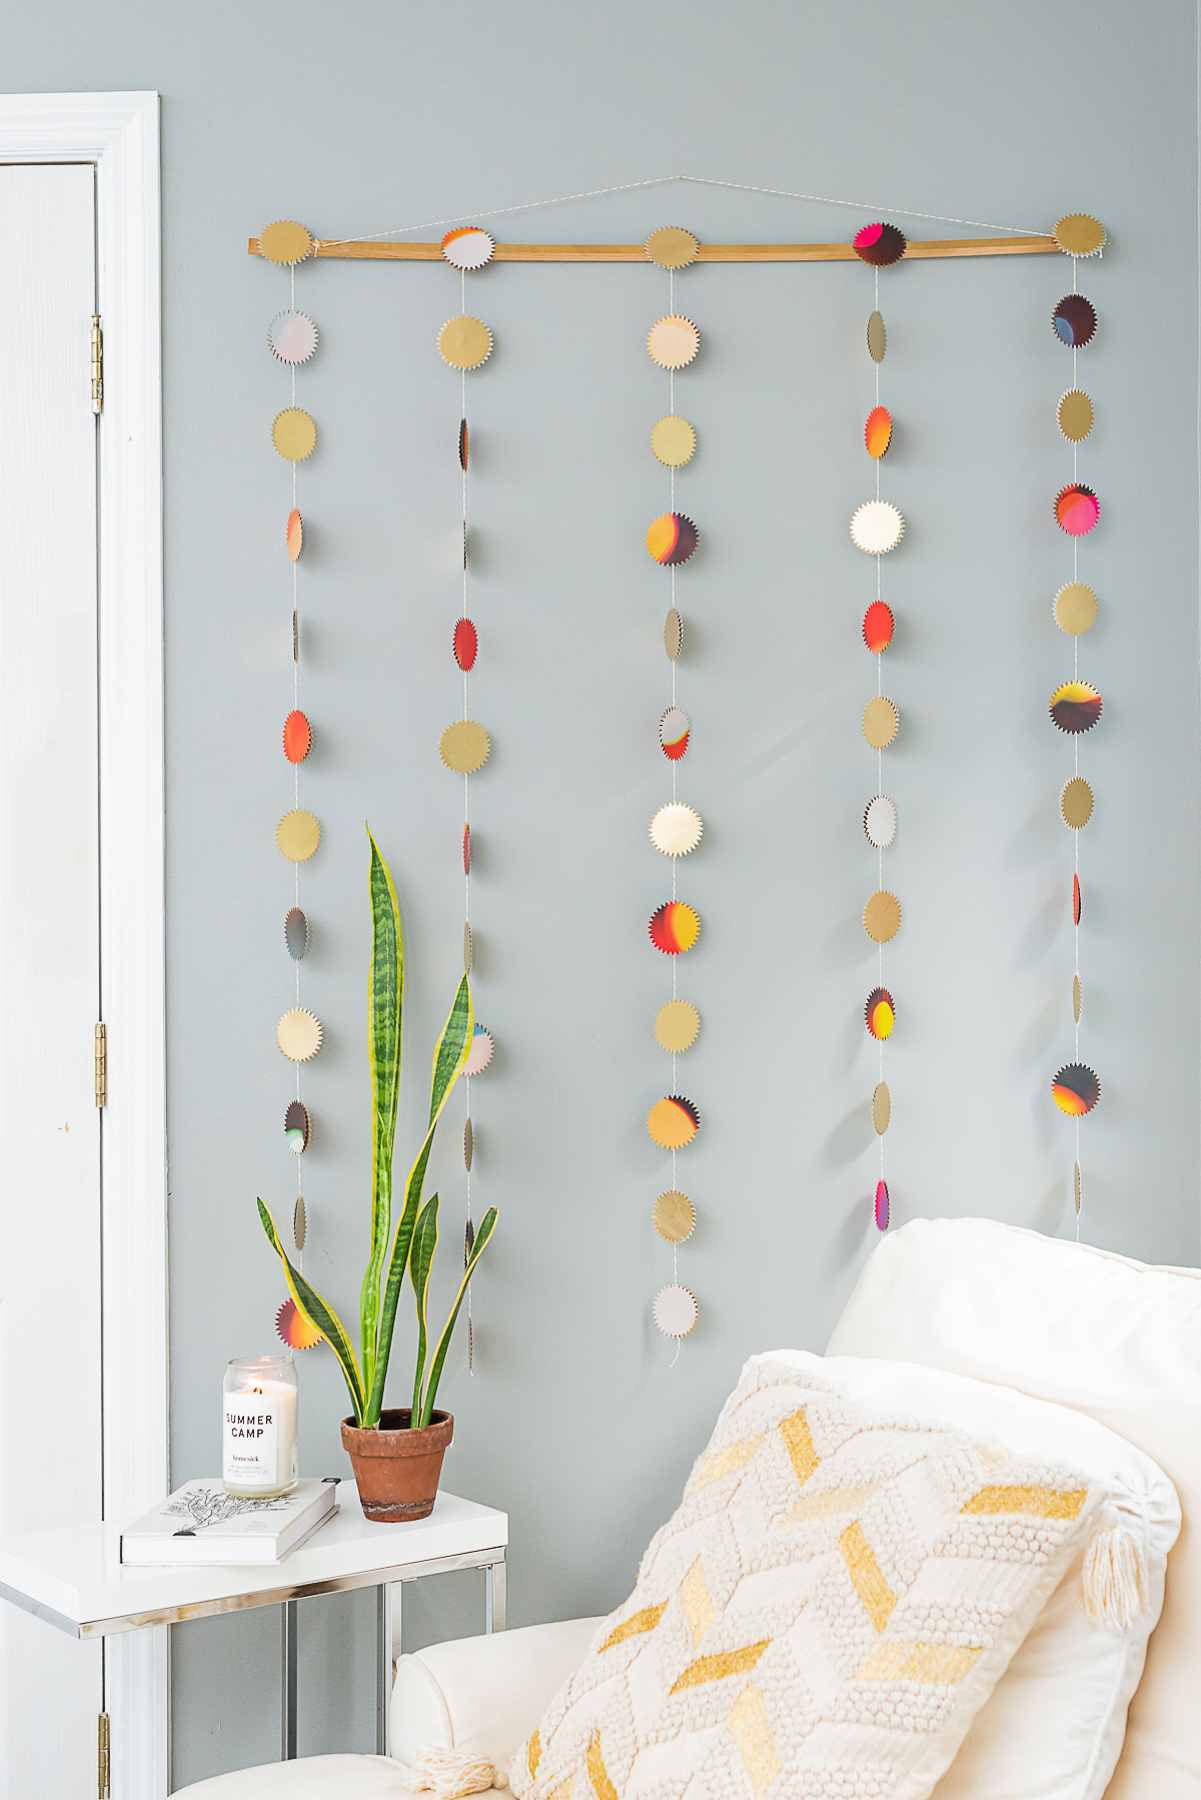
Hang your backdrop!
With a finished backdrop, hang it on the wall where you plan to host your homemade photo booth. Remember to consider the light of your location. You’ll want to be sure there is enough light (natural or artificial, depending on what you have available), to ensure the photos turn out.
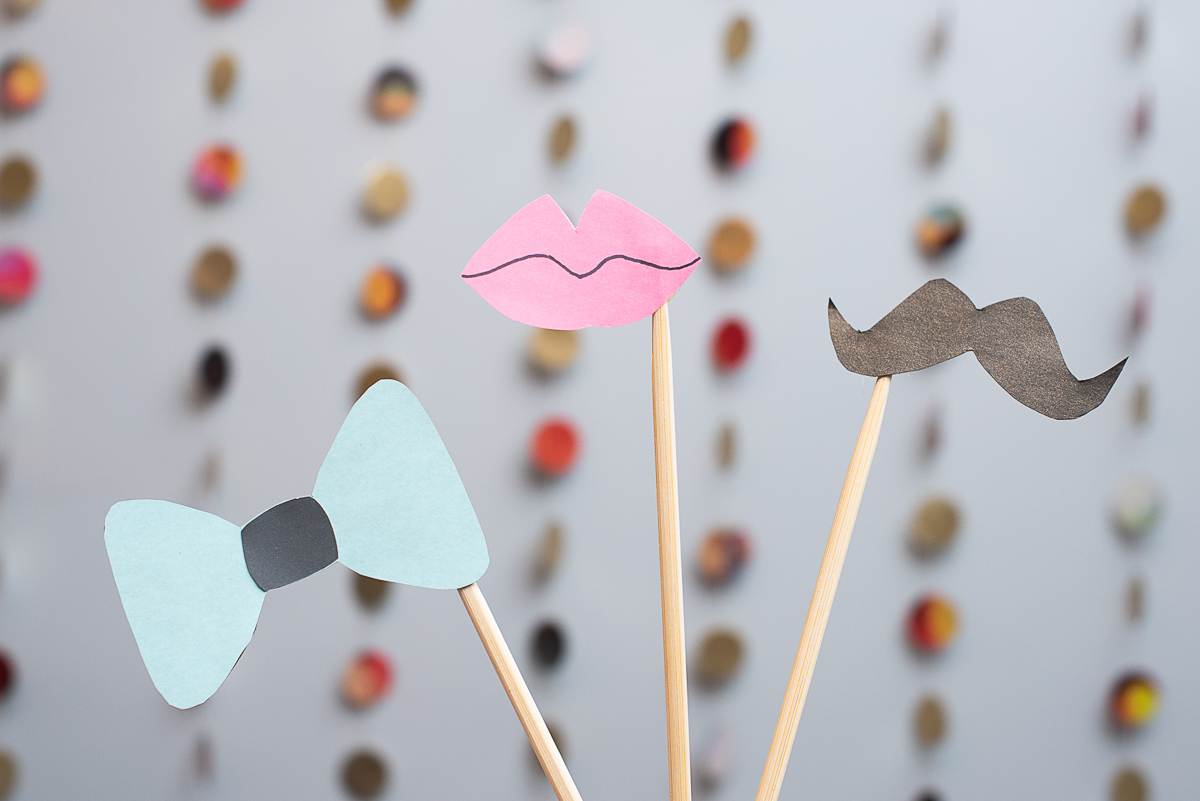
Create photobooth props
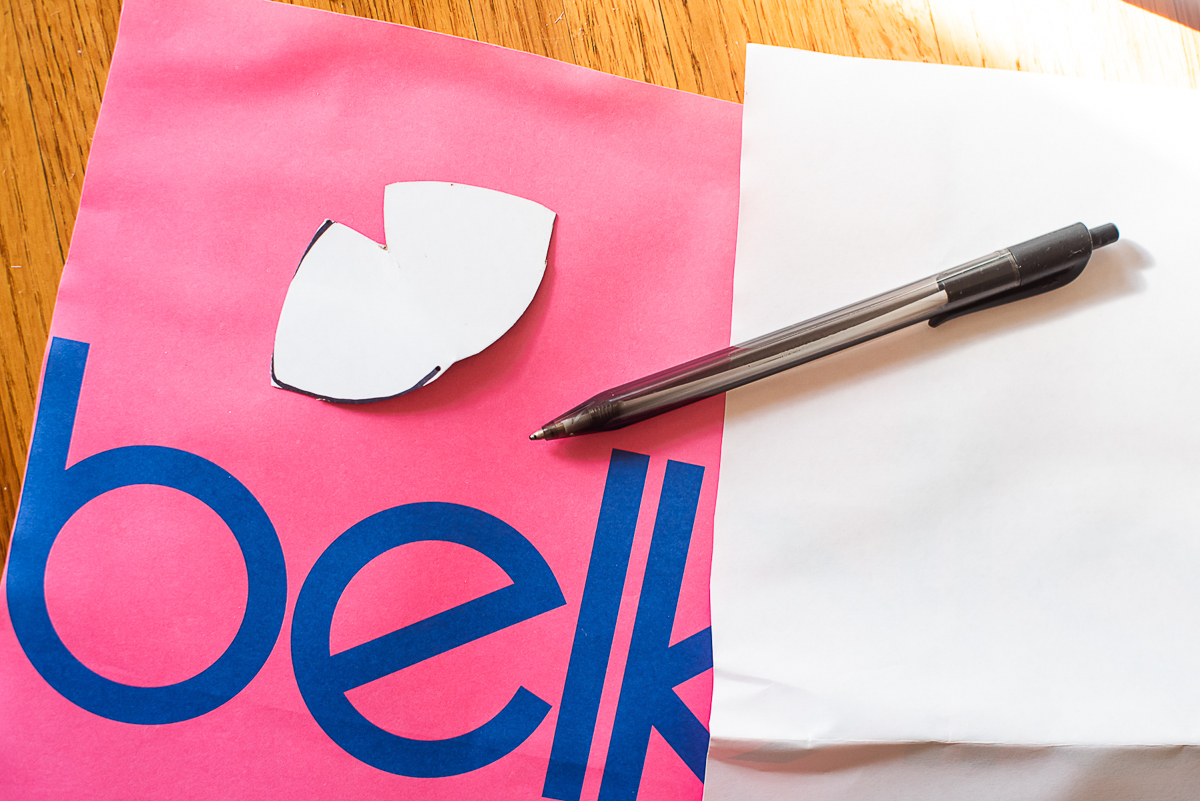
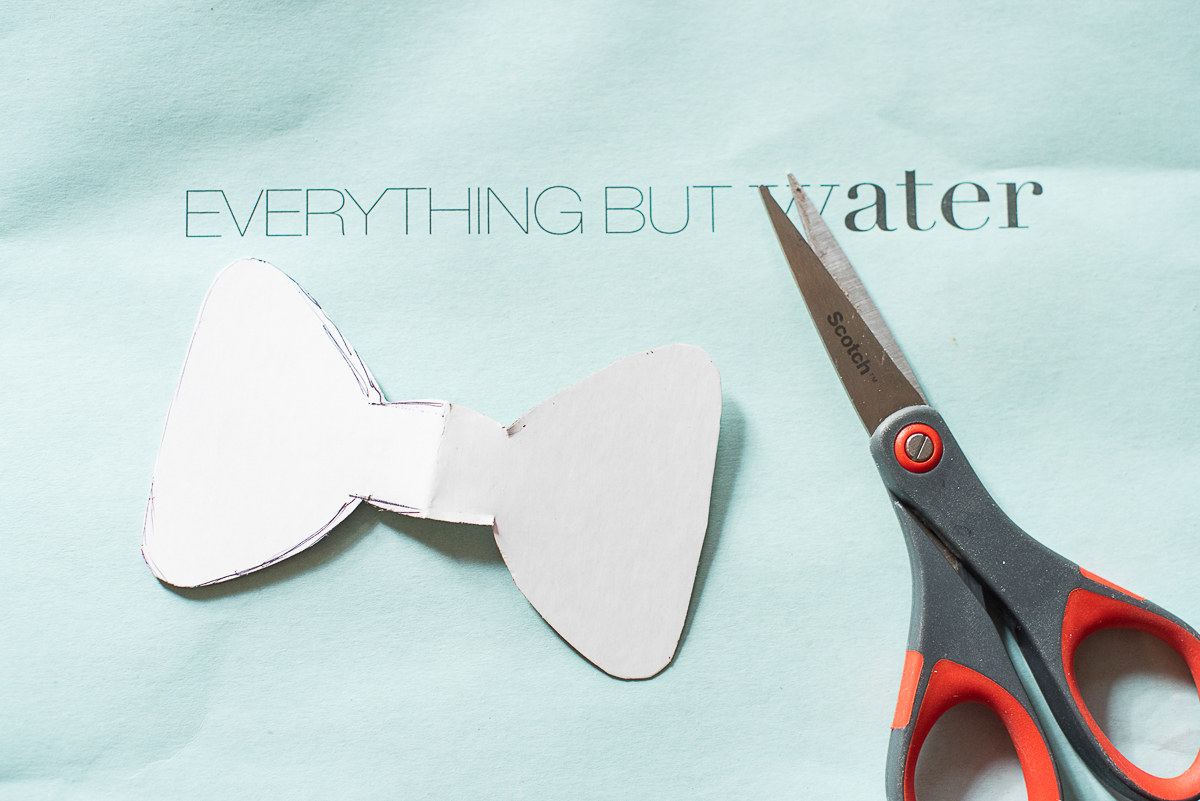
Using a remaining gift box or sturdy gift bag (I actually used the posterboard inset in the bottom of the gift bags), trace a template for your photo booth props. It may be helpful to Google vectors of these shapes if you’re uncomfortable free-handing this part.
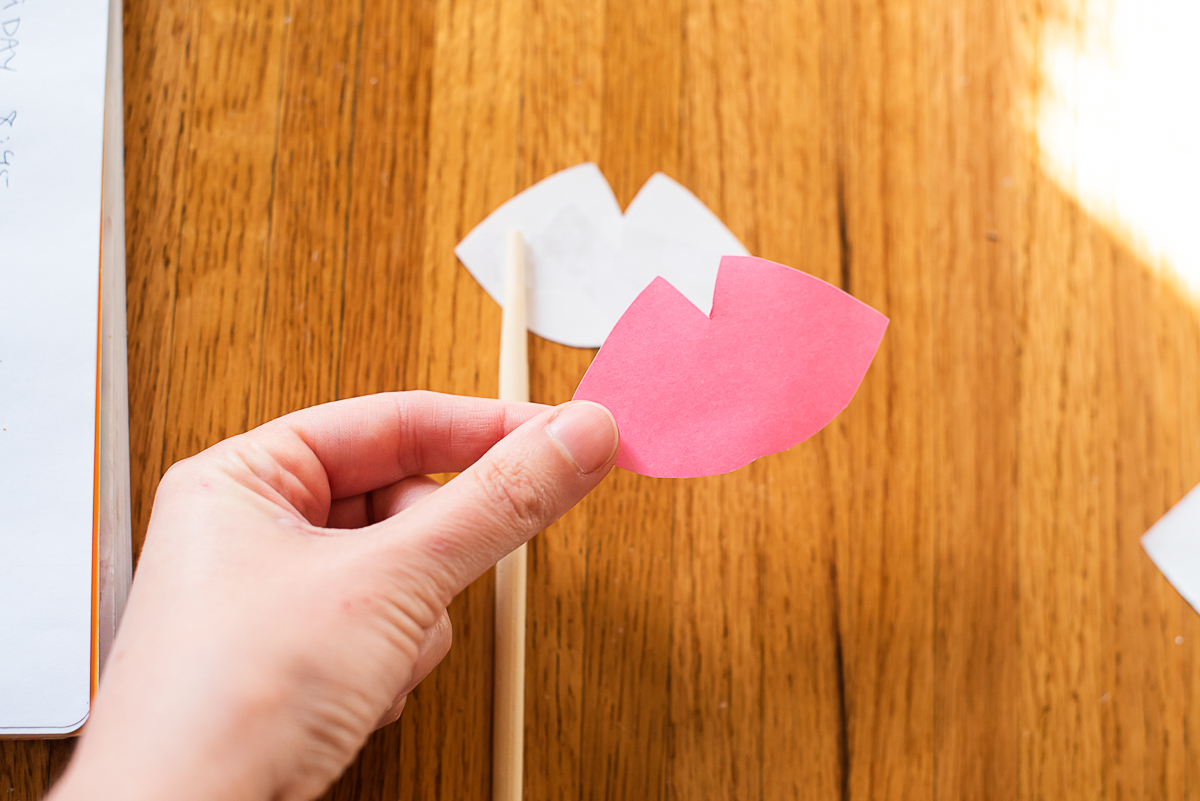
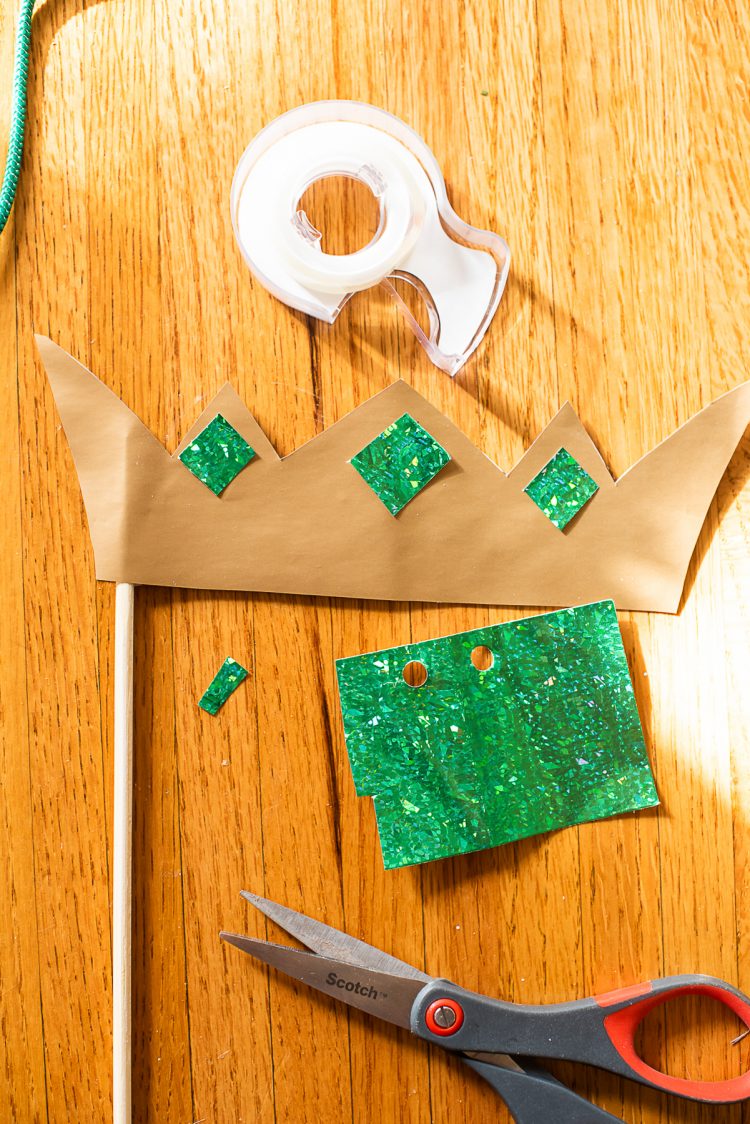
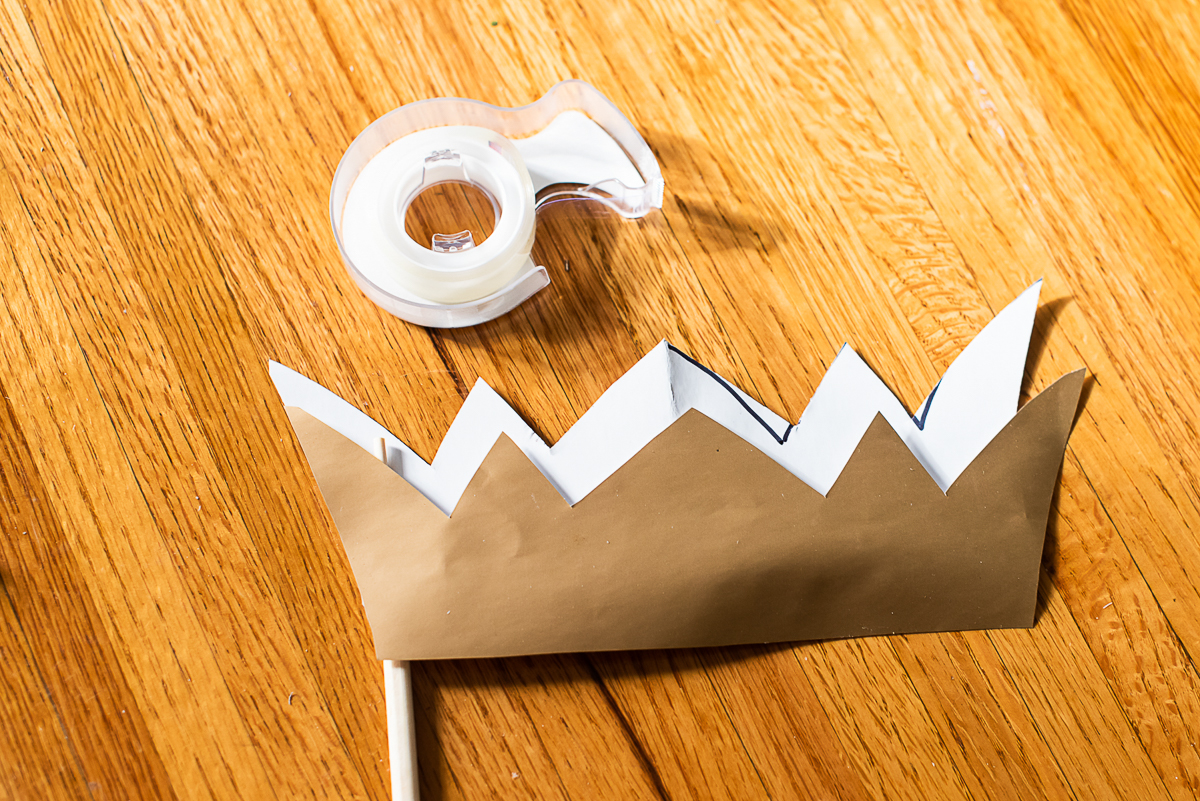
Cut out your templates, and then trace them on the backsides of your respective gift bag panels. Map out where your chopstick handle will best fall on each prop, and then secure it with tape or double-sided tape.
Add double-sided tape along the edges of your props, leaving enough space for a dollop of hot glue to secure your chopstick handle to the template backing. This will make your props sturdier and more durable. However, be sure the hot glue adheres to the gift box material or paper board to prevent it from bleeding through the gift bag side. (View photos for clarity.)
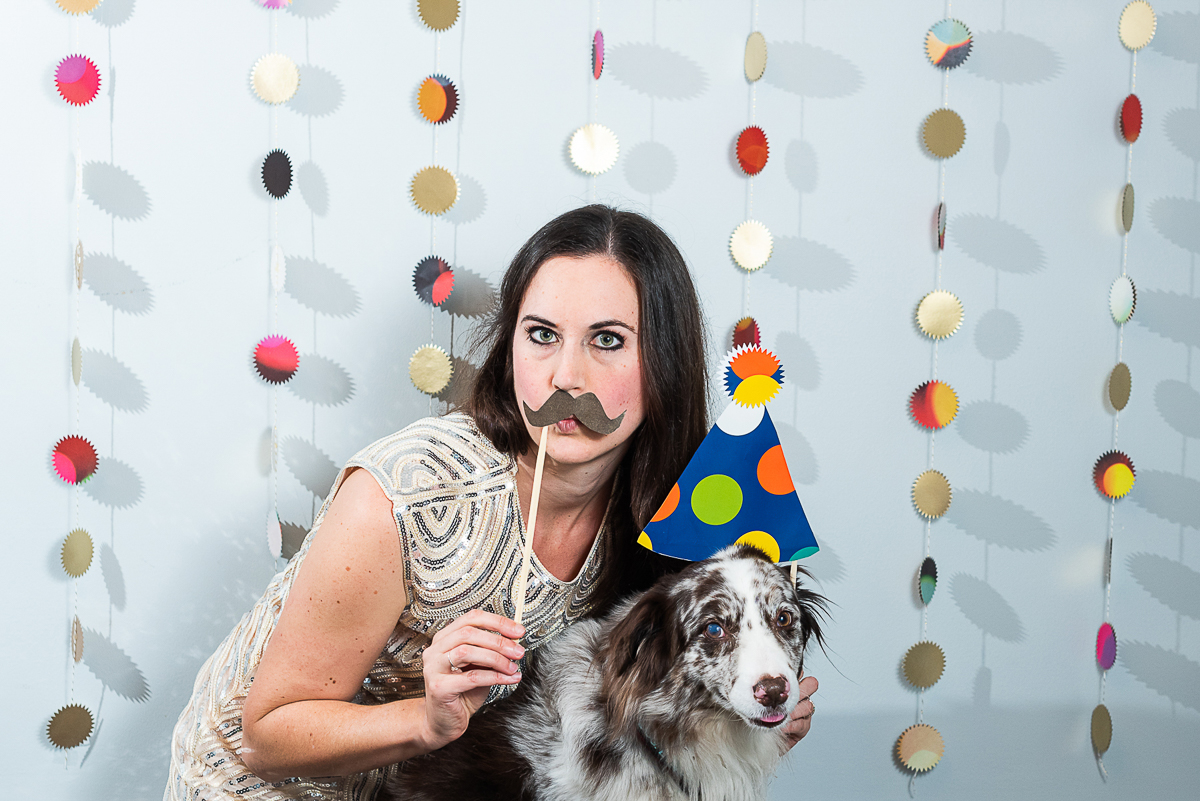
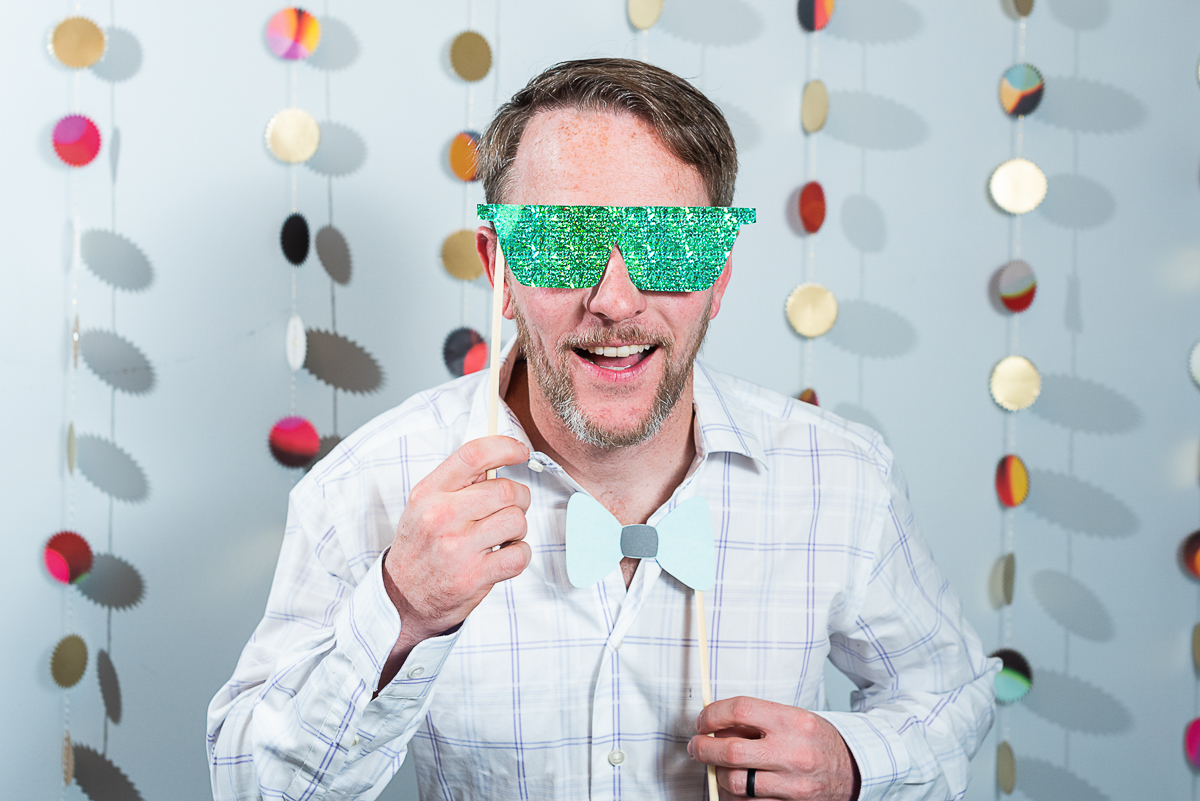
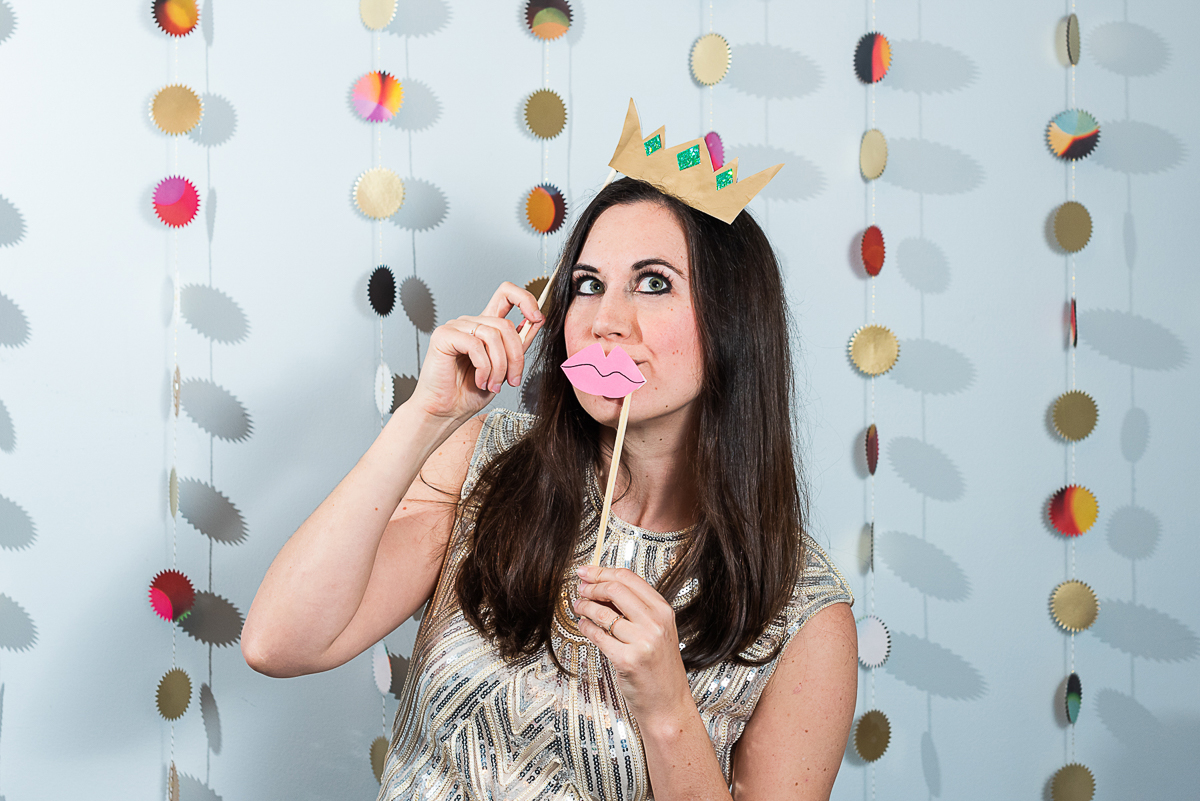
Make some memories!
Have fun and take lots of photos. You may want to set up a phone with a self-timer and ring light for added flair.
What to Do with Your Homemade Photo Booth after the Party
As always, I love to challenge people to break my DIYs down in an environmentally conscious way. Your photo booth backdrop is actually a gorgeous wall hanging. Consider adding it behind your baby’s crib in a nursery or displaying it in your office or favorite reading nook.
Doesn’t match your decor? No problem. Remove each of your garlands and add them to future gift-wrapped presents. Mine looked stunning on a Christmas gift wrapped with simple brown craft paper, and you can write the recipient’s name or a birthday message on your shapes using a Sharpie or paint pen.
If you try this at home, be sure to share it so we can see it! Tag us @honestlymodern so we can check it out and share it with others.
All photos via Reese Moore Photography
If You Like This DIY Photo Booth, You Might Also Like
Easy DIY Christmas Table Decorations: Upcycling Ideas for an Eco-friendly Holiday
Save Your Holiday Cards For Next Year’s Holiday Decor
9 Ways To Reuse Single Use Items For The Holidays
About the Author

Reese Moore
Reese Moore is a photographer, content creator, and pickle connoisseur who divides time between Charleston and Lake Lure. When she’s not behind the lens shooting stunning images for Reese Moore Photography, Reese loves to spend her time wandering the woods with her dog Gatsby or adventuring with her husband Logan in their Airstream Basecamp.
DIY Photo Booth: Reuse Gift Bags
Create this easy homemady DIY photo booth for New Year's Eve, a baby shower, a birthday party, or any day of fun. Reuse gift bags to create a fun backdrop and simple photo props for an eco-friendly DIY photo booth.
Materials
- Wooden rod, PVC pipe, or bamboo stalk measuring approximately 6 feet (Note: I used two wooden rods each measuring 3 feet from a craft store and simply hung next to each other because I wanted to reuse one half of my backdrop for another purpose).
- Assorted gift bags and used gift boxes (As a reference point, I used 6 gift bags and 4 boxes in this DIY.)
- Decorative twine, such as bakers twine, fishing line, or fine twine
- Metallic spray paint (optional)
- To-go Chopsticks, bamboo grilling skewers, or possibly popsicle sticks
Tools
- Large decorative hole punch
- Double-sided tape
- Hot glue gun
- Scissors
- Measuring tape
- Pen for measuring
- Camera phone with self-timer (optional)
- Ring light (optional)
Instructions
- Game plan your homemade photo booth. Lay out your gift bags and decide what you’d like the color palette of your backdrop to be. I had a stunning giant Anthropologie bag made from recycled paper (added bonus!) covered with festive abstract forms, and I knew I wanted to pair that with some metallic gold.
- Then decide how many photo booth props you’d like to make (I did 6) and what bags make the most sense for each of those based on color. Bow ties, lips, glasses, mustaches, crowns, hats, and polaroid forms are all super easy to cut out and very kid-friendly in a photo booth.
- Start your backdrop. If desired, spray paint your hanging rod and gift boxes. While they are drying, measure out your decorative twine. I used 5 separate 4-foot long strands per rod, so 10 total, for a half-body photo booth backdrop. Adjust your length as desired.
- Using a sharp pair of scissors or box cutter, slice down the seams of your gift bag to form separate sheets with clean edges. Remove and discard the handles. Then use your large decorative hole punch to cut out the shapes for your backdrop, keeping in mind that you’ll want to have the decorative paper on both sides of the string. Repeat with your gold-painted gift boxes, optional.
- Working on newspaper or a cardboard box, lay your string out and arrange your paper shapes along the length by tucking them under the string with the pretty side facing down. I spaced mine two inches apart. Then, working one piece at a time, add a dab of hot glue in the center of each paper shape and lay the string into the glue. Press a matching paper shape on top of the string, aligning the edges with the decorative paper facing outward, as pictured.
- Repeat along the length of each string, then use your hot glue gun to attach each string garland to your hanging rod from a paper shape - or alternately, add a paper shape to hide the hot glue.
- Hang your backdrop!
- Using a remaining gift box or sturdy gift bag (I actually used the posterboard inset in the bottom of the gift bags), trace a template for your photo booth props. It may be helpful to Google vectors of these shapes if you’re uncomfortable free-handing this part. Cut out your templates, and then trace them on the backsides of your respective gift bag panels. Map out where your chopstick handle will best fall on each prop, and then secure it with tape or double-sided tape. Add double-sided tape along the edges of your props, leaving enough space for a dollop of hot glue to secure your chopstick handle to the template backing. This will make your props sturdier and more durable, but you’ll want the hot glue to adhere to the gift box material or paper board to prevent it from bleeding through the gift bag side. (View photos for clarity.)
- Make some memories! You may want to set up a phone with a self-timer and ring light for added flair.