
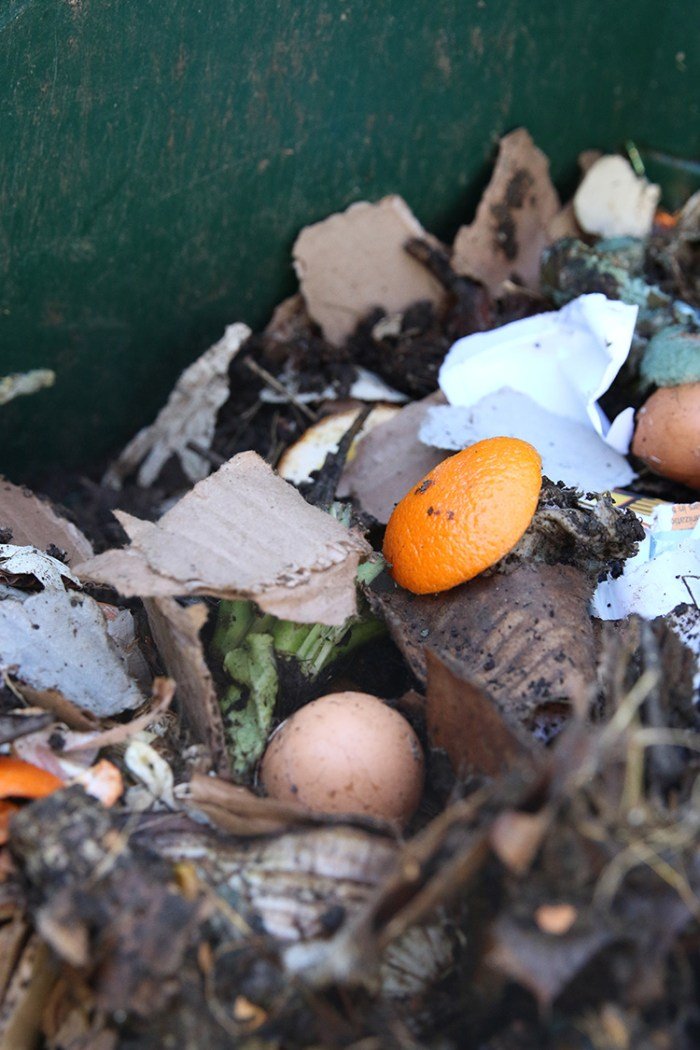
What Is The Right Ratio of Greens and Browns For Composting At Home?
What’s with all the “browns” and “greens” chatter in composting? Inputs to compost are all the colors of the rainbow, not just brown and green. So why the terms and, more importantly, how much of each do you need in your compost bin?
Read on for all the details about how much “greens” and “browns” you need in a compost pile. Hint: It’s not as scientific as you think.
If you’ve done any research on composting at home, you’ve almost certainly heard the terms “greens” and “browns”. Generically, these terms represent the nitrogen and carbon inputs to your compost pile, respectively. Check out this past post that digs into what constitutes “greens” and browns” in more detail as well as the four components of a healthy compost heap.
Many posts on composting suggest a particular volume ratio of “browns” (or carbon materials) to “greens” (or nitrogen materials). I’ve seen a wide range of claims about the right ratio to perfect your compost pile. But throw all those simplified ratios in the trash (or the compost bin, as the case might be).
If you’re just composting at home to simply reduce landfill waste and replenish the soil, here’s why you should forget the darn ratios.
Forget The Perfect “Browns” and “Greens” Ratios
A perfect compost ratio is driven by the relative amounts of carbon and nitrogen elements in the pile. Scientists have determined that compost decomposes most efficiently with a carbon to nitrogen ratio of 30:1 (30 parts carbon to 1 part nitrogen).
That’s all fine and good, but here’s the catch. Each “ingredient” in our compost pile is composed of a unique amount of carbon and nitrogen. Let me give you an example:
Sawdust and oak leaves are both carbon-rich elements to add to a compost pile. However, sawdust has a much higher composition of carbon than oak leaves. If we hope to achieve a 30:1 carbon to nitrogen ratio, that requires far more oak leaves than sawdust given a set amount of nitrogen materials in the heap. We might need three to four times (or more) oak leaves than sawdust to match a certain level of nitrogen materials in the compost bin.
On the other hand, suppose we have a pile of sawdust and plan to add nitrogen materials like coffee grounds or food scraps to the compost bin. As noted above, we hope to achieve a 30:1 ratio of carbon to nitrogen. Coffee grounds have more nitrogen than citrus peels, for example, so we need far fewer coffee grounds than citrus peels to achieve the desired ratio. A cup of coffee grounds adds much more nitrogen to the compost pile than a cup of citrus peels.
All this is to reiterate… don’t worry about ratios. You probably don’t have enough information about the contents of your compost bin and the carbon and nitrogen compositions of each of the items in your bin or pile to know how much of each “ingredient” to add to your pile.
Maybe I’m making assumptions about each person’s knowledge of carbon and nitrogen composition of composting contents, but I don’t have a darn clue how much carbon or nitrogen I’m adding to my compost pile at any given point in time.
Sneak A Peek and Take A Whiff
Let’s cut to the chase. Forget about measurements and ratios. The real way to know if you have the right ratios of browns to greens (or carbon to nitrogen) is simply to sneak a peek and take a whiff. That’s it!
Take a look and smell your compost. First and foremost, the compost shouldn’t stink. If it smells like garbage or smells acidic, you have excess nitrogen or “greens”. This wet and stinky pile might also have more bugs flying around it than you would like.
It usually means you added more food scraps than you currently have carbon materials to match. Simply add some “browns” like dried leaves, cardboard, sawdust, or newspaper. Mix them in and let it sit for a day or so.
If your compost looks wet, this could be a result of too many “greens” (or nitrogen) or simply too much water. Either way, add carbon materials and turn the compost to mix in air and help dry it out. The compost should be moist but not soggy.
When the pile looks dry, you probably have either too many “browns” (or carbon) or not enough water. In either case, add more “greens” and some water. Turn the pile to mix everything together and give it a day or two to decompose.
Finding the perfect ratio of “greens” to “browns” while composting at home is more an exercise in trial and error and observation than mastering some perfect mathematical ratio. Commercial composting facilities may take a more scientific approach (I really don’t know…), but when composting at home, don’t get worked up about ratios.
Sneak a peak and take a whiff of your compost pile. You’ll know in ten seconds if you need more carbon or nitrogen materials to find that perfect blend.
If your compost looks damp, dark brown, and has a sweet, Earthy smell, you’ve nailed it. Then you’ll know that you have just the right ratio for your at-home compost heap.

If you have more questions about composting at home, don’t hesitate to ask! Leave your questions in the comments so everyone can benefit from the answers, and I will do my very best to help you out. You can also check out the whole series about Everything To Know About Composting At Home.


This article pretty much my approach for the last three years of composting on my balcony in a tumbler that I salvaged from the curb.
Any time something looks or smells noticeably about the compost, I look it up to see if it’s even a problem and, if so, how to address it.
I’ve had a few different ecosystems take place in there.
Mold? Oops, too wet.
Mushrooms? Too many browns.
Bolt fly larvae? Let ’em do their thing and they’ll leave when it’s time.
Just last week I finally got a medium sized pitch fork and turned and broke up the compost, instead of just tumbling it. In the process I rooted around for anything that hasn’t decomposed.
Despite how much kitchen scraps and random boxes I’ve thrown in there, the only things that didn’t break down were some tape I missed on boxes, some scraps of clothes that I didn’t cut small enough (namely the double ply seams of denim), and a few larger ham bones.
Nothing that couldn’t be picked out (if desired) when planting, or that wouldn’t just serve as extra filler.
In the spring, after everything planted has been broken down by the physical processes of winter, I throw it back through the bin to kickstart the process all over again.
So if bones don’t break down the first time around, they’ll eventually do so.
My tumbler is secured, so no wildlife has been attracted to any of the food scrap smells, and I make sure to add absorbent browns first, and then add any grease, oil, or dairy to soak into it for mutually assured decomposition. I don’t tumble it for about a week afterwards, so that it has a chance to absorb or evaporate any excess moisture.
Thanks for sharing this!