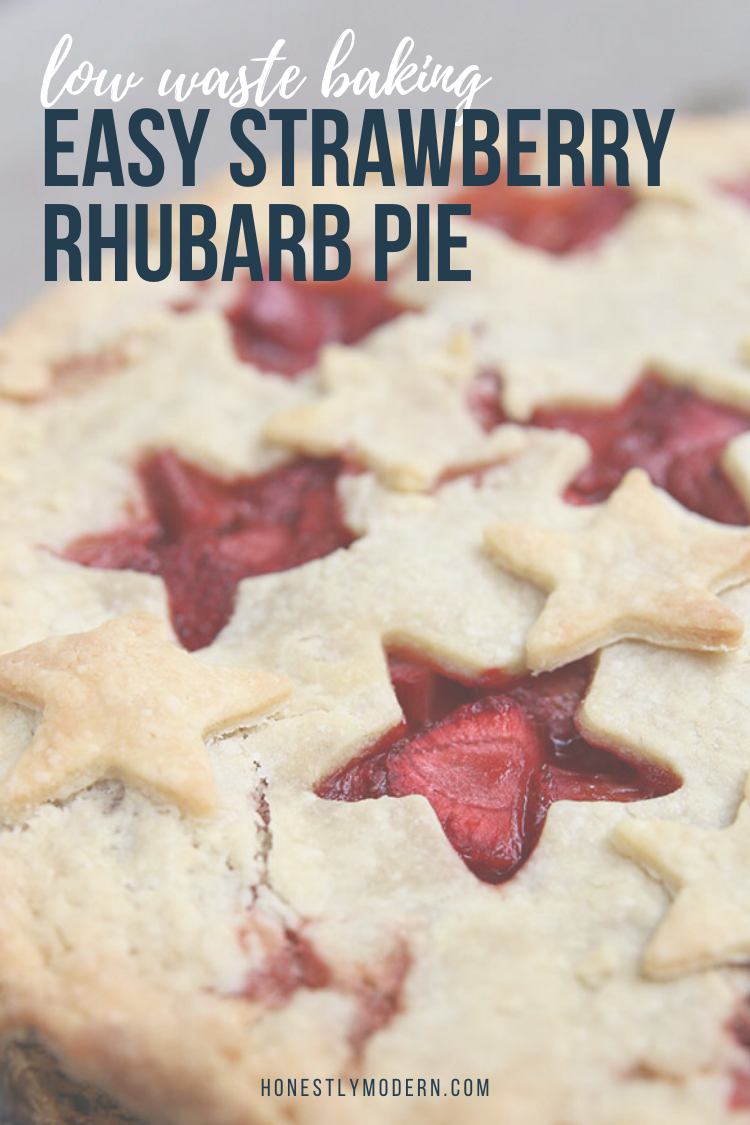
Easy Strawberry Rhubarb Pie
Looking for the perfect summer dessert that’s sweet, fun, and even a little impressive? Scrumptious and easy strawberry rhubarb pie is perfect for June and July!
Pie might seem intimidating, but I don’t think it’s as hard as it seems (as long as we aren’t striving for perfection). Consider this dessert for the Fourth of July or anytime during summer when strawberries are sweet and rhubarb is ready to pick.
It’s summer which means that, in our house, it’s the season of easy strawberry rhubarb pie. I don’t make a lot of pies, and when I do it’s normally apple pie for a family gathering.
The apple pie recipe was handed down from M’s grandmother, who no longer makes them but has tried to teach me all her tricks. Hopefully, I can live up to the expectations.
A few years ago, I took her pie crust recipe and used it to make a simple strawberry rhubarb pie. I didn’t eat pie growing up. We were strictly a brownies and cookies house, so I didn’t know much about pie (except I was pretty sure I didn’t like it and didn’t have a reason to start liking it).
While visiting Vancouver in 2011 with M, however, we ate dinner at Aphrodite’s Organic Cafe and Pie Shop. We had the best strawberry rhubarb pie and agreed I would make it once a year, when strawberry and rhubarb are in season, as an ode to our trip (and the delicious pie).
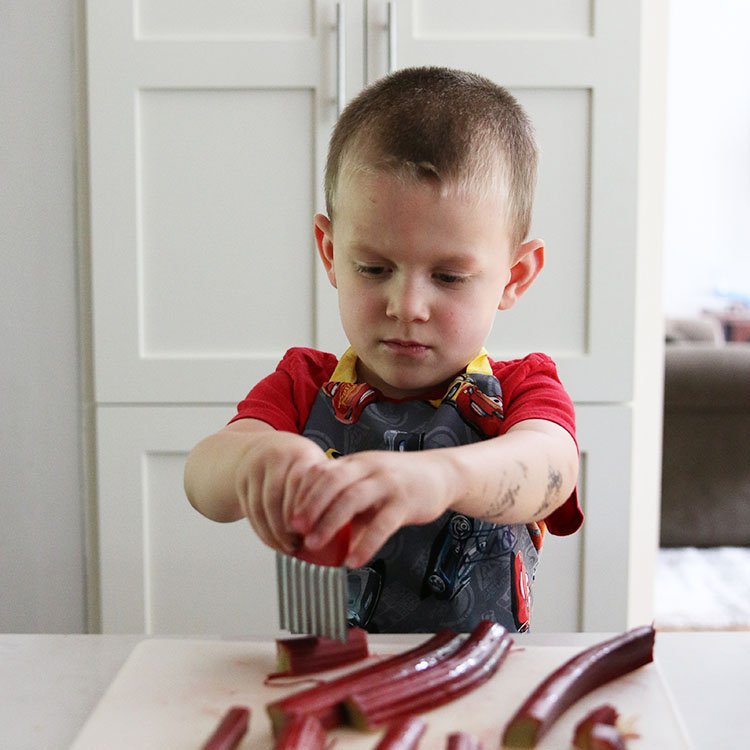
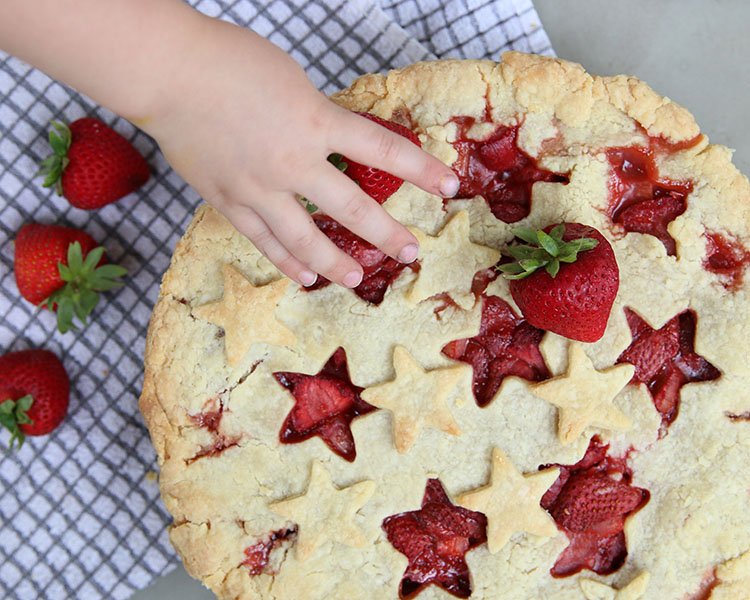
So this week, J and I plan to throw on our aprons and set to work on our annual strawberry rhubarb pie. If you’re not keen on baking with kids, consider these tips for baking with kids before discounting it. It’s not as hard as you might think, and your little ones will love spending time with you.

He uses his favorite chopping tool to cut some of the strawberries rhubarb (with a little help from me). We mixed and rolled out the dough, and then set to work on piecing together the pie.
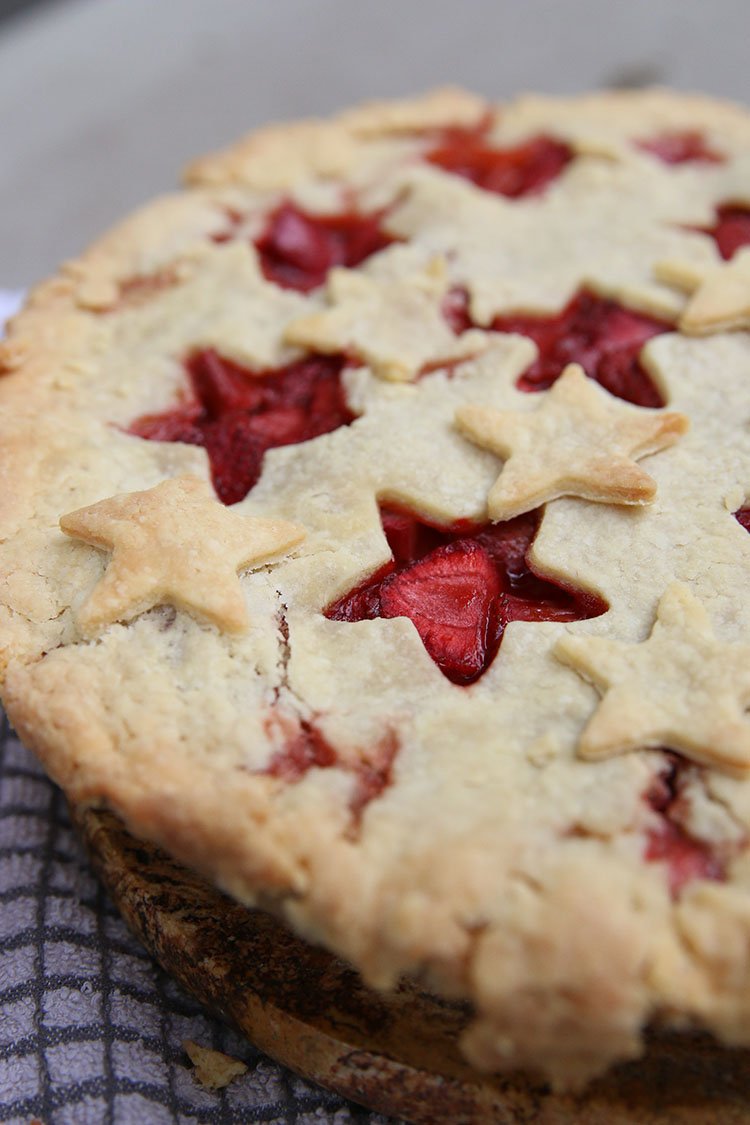
Although the dough usually turns out well, I am not a pie-making expert. I almost always end up with a very ‘organic-looking’ pie crust, if by organic I mean “messy”. But it all tastes great, so I don’t get too worried about it.
To reduce food waste, we use a bunch of practices and tips in my Comprehensive Beginner’s Guide to Zero Waste Baking. Especially when it’s homemade and we use produce without packaging, a pie like this easy strawberry rhubarb pie doesn’t create a whole lot of waste!
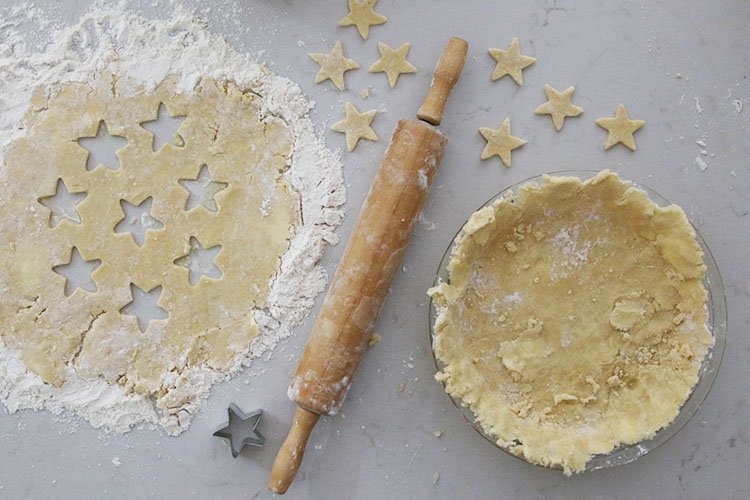
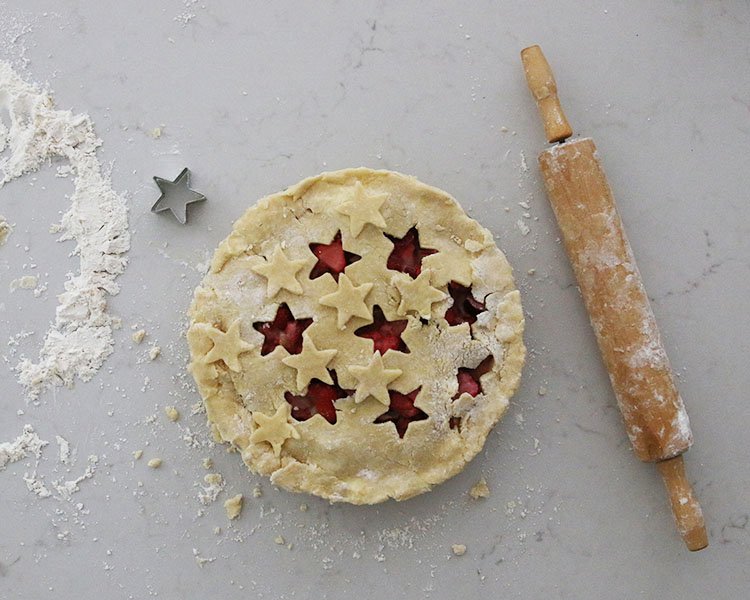
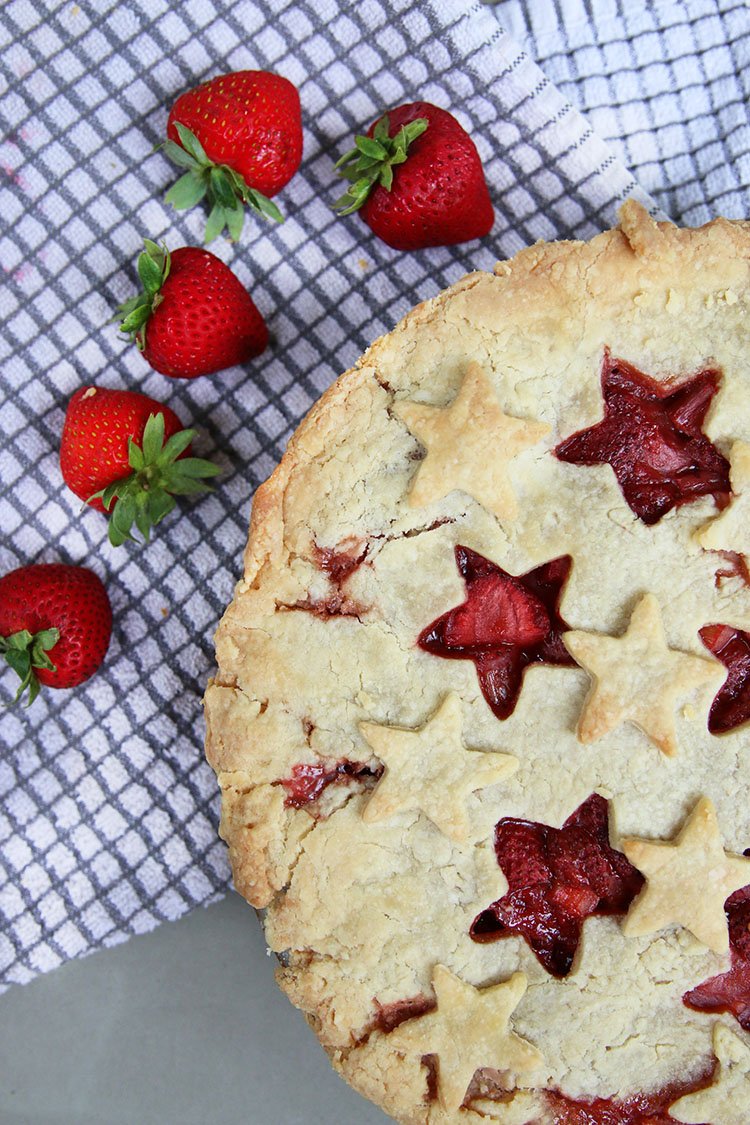
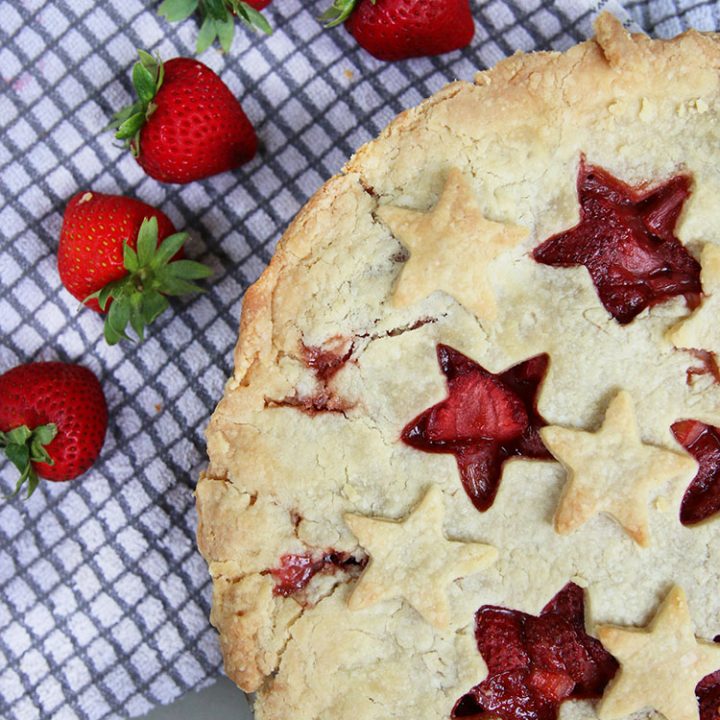
Last year was the first time I pursued a little fancy flair with the pie crust on top of the pie. It always seemed so out of my league. But inspired by a pie I saw on Instagram, I grabbed a star cookie cutter and gave our pie a little upscale decor.
Turns out, the stars made the simple strawberry rhubarb pie just perfect for the Fourth of July. Does this not look like it would be a killer Independence Day dessert?!
As luck would have it, we made the pie right before having my sister in town, so she and her husband helped us eat it. Until next summer, here’s to our annual strawberry rhubarb pie.
If You Like Low Waste Summer Desserts, You Might Also Like
Simple & Delicious Homemade Blueberry Jam
Versatile Snacks and Sides To Reduce Food Waste

Easy Strawberry Rhubarb Pie
Low waste and easy strawberry rhubarb pie that you can try even if you've never baked a pie before.
Ingredients
Filling
- 2 1/2 cups of chopped strawberries - I used frozen that had collected over time in my freezer, but fresh or frozen will work
- 2 cups of rhubarb chopped into 1/2 inch slices
- 1/3 cup brown sugar
- 1/3 cup white sugar
- 1/4 cup corn starch
- 1 tbsp orange juice
Crust
- 3 cups of flour
- 6 tbsp butter chilled and cubed
- 3/4 cup vegetable shortening like Crisco
- 1/4 cup of orange juice, be sure it's cold
Instructions
- Preheat oven to 400 degrees Fahrenheit.
- To make the filling, mix all the ingredients together and set aside. Allow to sit for 20-30 minutes so the sugar can soften the rhubarb and the strawberries.
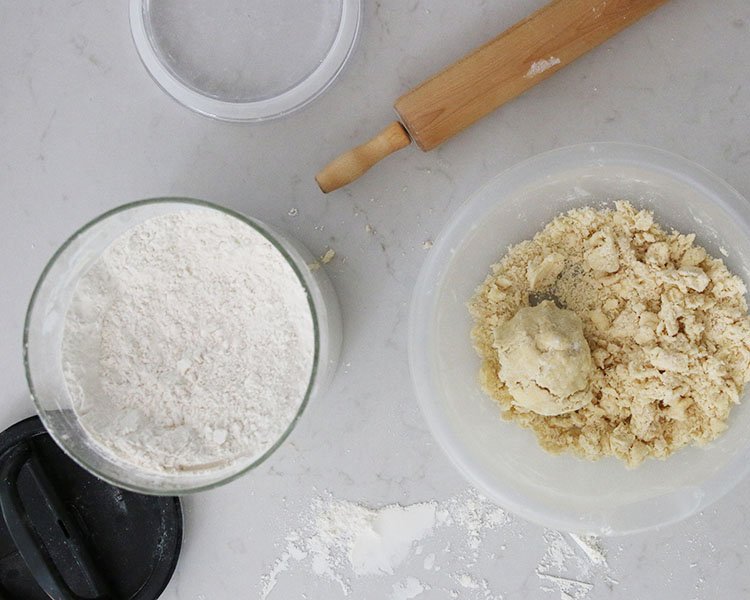
- For the dough, mix the butter, shortening, and flour using your fingertips. Gently mix the butter and shortening into the flour.
- Slowly add the orange juice in small amounts (about 1 tbsp at a time) and continue mixing with your fingertips until you reach a consistency such that the dough looks crumbly but is also a bit sticky. It should stick to your fingers and be able to hold the shape of a ball when you pack it together. However, you don't want to overwork it or make it too wet and sticky.
- Split the dough into two balls, one for the top crust and one for the bottom crust.
- Cover the work surface with a dusting of flour to prevent the dough from sticking, and roll one of the dough balls out into a circle large enough to cover the bottom of the pie pan.
- When the dough is about a quarter inch thick, transfer it to the pie pan. (I roll the dough around the rolling pin to carry it so it doesn't break.)
- Using a fork, poke a few holes in the bottom of the crust. Then add the filling.
- Roll out the second dough ball on a flour-covered work surface until it is large enough to cover the pie and about 1/4" thick. Roll it around the rolling pin to transfer it and lay the dough over the pie filling.
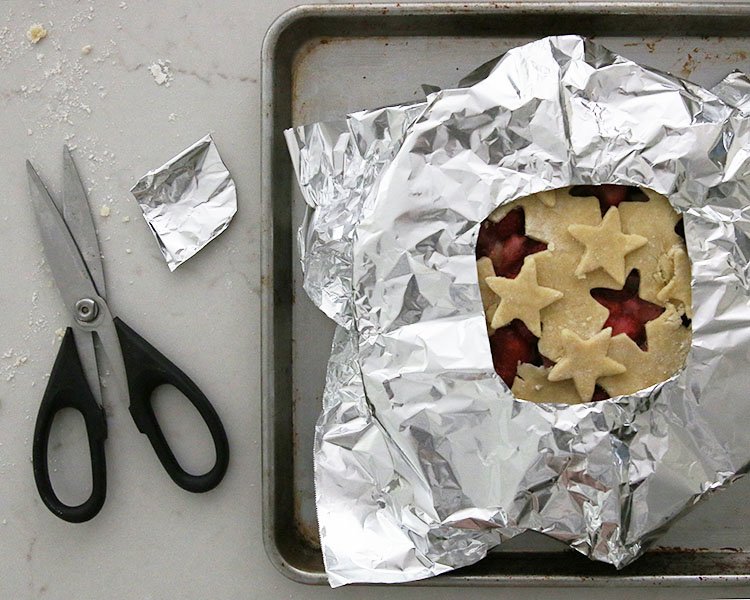
- Cut a circle out of the middle of a piece of foil that is large enough to cover the pie. I start with a square piece of foil, fold it in half and then fold in half again. Then I cut a quarter circle out of the center, unfold, and have a piece of foil with a hole in the center.
- Cover the pie with foil. The middle will be open due to the hole in the foil.
- Bake for 20 minutes. The hole allows the middle to cook without burning the edges of the crust.
- Reduce temperature to 350 degrees, remove foil, and bake for another 30 minutes or until done (crust is golden brown and filling is hot).
- Allow to sit and cool for 15-20 minutes before serving.
Notes
I've made this recipe with all butter when I had no Crisco on hand. I replaced the vegetable shortening with 6 tbsp of butter (so I used 12 tbsp of butter in total). Vegetable shortening helps increase the stability of the crust and makes it a bit flakier while butter offers a slightly better taste because... butter!
For a non-professional baker intent on making a pie that is tasty and presentable (enough), any of these options will work just fine. In my opinion, it's better to use what I already have than stash my cabinets with miscellaneous items I won't often use.