
Homemade Mini Frosted Cupcakes Even a Beginner Can Bake
With a little patience, you can make gourmet cupcakes for your next birthday party even if you’re not a “fancy baker”.
When it comes to cooking and baking, I’ve been known to burn a thing or two. I get distracted, forget things will continue cooking even after the stove or oven is turned off, and just didn’t grow up spending much time in the kitchen.
As I’ve gotten older and watched friends excel in the kitchen, I’ve come to believe my biggest problem perfecting fancy dishes was my lack of diligence in planning and prepping. Up until recently, I didn’t always read through the whole recipe carefully before starting. I didn’t necessarily practice “mise en place”, a French term for getting all the tools and ingredients out and ready before beginning. Like many things in life though, looking ahead and preparing makes a big difference in the final outcome. I know… big revelations over here.
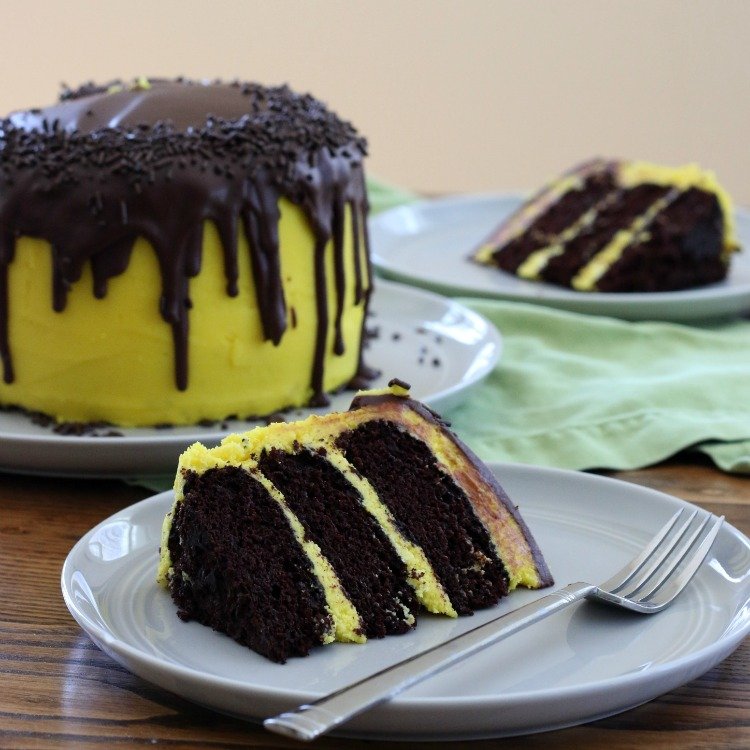
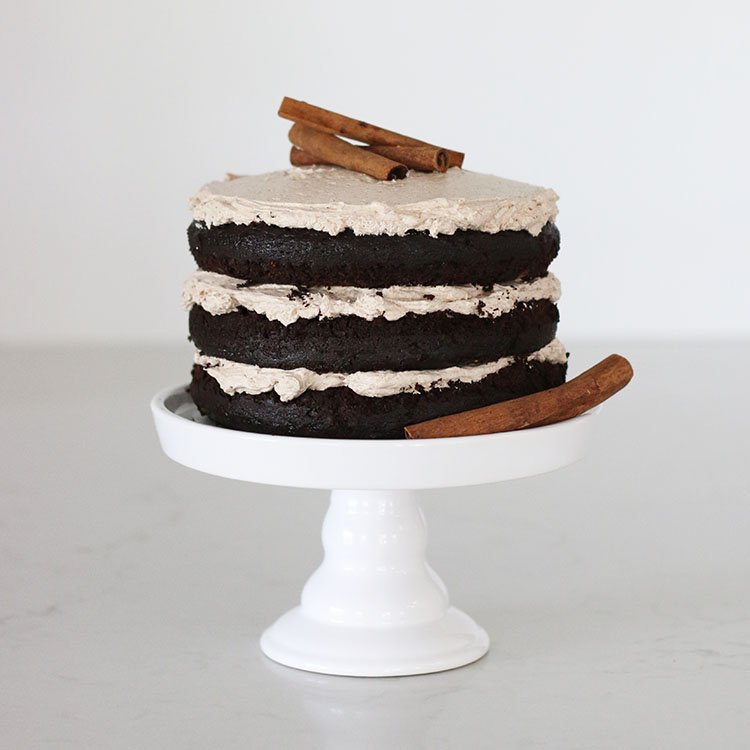
Last weekend, we celebrated J’s upcoming birthday with family. I wanted to make a cake and do something a little more fun and special than a cake from a box with pre-packaged frosting (which I don’t really like). I follow Liv for Cake and drool over her beautiful cakes (are they not ridiculous?!). I knew I couldn’t replicate her perfectly, but I let her creations inspire my design for a modern cake for J. He chose yellow and brown (his two favorite colors), and I set out to enjoy the process of exploring fancy cake baking skills.
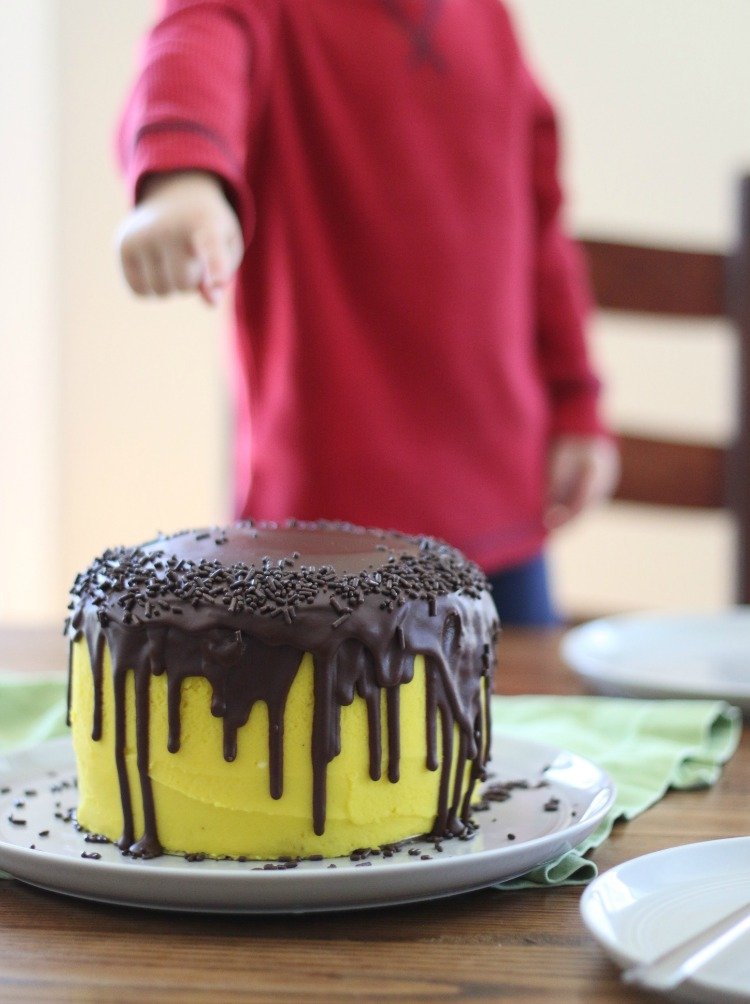
I’ve never made a “practice batch” of anything. But I knew I was in a little over my head with this one, and I really didn’t want a cake disaster the day of the party. So two weekends ago, I made a practice cake and learned a lot about the recipes, the amounts of cake and frosting each recipe made, how long each took to complete, and how I could make each one better in my second try. Nevertheless, we enjoyed the cake and had a “practice party” for J while indulging in the practice cake.
This past weekend, I had every intention of remaking the cake. But Friday, the day I planned to make the cake, spiraled out of control and all plans were shot. I could have stayed up late to make the cake anyway. Instead, I chose to get some sleep and settle for cupcakes.
Part of me felt guilty for bailing on the cake. But in the end, J said he wanted cupcakes (and all he really cared about was yellow frosting and a candle to blow out). All’s well that ends well, and the cupcakes were a very big hit, even for the handful of guests who said they aren’t usually cupcake eaters.

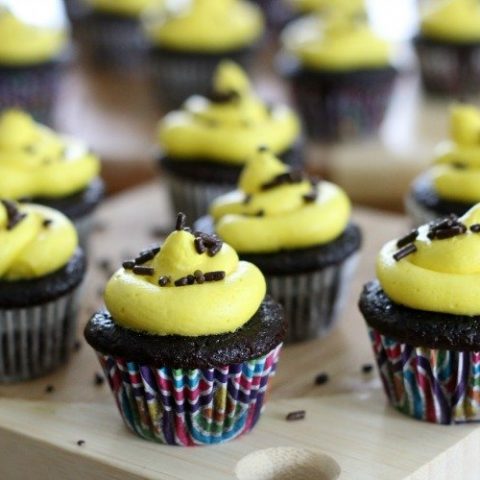
… Yes, that’s a mini hand stealing sprinkles from my mini cupcakes…
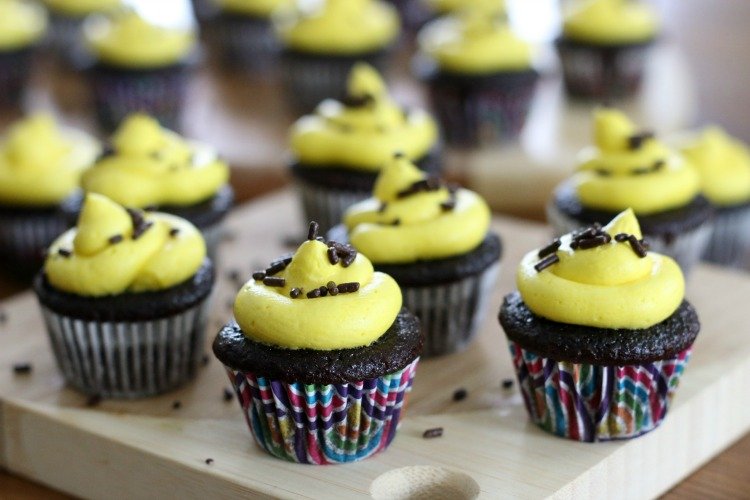
The Mini Cupcake Recipe
For the cake, I followed this chocolate cake recipe from Liv For Cake. Instead of making a whole cake, I used mini cupcake pans and baked them for about 12 minutes on 350 degrees. When converted to cupcakes, with each cupcake cavity filled about 3/4 full, I made 70 mini cupcakes.
I had never made a sturdy buttercream before, so I hopped over to Craftsy and watched two courses on icing. First I watched the free course, Modern Buttercream, which helped me understand how to apply the frosting on the practice cake I made. Later, I watched Icing on the Cake: The Ultimate Frosting Toolkit, which I found to be more helpful with respect to recipe specifics, knowing which frosting to use and tips to make it well.
Both of these are pretty long online classes, so I didn’t watch them in one sitting. I watched them in the background while I made dinner, folded laundry, and did other chores. Then I returned to the video, as needed, while I was making the cupcakes to make sure I got the recipe right.
Not ambitious enough to try to pasteurize eggs myself for the recipe, I chose American Buttercream (which doesn’t have any eggs in it). The recipe is at the bottom of the post. Although I was being somewhat adventurous, I didn’t want to stray too far into uncharted territory.
I frosted the cupcakes with this frosting decorator. I bought it a while back and don’t use it all that often, but I was pumped to have it for these. Frosting the cupcakes was super easy! T even did a handful of them himself with no issues and loved it. It was definitely a reminder that having the right tools for a project can make such a difference.
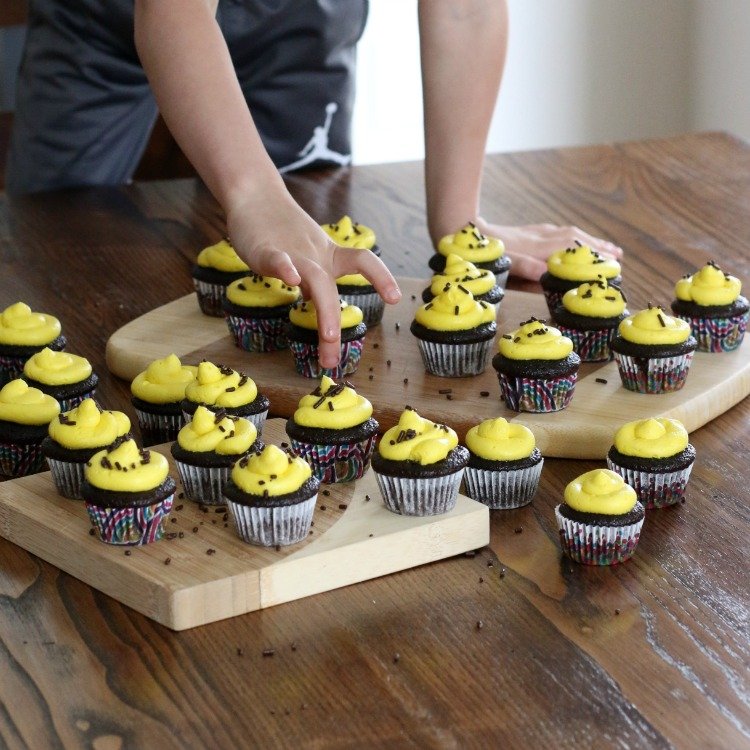
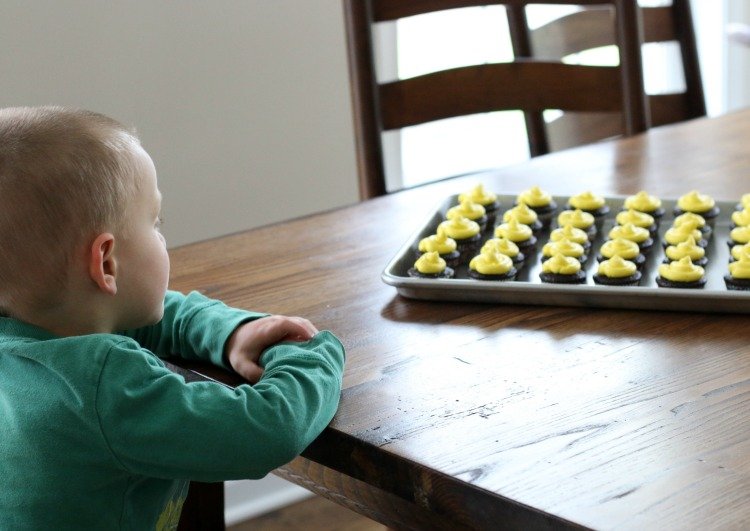
… Eventually, the boys got to try the mini cupcakes after my “photo shoot” and before the party, which they definitely appreciated …
Making the cupcakes from scratch obviously took longer than buying a box recipe or buying them from a local bakery, but I enjoy the process of baking and stretching my kitchen creativity. Taking on the little project was as much for my own enjoyment as it was to offer J a fun treat for his big day.
If you want to give it a shot but are hesitant about the time commitment, definitely go with the mini cupcakes. The cake required a little more time management and patience. If you try it, be sure to tag me (@honestlymodern on Instagram or Facebook) so I can see it!
Lastly, I thought you might appreciate a little ‘behind the scenes’ photo from just before I snapped a few pictures for the blog. As I was setting up the shoot, J sat longingly and patient as could be waiting for his own birthday cupcakes. So sweet… (and a seasoned child of a blogger who styles food photographs in her free time).
American Buttercream
American Buttercream: Recipe adapted from Craftsy class Icing on the Cake: The Ultimate Frosting Toolkit
Ingredients
- 2 sticks of butter, softened at room temperature
- 2 1/3 cups of confectioner's sugar, sifted
- 4 tbsp whole milk
- 2 tsp vanilla
- 3 -4 drops of food coloring gel, optional
Instructions
- In a stand mixer, mix the butter until smooth.
- Add the confectioner's sugar slowly to incorporate.
- Slowly add milk and vanilla while mixing.
- Mix all ingredients in stand mixer for 3 - 4 minutes, until buttercream is light, airy and smooth. (Note: The Craftsy video mentioned above was really helpful in understanding how to know when the buttercream was done, but it's certainly not necessary.)
- Remove bowl from stand mixer and fold in 3 -4 drops of food coloring gel (optional).
Nutrition Information:
Serving Size: 1 gramsAmount Per Serving: Unsaturated Fat: 0g
I wish I made pretty baked goods but I’ve never made anything as pretty as these.
Thanks Shelley! I promise you really can do it. This was the first time I tried. It took some patience, but you should give it a shot sometime 🙂 Thanks for stopping by.