Foraged Pine Cones for an Evergreen-inspired Sustainable Christmas Tablescape
Are you looking for ideas for a sustainable Christmas tablescape? These quick and easy DIY Christmas table decorations make hosting an eco-friendly Christmas dinner a snap.

When it comes to Christmas, I frankly go a little insane.
When I’m not building a human-sized lawn decoration and decorating every nook and cranny of the house while howling along to Mariah Carey on full blast, I’m wrapping presents, mailing Christmas cards, and swearing my way through over-the-top Martha Stewart recipes.
We live BIG from Thanksgiving to New Year’s. While I wouldn’t have it any other way, it can also be… a bit much. (Am I a bit much? Am I the problem?! She pondered, clutching her fourth cup of gingerbread-flavored coffee…)
Anyway, if the holidays aren’t hard enough, they can be even trickier to navigate as an environmentalist. The most wonderful time of the year is also the most wasteful, but none of us need the extra work or stress that too often accompanies a broken system that puts all the work on the consumer.
So, in the spirit of the season, I challenged myself to throw together a quick and easy, sustainable Christmas tablescape that is also easily repurposed! Who doesn’t love a gift that keeps giving, right?

Here’s why this elegant and sustainable Christmas tablescape is going to land you on the “nice” list this year:
- You’ll use foraged pine cones, a beautiful seasonal item.
- Your house will smell like a hot lumberjack has taken over your kitchen.
- You’ll divert some old candles and toilet paper rolls from the landfill.
- Your “snow-covered” pine cones are also firestarters, which can double as a functional, seasonal party favor.
- The only parts of this tablescape that are landfill-bound are the napkin rings and wire from the live garland.
Before we dive in, I want to gently remind you to scroll to the bottom of this post, where you’ll find tips and ideas for how to get the most “bang for your buck” and responsibly dispose of your sustainable Christmas tablescape after the party is over!
A Few Notes on Foraging Pine Cones
While you could buy a plastic bag of pine cones with a gag-inducing artificial cinnamon fragrance, please just… don’t. You can easily find pine cones in city parks, wooded areas, or a kindly neighbor’s yard.
What are you looking for? Freshly fallen pine cones that haven’t yet been ravaged by squirrels.
What if your foraged pine cones are tightly shut?
That’s totally fine. I’ll tell you how to clean and prep your pine cones for this sustainable Christmas tablescape below, but all you’ll need to do is pop them in the oven!


Suggested Materials for an Evergreen-inspired, Sustainable Christmas Tablescape
- 20-25 pine cones, depending on how many place card holders you’ll be making and the length of your table
- 2-3 cardboard toilet paper rolls
- Xacto knife
- Ruler
- Acrylic paint (optional)
- Hot glue gun with cartridges
- 2-3 old white candles (You can easily find these at the thrift store if you don’t want to use yours.)
- Small, shallow metal tray for melting wax*
- Metal baking tray to protect your oven from any wax spillage
- Parchment paper
- Live garland one foot longer than the length of your table or 3 feet longer if you like the “draped” look
- Fresh cranberries
- Scrap paper
- Fine markers for place cards
- Cloth napkins (You may recognize mine from the Uncle Sam-Inspired 4th of July Tablescape.)
- Silverware
- China (You can pick up gorgeous china at nearly all thrift stores.)
- Glasses (These were gifted by a wine bar that was going out of business.)
- Votives and glass holders
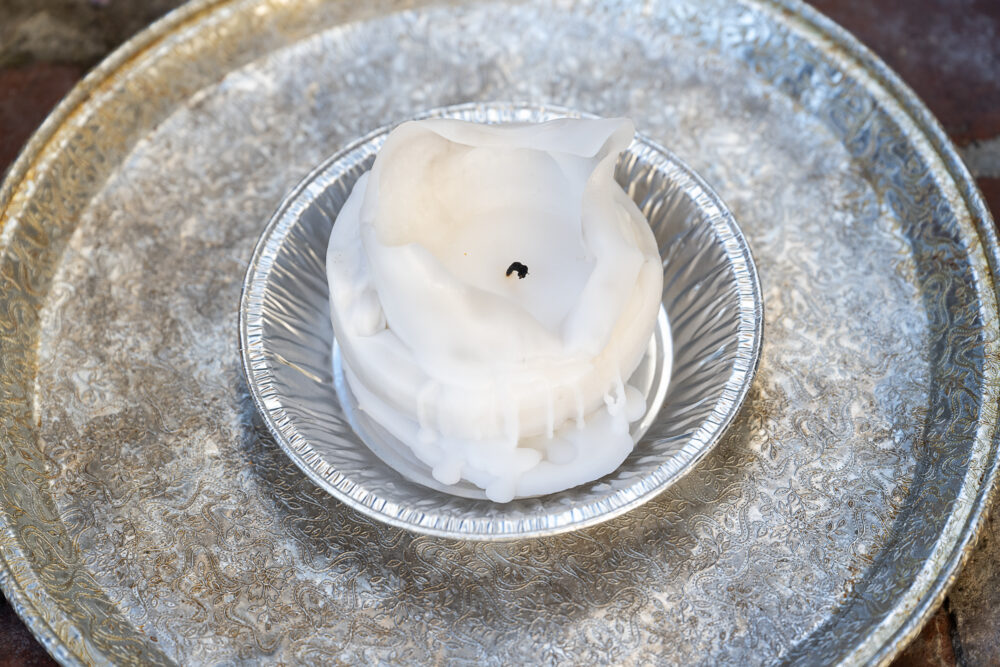
*Note: You’ll want to use a metal tray that’s small enough that your wax won’t spread out and cool instantly, but that’s also shallow enough to easily roll your pine cones without dunking them. You do not want to use a dish you use for cooking. I used a small, clean, used disposable pie pan, but you can easily find a small saucepan at the local thrift store.

Instructions for Assembling an Evergreen-inspired, Sustainable Christmas Tablescape
Preparing the Foraged Pine Cones
- Clean your pine cones by soaking them in a dilute vinegar solution or soapy water for 5-10 minutes. Rinse them thoroughly and pat dry with a towel.
- Preheat your oven to 200 degrees Fahrenheit. Line a baking sheet with parchment paper or aluminum foil to protect it from any sap or debris, and spread your pine cones in an even layer.
- Place your baking sheet on the center rack and toast your pine cones until they are fully opened. The cooking time will vary by how tightly shut your pine cones are. Mine were rock-hard pine nubs, and the first batch took over an hour. Jen also did this recently, and she said hers opened in 30 minutes, so you’ll want to check them periodically to see how they’re progressing. (If you’re short on time, move to the first steps in the section below while your pine cones open.)
- Remove the baking sheet from the oven and let your pine cones cool, but don’t turn off your oven if you’ve already completed steps 5-8 while your pine cones opened.

Assembling Your Evergreen-inspired, Sustainable Tablescape
5. Iron your napkins if needed.
6. Use a ruler to mark your toilet paper rolls into 1-inch rings. You’ll be making one for each place setting at your table.
7. Use the Xacto knife to cut the rounds without flattening the rings.
8. If desired, brush a quick coat of acrylic paint onto all sides of the cardboard rings. This, to me, helps disguise the fact that they were once part of a toilet paper roll.
9. While the paint dries, set your oven to 250 degrees Fahrenheit. Place your candles in the small metal container and rest it on the larger tray. This will protect your oven from any leaks or spillage while working with the melted wax. Place the tray on the center rack of your oven and let the wax heat until fully melted. The time will depend on your oven and the size of your candles.
10. While you wait for your wax to melt, plug in your glue gun to heat. Then, measure approximately one foot of your live garland and cut through the wiring to separate it from the rest of the garland. Snip through the rest of the wiring on the small piece to create a pile of foliage. Trim your pieces of greenery to approximately 3 inches long.

11. Working one piece at a time, attach the stem end of your greenery pieces to the cardboard ring with a small dab of hot glue. Attach the next piece so that the leafy “unattached” end will cover the previous dab of hot glue. Repeat this process until your cardboard ring is fully covered with greenery. Repeat for all of your napkin rings and set them aside.
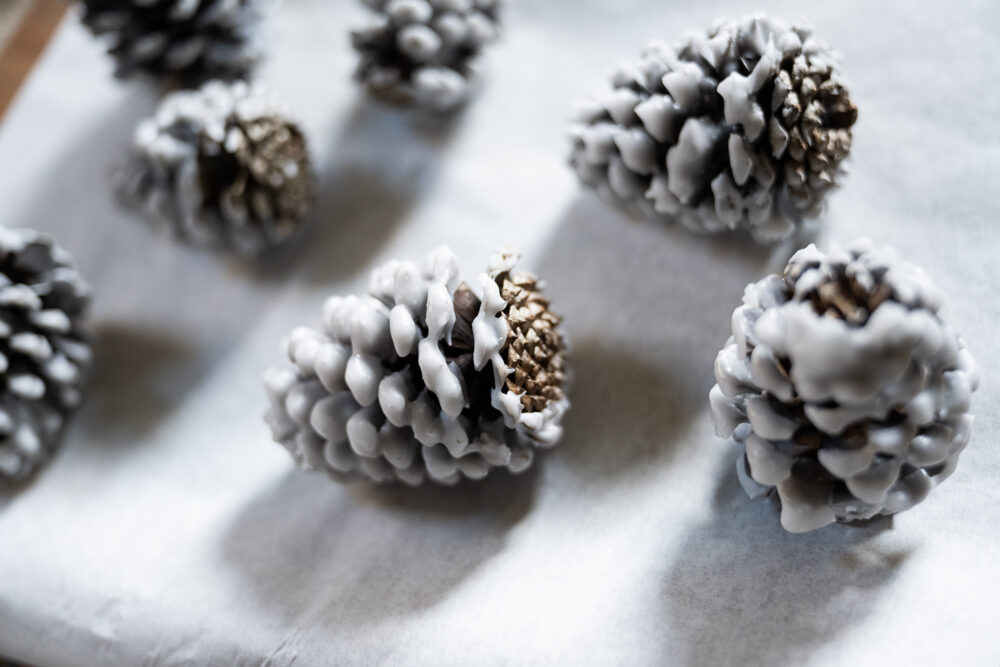
12. Once your wax has melted, spread a piece of parchment paper on a flat surface for your pine cones to cool on, and transfer your trays with the melted wax to a heat-proof surface or trivet.
13. Working quickly, roll your pine cones in the liquid wax and place them on the parchment paper. If you have time before the wax congeals, you may want to do a second or third coat. Rewarm your wax as necessary.
14. After finishing your pine cones, lightly dip the unattached ends of the greenery on your napkin rings in the soft wax and let them cool on the same parchment paper with the pine cones.
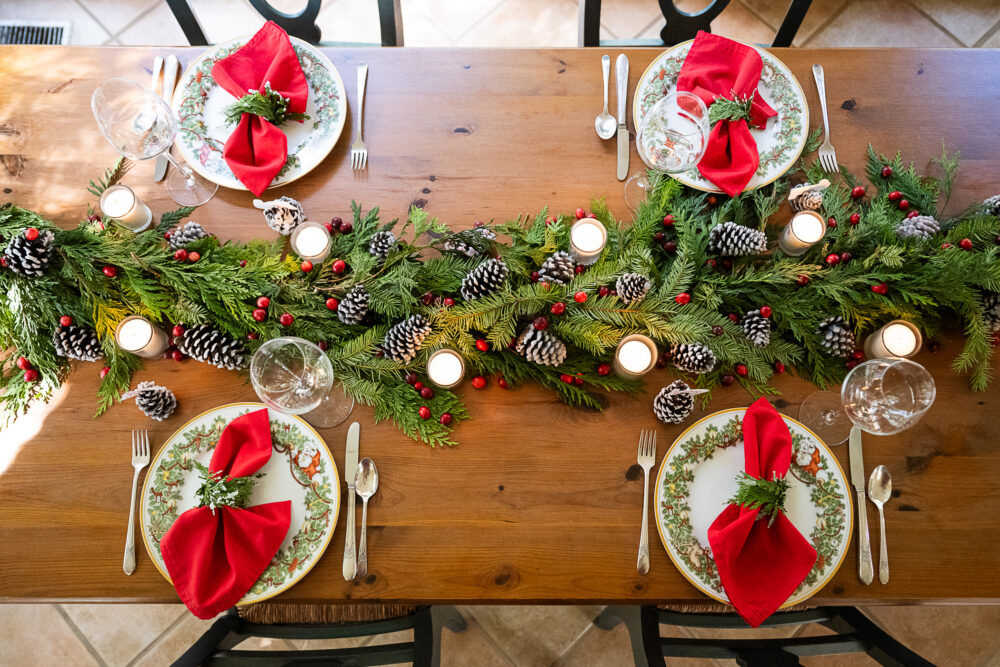
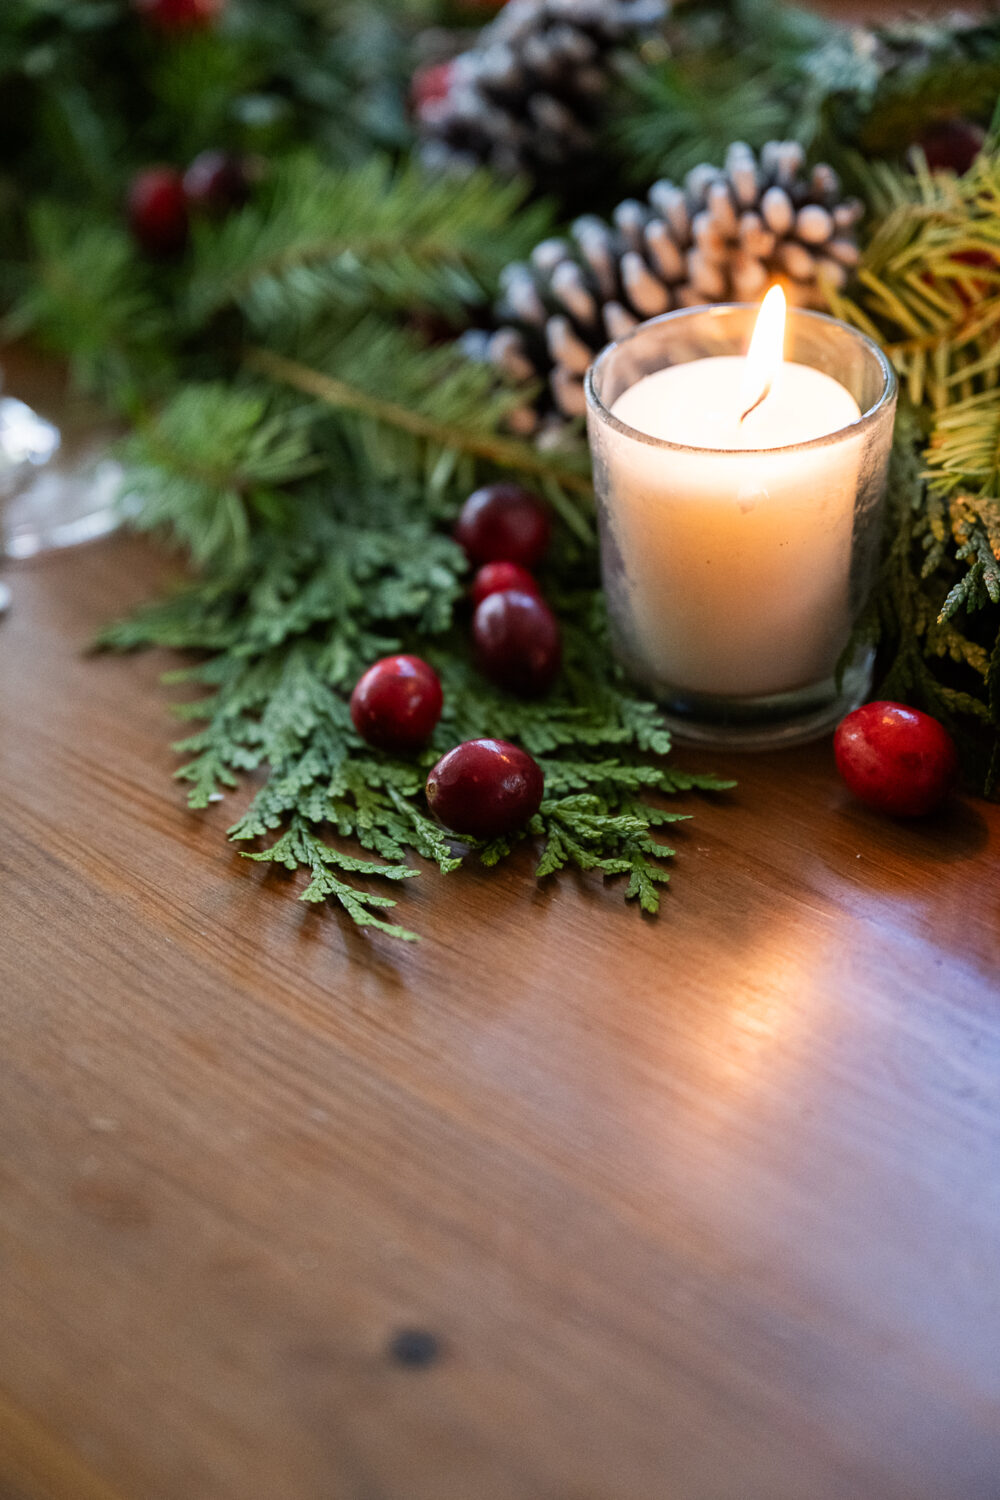
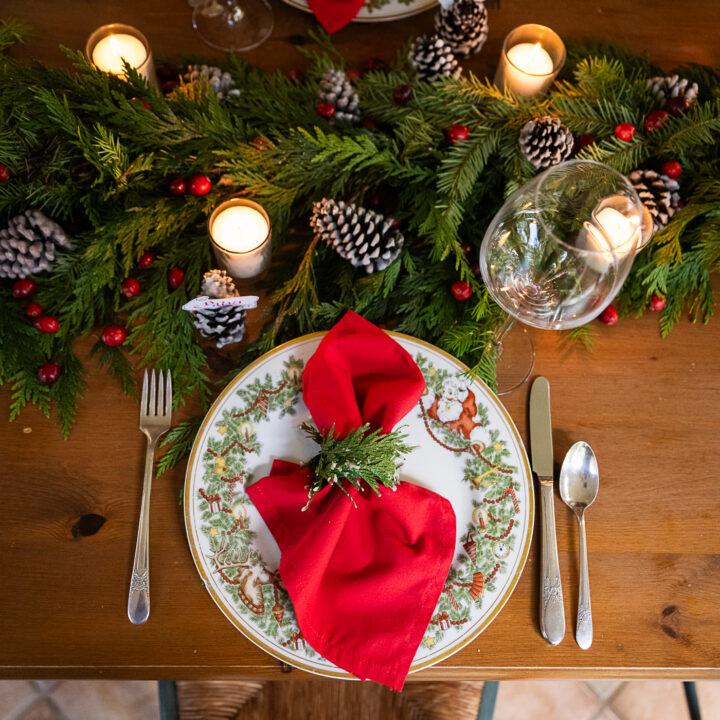
15. While your pine cones and napkin rings set, arrange your live garland down the length of your table. Set the table with your plates, silverware, and glassware. Add your votive candles.
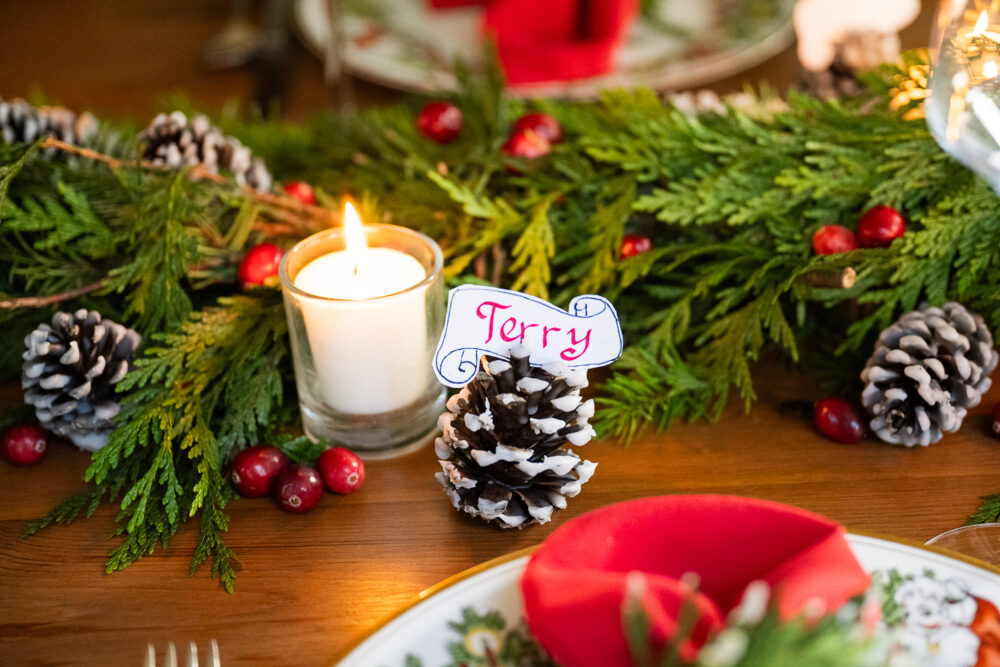
16. Reserve the prettiest pine cones to serve as your place card holders, and nestle the rest along your garland centerpiece. Then gently sprinkle your cranberries throughout.
17. Gently pull your folded napkins through your napkin rings and center them in the middle of each plate. Tuck your name cards into the tops of your reserved pine cones, light your candles, and bon appetite!


I hope your holidays are merry and bright. To get the most out of your evergreen-inspired, sustainable Christmas tablescape, check out the tips below!
Breaking Down Your Evergreen-inspired, Sustainable Christmas Tablescape
- Enjoy the wax-dipped pine cones as seasonal decor by styling them in a bowl with ornaments, tucking them into a wreath, or along a mantel.
- Alternatively, give your guests the wax-covered pine cones to use as firestarters.
- Use any excess candle wax and greenery trimmings to make these DIY firestarters in an old egg carton.
- Compost any leftover greenery trimmings.
- String the cranberries with popcorn or dried orange slices to enjoy as seasonal decor, add them to a simmer pot, and/or compost them when you’re finished enjoying them.
- Use the live garland along a mantel or entryway table or over a doorway. You can also twist it into a wreath form or two.
- When you’re tired of your live garland, snip away the bindings and compost it.
- Reserve your china for next year, give it away as a gift, or donate it to a local thrift store.
- Enjoy your cloth napkins on Valentine’s Day (or for everyday use!).
All photos from Reese Moore Photography.
About the Author

Reese Moore
Reese Moore is a photographer, content creator, and pickle connoisseur who divides time between Charleston and Lake Lure. When she’s not behind the lens shooting stunning images for Reese Moore Photography, Reese loves to spend her time wandering the woods with her dog Gatsby or adventuring with her husband Logan in their Airstream Basecamp.
Evergreen-inspired Sustainable Christmas Tablescape
Are you looking for ideas for a sustainable Christmas tablescape? These quick and easy DIY Christmas table decorations make hosting an eco-friendly Christmas dinner a snap.
Materials
- 20-25 pine cones, depending on how many place card holders you’ll be making and the length of your table
- 2-3 cardboard toilet paper rolls
- Acrylic paint (optional)
- 2-3 old white candles (You can easily find these at the thrift store if you don’t want to use yours.)
- Parchment paper
- Live garland one foot longer than the length of your table or 3 feet longer if you like the “draped” look
- Fresh cranberries
- Scrap paper
- Cloth napkins
- Silverware
- China (You can pick up gorgeous china at nearly all thrift stores.)
- Glasses (These were gifted by a wine bar that was going out of business.)
- Votives and glass holders
Tools
- Xacto knife
- Ruler
- Hot glue gun with cartridges
- Small, shallow metal tray for melting wax*
- Metal baking tray to protect your oven from any wax spillage
- Fine markers for place cards
Instructions
- Clean your pine cones by soaking them in a dilute vinegar solution or soapy water for 5-10 minutes. Rinse them thoroughly and pat dry with a towel.
- Preheat your oven to 200 degrees Fahrenheit. Line a baking sheet with parchment paper or aluminum foil to protect it from any sap or debris, and spread your pine cones in an even layer.
- Place your baking sheet on the center rack and toast your pine cones until they are fully opened. The cooking time will vary by how tightly shut your pine cones are. Mine were rock-hard pine nubs, and the first batch took over an hour. Jen also did this recently, and she said hers opened in 30 minutes, so you’ll want to check them periodically to see how they’re progressing. (If you’re short on time, move to the first steps in the section below while your pine cones open.)
- Remove the baking sheet from the oven and let your pine cones cool, but don’t turn off your oven if you’ve already completed steps 5-8 while your pine cones opened.
- Iron your napkins if needed.
- Use a ruler to mark your toilet paper rolls into 1-inch rings. You’ll be making one for each place setting at your table.
- Use the Xacto knife to cut the rounds without flattening the rings.
- If desired, brush a quick coat of acrylic paint onto all sides of the cardboard rings. This, to me, helps disguise the fact that they were once part of a toilet paper roll.
- While the paint dries, set your oven to 250 degrees Fahrenheit. Place your candles in the small metal container and rest it on the larger tray. This will protect your oven from any leaks or spillage while working with the melted wax. Place the tray on the center rack of your oven and let the wax heat until fully melted. The time will depend on your oven and the size of your candles.
- While you wait for your wax to melt, plug in your glue gun to heat. Then, measure approximately one foot of your live garland and cut through the wiring to separate it from the rest of the garland. Snip through the rest of the wiring on the small piece to create a pile of foliage. Trim your pieces of greenery to approximately 3 inches long.
- Working one piece at a time, attach the stem end of your greenery pieces to the cardboard ring with a small dab of hot glue. Attach the next piece so that the leafy “unattached” end will cover the previous dab of hot glue. Repeat this process until your cardboard ring is fully covered with greenery. Repeat for all of your napkin rings and set them aside.
- Once your wax has melted, spread a piece of parchment paper on a flat surface for your pine cones to cool on, and transfer your trays with the melted wax to a heat-proof surface or trivet.
- Working quickly, roll your pine cones in the liquid wax and place them on the parchment paper. If you have time before the wax congeals, you may want to do a second or third coat. Rewarm your wax as necessary.
- After finishing your pine cones, lightly dip the unattached ends of the greenery on your napkin rings in the soft wax and let them cool on the same parchment paper with the pine cones.
- While your pine cones and napkin rings set, arrange your live garland down the length of your table. Set the table with your plates, silverware, and glassware. Add your votive candles.
- Reserve the prettiest pine cones to serve as your place card holders, and nestle the rest along your garland centerpiece. Then gently sprinkle your cranberries throughout.
- Gently pull your folded napkins through your napkin rings and center them in the middle of each plate. Tuck your name cards into the tops of your reserved pine cones, light your candles, and bon appetite!