How to Reuse Old Books to Make Homemade Cards
Are you interested in reusing old books? Do you want to make truly unique homemade cards? Read on for this simple, fun tutorial on how to upcycle old books into greeting cards to send or gift to a loved one!

Raise your hand if you’ve got more than a couple of outdated travel books, stained cookbooks, and worse-for-wear children’s books kicking around your house.
If I’ve learned one thing since becoming the steward of our Little Free Library, it’s that we all have a stack of unwanted books hiding somewhere in our homes – and people are dying to leave stacks of them on your front doorstep. (It’s literally at the point that my husband cries, “Nooooooo!” whenever another neighbor tries to bring us books to store for the LFL.)
I have no statistics to back this up, but I strongly suspect that the number of books in existence far outstrips the desire and need to own those books, particularly once their covers or pages are damaged. Point blank, what I’m saying is that most books have a useful lifespan, whether you take them to the Little Free Library or local Goodwill or not. There are books that no one really wants anymore.
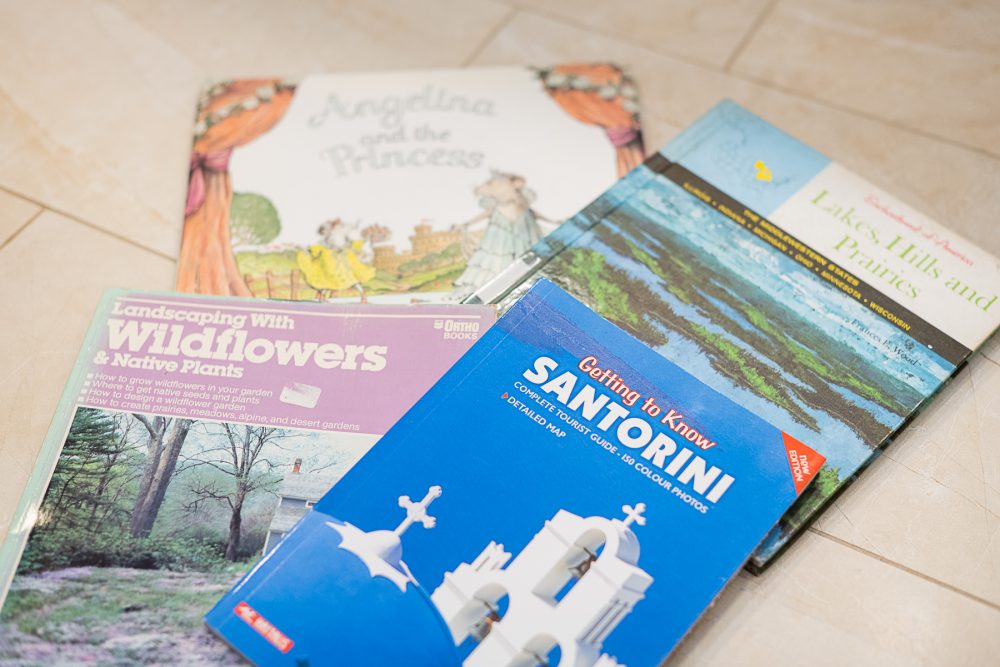
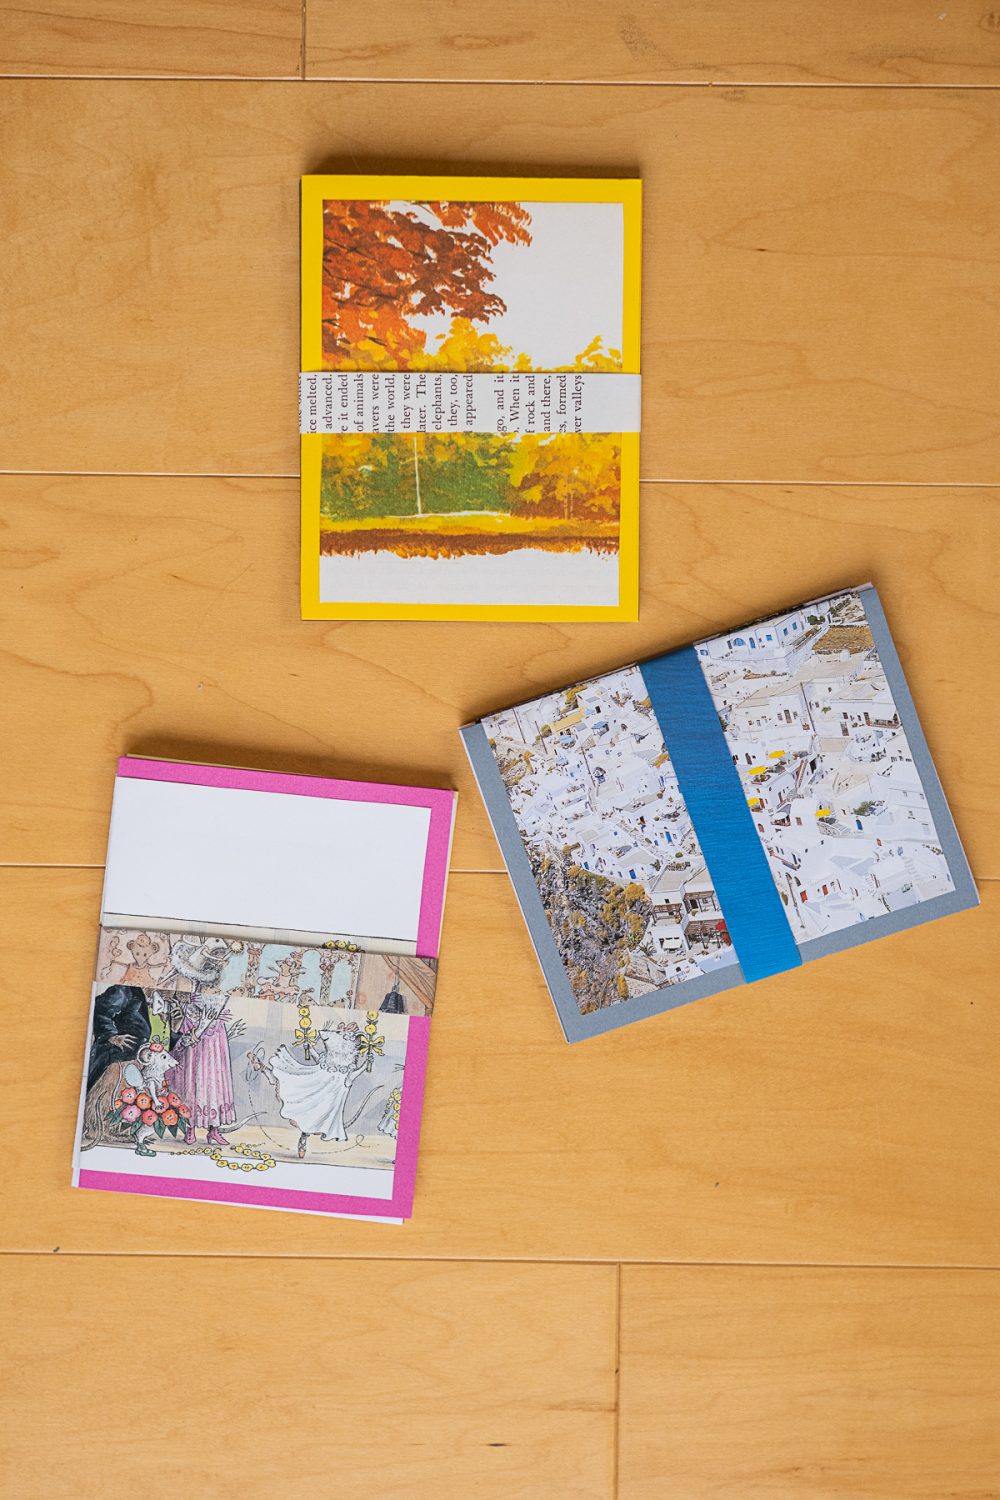
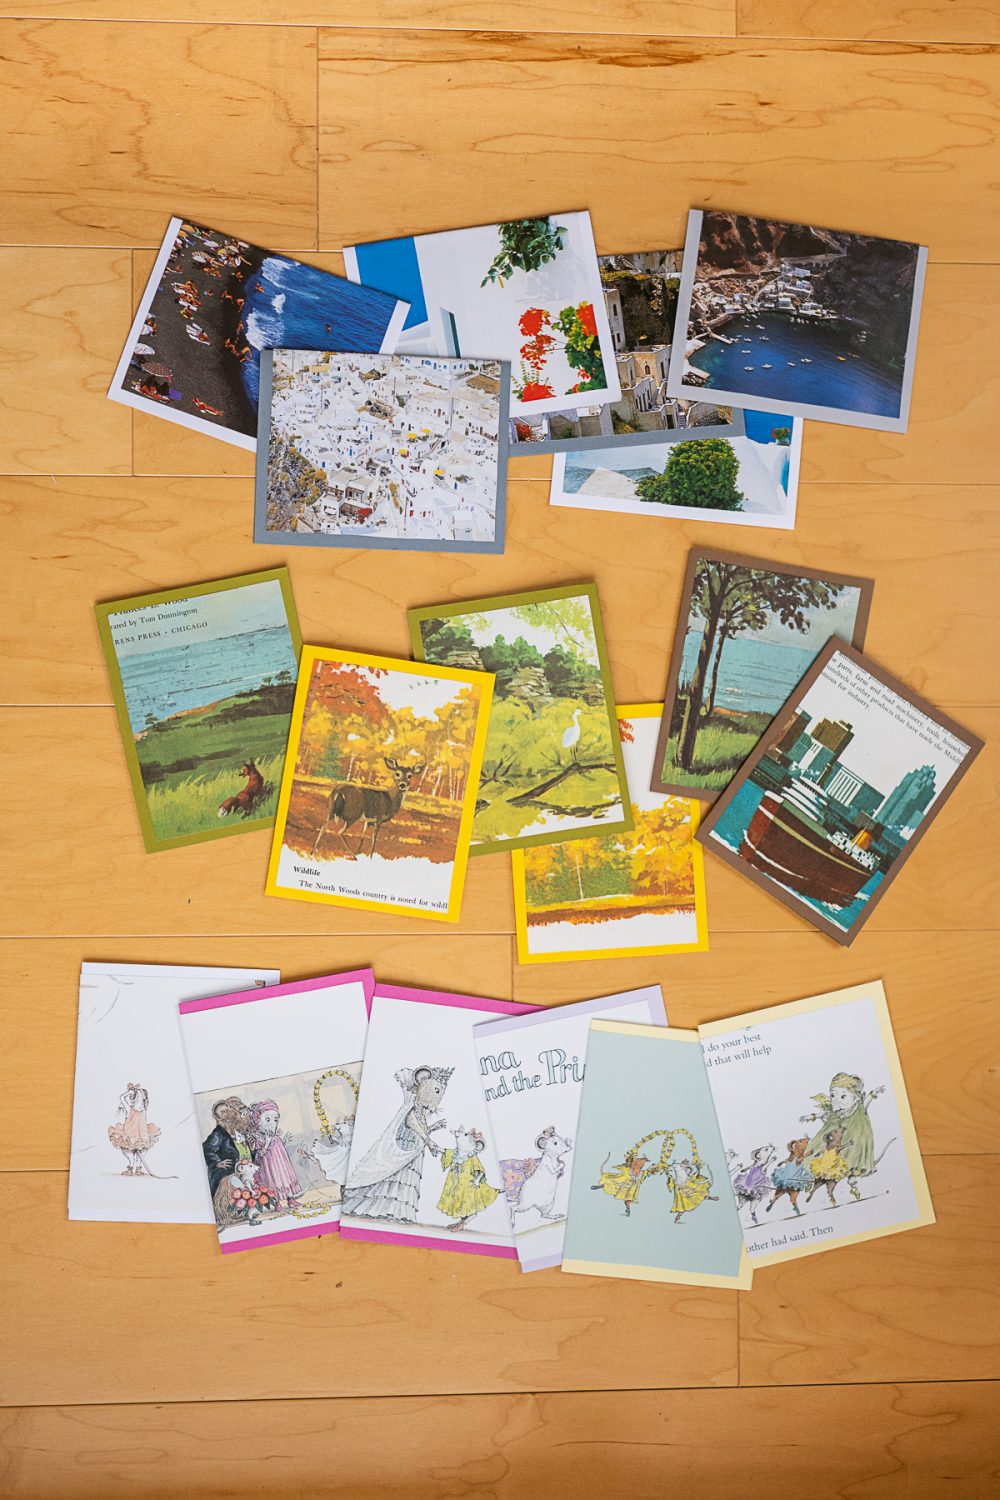
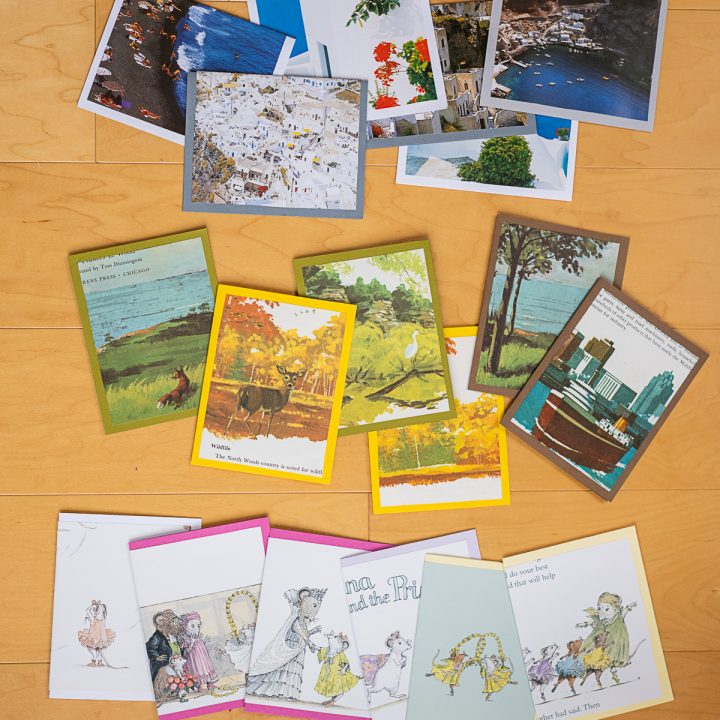
So, what do you do what that 1980s travel guide to Santorini, the copy of Angelina and the Princess with ripped pages, and the battered copy of Lakes, Hills, and Prairies? Get creative! Even when books are past their prime, they offer tons of opportunities to get creative and try a new craft.
We’ve got a roundup of creative ways to reuse old books, from old book crafts to lamps made from vintage hardcover novels coming at you shortly, but this quick, easy, kid-friendly DIY tutorial will leave you with the loveliest, most unique set of homemade cards to use for birthdays, thank you notes, or to give away at Mother’s Day!
Materials to Upcycle Old Books into Homemade Cards
- Old books with illustrations, pictures, or colorful pages
- Cardstock or medium-to-heavy-weight construction paper
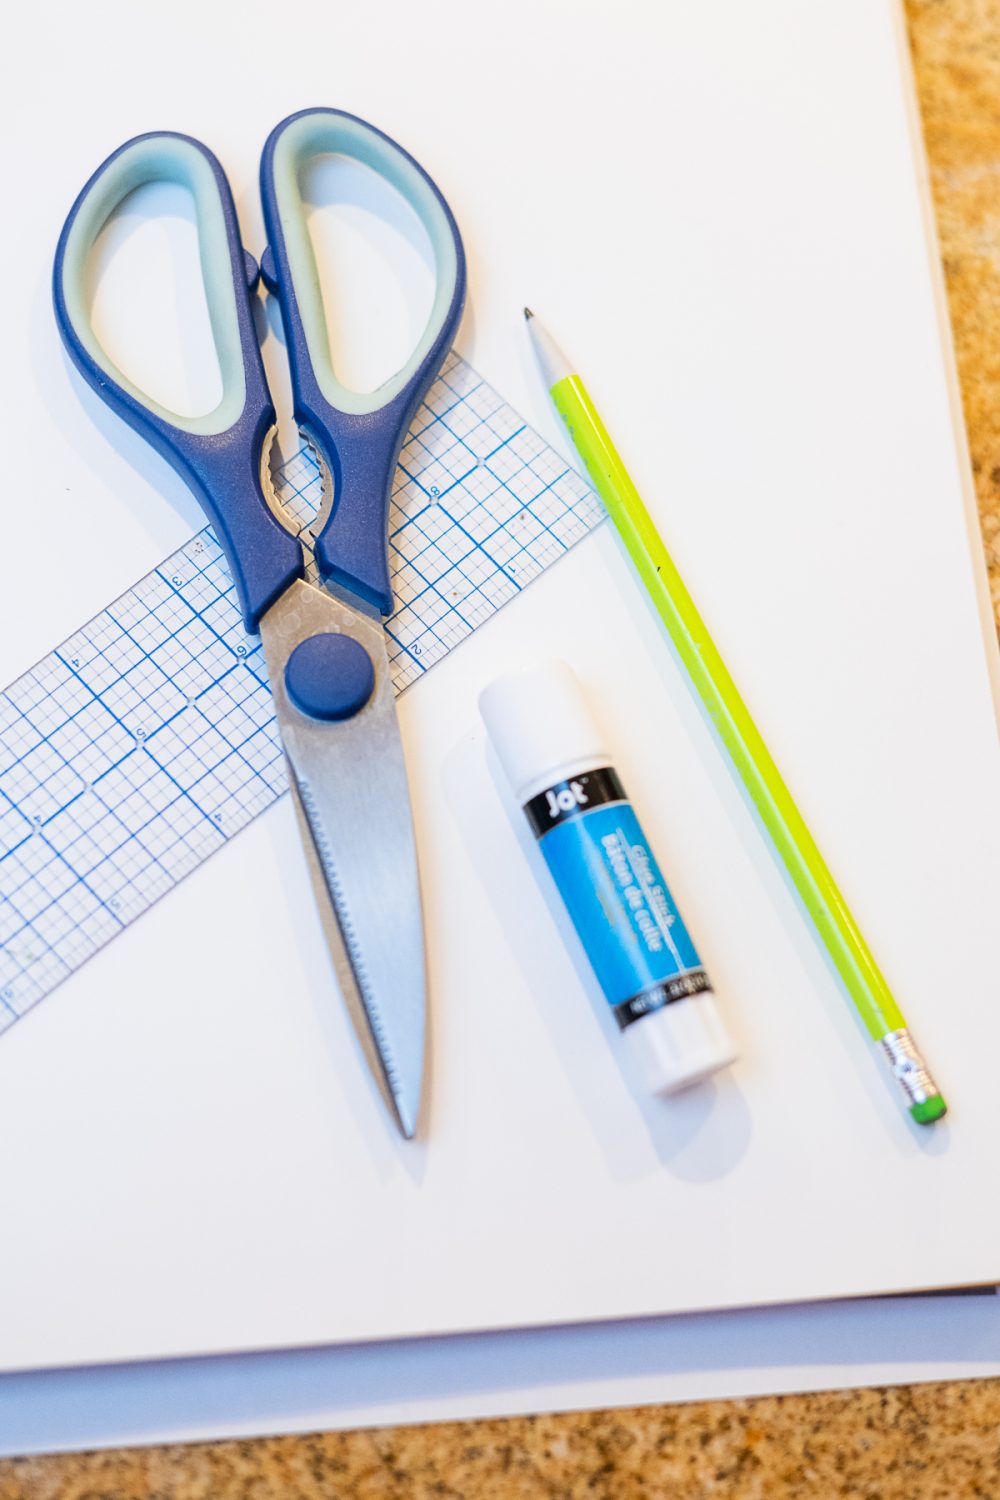
- A ruler
- Pencil
- Eraser
- High-quality glue stick and/or Mod Podge and a very fine brush or toothpick
- Heavy book or box to weigh down the cards while they dry
- Xacto knife
- Scissors
- Optional: Envelopes to accompany your finished cards (I used size A2 envelopes)
- Optional: Glue gun to quickly seal the paper band on your cards if you’re giving them as gifts

How to Upcycle Old Books into Homemade Cards
- Pick your books! If you don’t have a book in mind, hit the local thrift store. Children’s books, old coffee table books, travel guides, and cookbooks are all great options.
- Pick the size of your finished cards. I made 4.25” x 5.5” cards (measured when folded) to fit easily in my A2 envelopes. Here is a list of standard envelope sizes.
- Decide on the layout of your cards. I made two sets that opened from right to left (traditional) and one set that opened from bottom to top so you can see all your options.
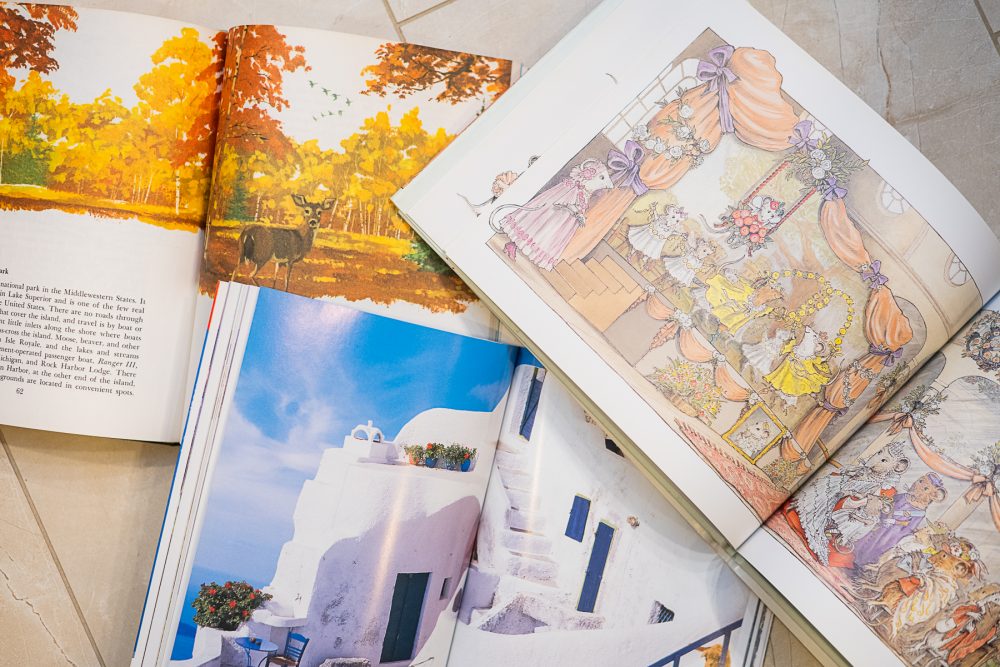
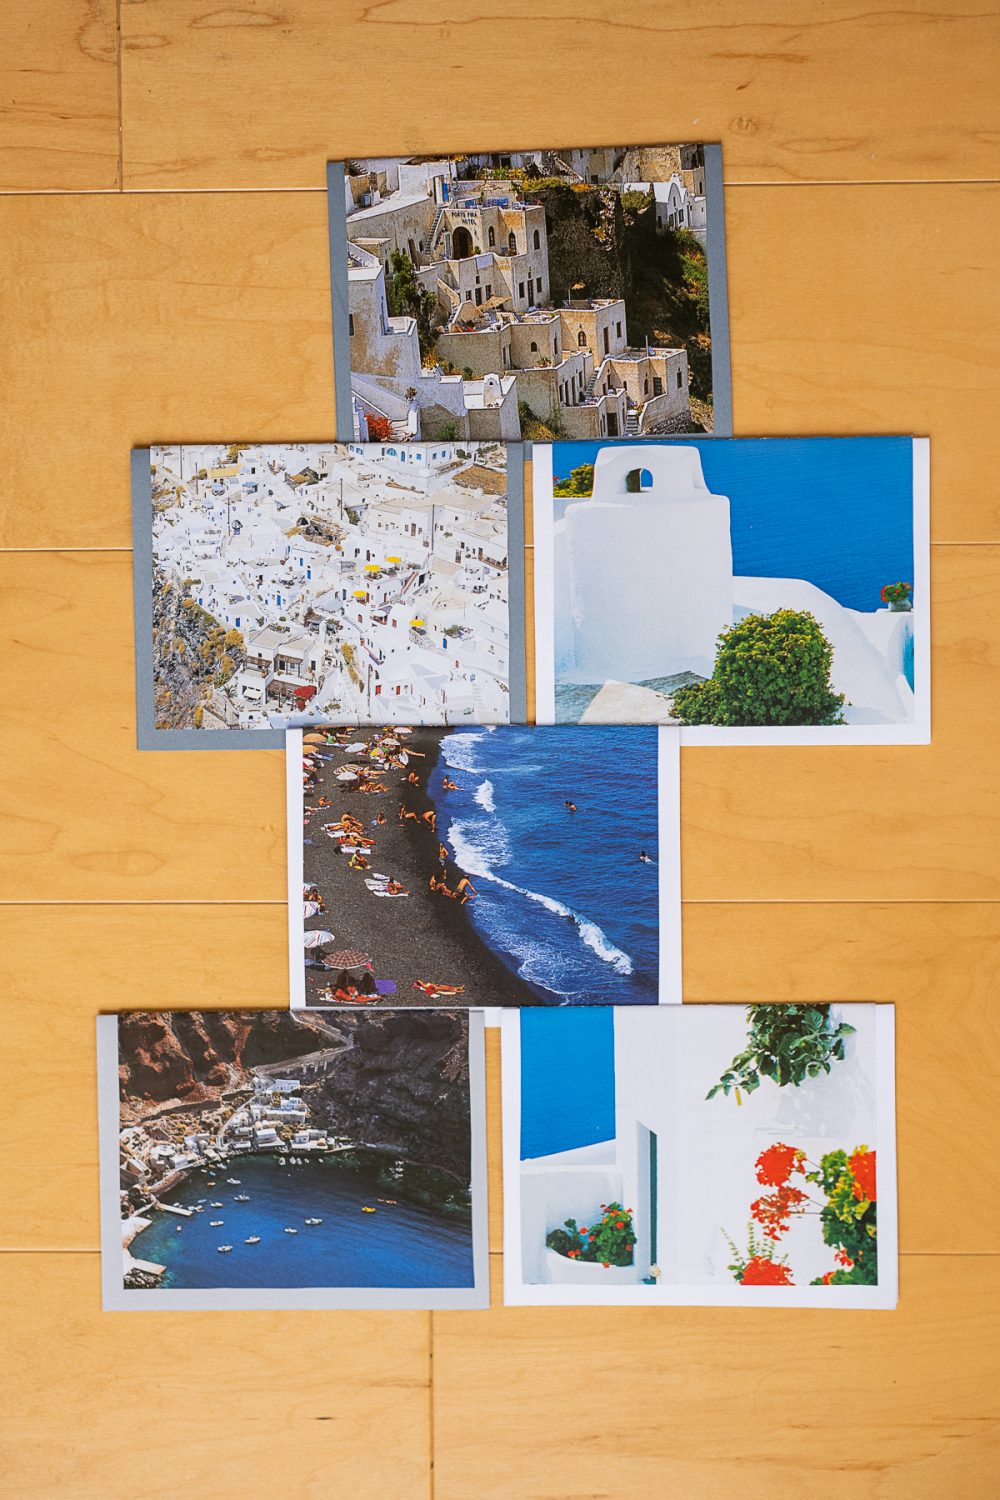
- Then, assess your books. If you’ve picked vertical books or books with smaller pages, you may want to cut a decorative panel that only goes on the front (like Lakes, Hills, and Prairies). A medium to large horizontal book will likely allow your decorative panel to wrap around from front to back, like the Angelina Ballerina book. If you’re working with a vertical book with medium to large pictures, you can easily do a decorative panel that covers the front and back by creating cards that open from the bottom (or “calendar” style), as demonstrated in the Getting to Know Santorini cards.
- Cut your stencil for your decorative panels. I wanted a ½ inch border on mine, so my “front-only” panels measured 3.75” x 5”, and my “front-and-back” panels measured 8” x 5”.
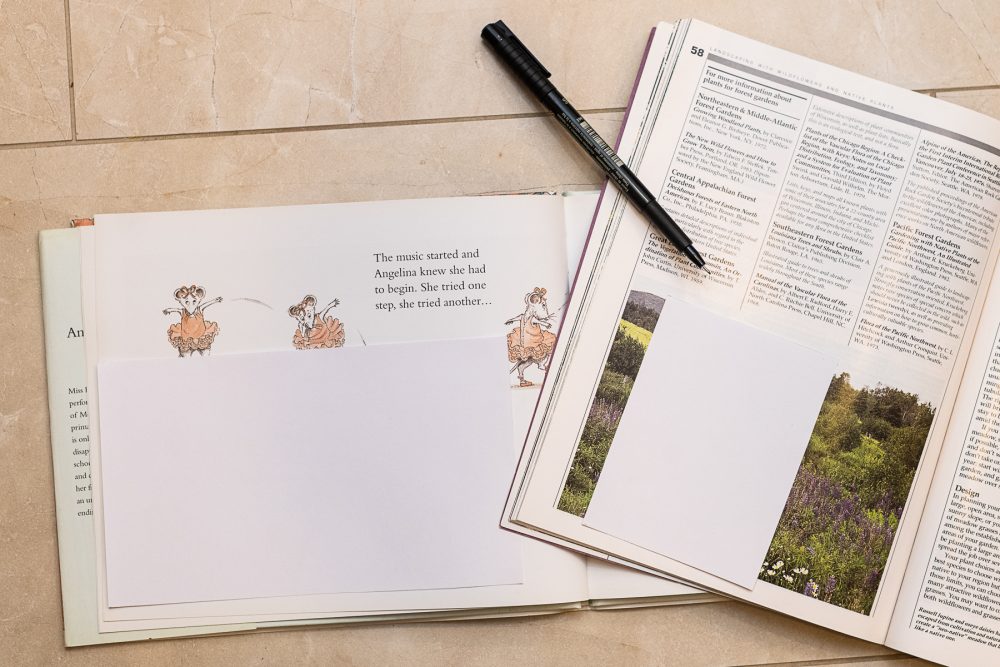
- Use the Xacto knife to remove the pages you plan to use to make the decorative panels. (I made 3 sets of 6 cards.) Lay them flat, trace your stencil over the desired portion of the pages, and cut them out, being sure to cut to the inside of the guidelines (or erase them afterward if you’re using a pencil) so they don’t show on your finished greeting cards.
- Pick the colors of cardstock or construction paper that complement your decorative panels.
- Then, use the ruler to trace the cardstock base for your cards. Again, mine were 4.25” x 5.5” when folded, so my cardstock sheets were 8.5” x 5.5”. Cut them out, keeping to the inside of your guidelines.
- Fold your cardstock panels into cards, taking a moment to run your thumbnail over the spine to ensure a crisp spine and precise fold. Do the same with your decorative panels if they’ll be folding over the front and the back, making sure to keep your selected images on the outside.
- Lay the decorative panels “pretty side down” on a piece of scrap paper and generously apply your glue sticks to the edges and spine of your paper.
- Center your decorative panel over your card and firmly apply it if you’re using a one-sided design. If your panel wraps around, apply your decorative panel using the folded spines as a guide. Nest your cardstock spine inside the crease of the decorative panel, then firmly press along the inside of the cardstock on the back side, fold the card, and firmly press the top of the card.
- Stack your finished cards under the heavy box or book to ensure seamless adhesion.
- If you notice that your corners aren’t quite as flush as you’d like, apply a tiny bead of Mod Podge and return the cards under the book to dry.
You can end here!
If you do decide to make these cards as a gift, you may want to scan the steps below for a fun packaging idea.
To Create the Decorative Paper Band:
- Take a leftover page of your book and remove it with the Xacto knife to lay it flat.
- Use your ruler to measure a ¾ inch wide strip along the widest dimension of the card.
- Cut out your decorative paper band with scissors.
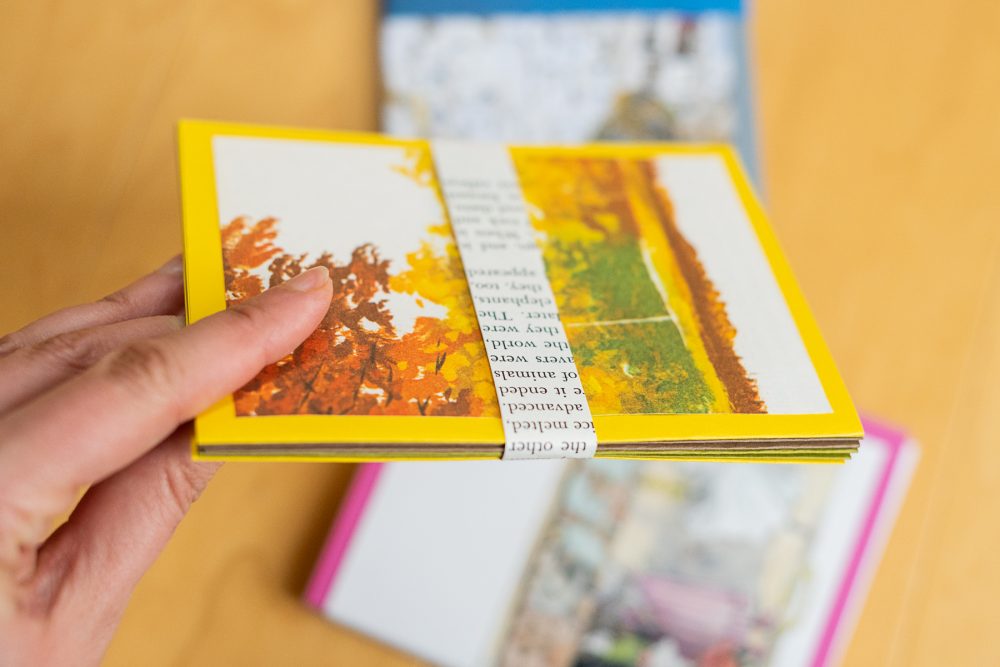
- Tightly fold it around the center of your bundle of cards and glue the ends together with a small dot of hot glue.
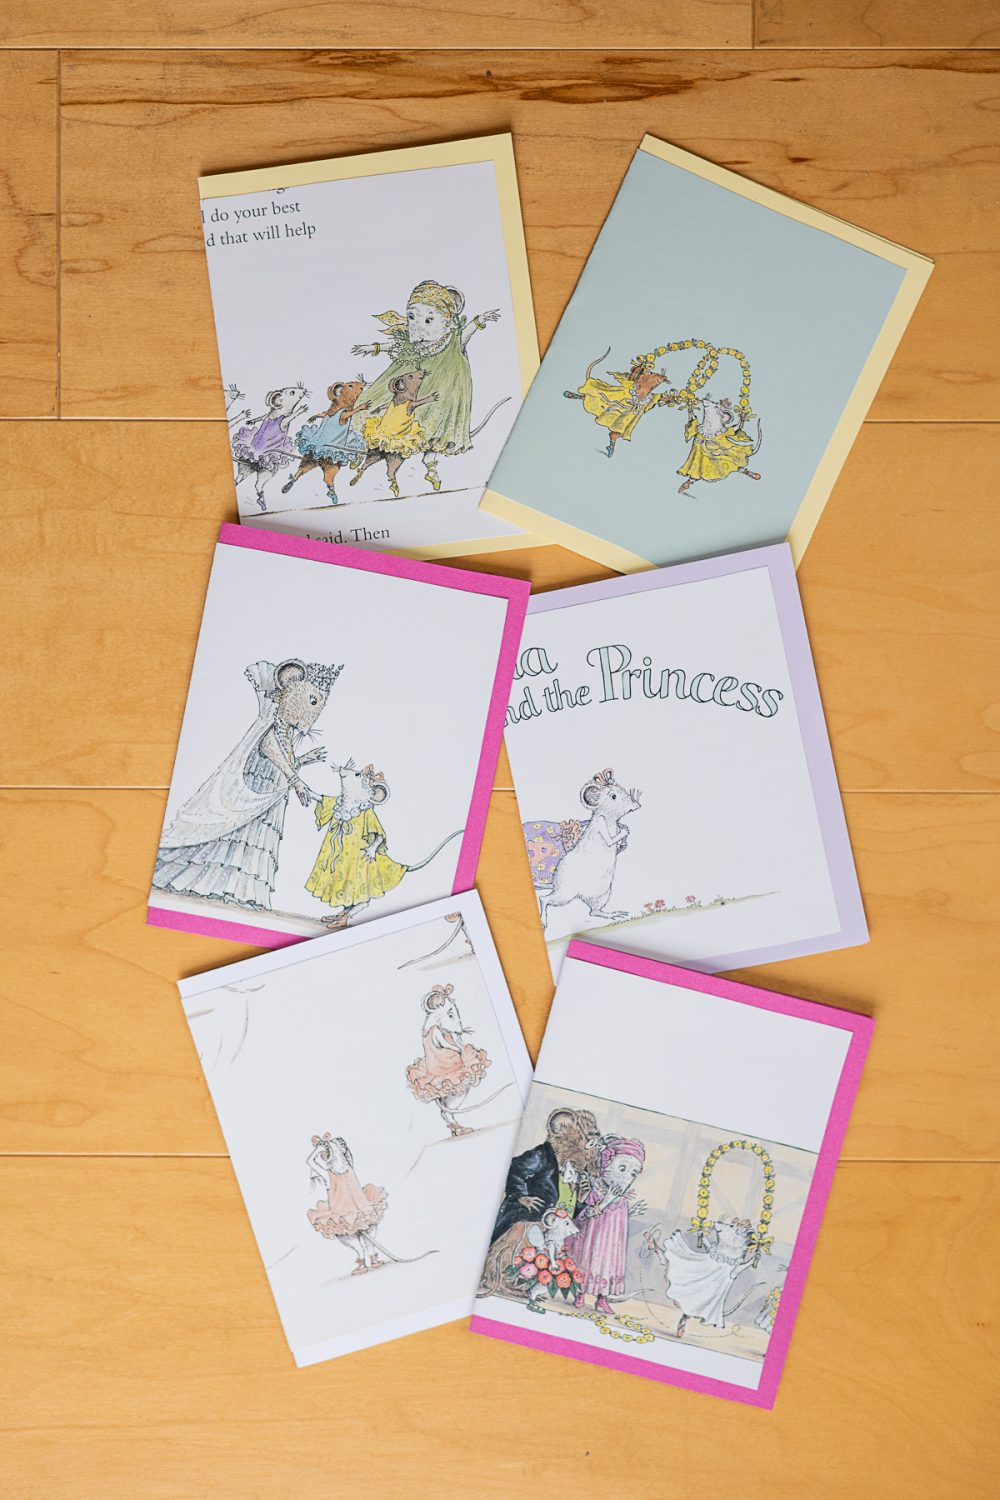
You’ve now made 6 beautiful cards to send to loved ones or give away to a friend. The Angelina cards have such a fun, nostalgic feel, while the Santorini photos almost feel abstract and modern when taken in a new context.
All photos via Reese Moore Photography
If you enjoyed How to Reuse Old Books to make Homemade Cards, you may also enjoy:
Easy DIY Christmas Table Decorations: Upcycling Ideas for an Eco-friendly Holiday
30+ Ways To Responsibly Dispose Of Old Books (Sell, Donate, & Recycle)
11 Tips To Avoid Library Fines For Overdue Books
About the Author

Reese Moore
Reese Moore is a photographer, content creator, and pickle connoisseur who divides time between Charleston and Lake Lure. When she’s not behind the lens shooting stunning images for Reese Moore Photography, Reese loves to spend her time wandering the woods with her dog Gatsby or adventuring with her husband Logan in their Airstream Basecamp.
How to Reuse Old Books to Make Greeting Cards
Repurpose old books to make fun greeting cards for any occasion.
Materials
- Old books with illustrations, pictures, or colorful pages
- Cardstock or medium-to-heavy-weight construction paper
- High-quality glue stick and/or Mod Podge and a very fine brush or toothpick
- Optional: Envelopes to accompany your finished cards (I used size A2 envelopes)
Tools
- A ruler
- Pencil
- Eraser
- Heavy book or box to weigh down the cards while they dry
- Xacto knife
- Scissors
- Optional: Glue gun to quickly seal the paper band on your cards if you’re giving them as gifts
Instructions
- Pick your books! If you don’t have a book in mind, hit the local thrift store. Children’s books, old coffee table books, travel guides, and cookbooks are all great options.
- Pick the size of your finished cards. I made 4.25” x 5.5” cards (measured when folded) to fit easily in my A2 envelopes. Here is a list of standard envelope sizes.
- Decide on the layout of your cards. I made two sets that opened from right to left (traditional) and one set that opened from bottom to top so you can see all your options.
- Then, assess your books. If you’ve picked vertical books or books with smaller pages, you may want to cut a decorative panel that only goes on the front (like Lakes, Hills, and Prairies). A medium to large horizontal book will likely allow your decorative panel to wrap around from front to back, like the Angelina Ballerina book. If you’re working with a vertical book with medium to large pictures, you can easily do a decorative panel that covers the front and back by creating cards that open from the bottom (or “calendar” style), as demonstrated in the Getting to Know Santorini cards.
- Cut your stencil for your decorative panels. I wanted a ½ inch border on mine, so my “front-only” panels measured 3.75” x 5”, and my “front-and-back” panels measured 8” x 5”.
- Use the Xacto knife to remove the pages you plan to use to make the decorative panels. (I made 3 sets of 6 cards.) Lay them flat, trace your stencil over the desired portion of the pages, and cut them out, being sure to cut to the inside of the guidelines (or erase them afterward if you’re using a pencil) so they don’t show on your finished greeting cards.
- Pick the colors of cardstock or construction paper that complement your decorative panels.
- Then, use the ruler to trace the cardstock base for your cards. Again, mine were 4.25” x 5.5” when folded, so my cardstock sheets were 8.5” x 5.5”. Cut them out, keeping to the inside of your guidelines.
- Fold your cardstock panels into cards, taking a moment to run your thumbnail over the spine to ensure a crisp spine and precise fold. Do the same with your decorative panels if they’ll be folding over the front and the back, making sure to keep your selected images on the outside.
- Lay the decorative panels “pretty side down” on a piece of scrap paper and generously apply your glue sticks to the edges and spine of your paper.
- Center your decorative panel over your card and firmly apply it if you’re using a one-sided design. If your panel wraps around, apply your decorative panel using the folded spines as a guide. Nest your cardstock spine inside the crease of the decorative panel, then firmly press along the inside of the cardstock on the back side, fold the card, and firmly press the top of the card.
- Stack your finished cards under the heavy box or book to ensure seamless adhesion.
- If you notice that your corners aren’t quite as flush as you’d like, apply a tiny bead of Mod Podge and return the cards under the book to dry.

![12 Engaging Earth Day Activities and Event For Kids [2021]](https://www.honestlymodern.com/wp-content/uploads/2020/08/Hiking-With-Boys-How-To-Help-Kids-Explore-Nature-1.jpg)