Can I Compost In A Suburban Neighborhood?
Wondering how to compost in a suburban neighborhood or subdivision? Try one of these eight composting methods that are great for small or suburban yards and won’t upset your neighbors.
Composting is easy if you have acres upon acres of space and don’t have to battle with wildlife. But can you compost in a suburban neighborhood? Certainly having neighbors who may be skeptical of smelly trash in your yard or attracting unwanted wildlife to the area may feel like a barrier to composting in an everyday suburban neighborhood.
However, I think just about everyone can find a way to compost in their own space. A few weeks ago, I shared several ideas of ways to compost while living in an apartment or small space. These options all work for urban and suburban composting as well. If you have a bit of outdoor space in a suburban neighborhood, however, there are a few additional options for composting at home.
This spring, my parents inquired about starting a compost bin in their yard. I was pretty pumped to see that everything I’ve shared about composting at home helped give them the confidence to try composting for themselves. Although I never specifically ask them to do it, I definitely talk about our composting regularly and remind friends and family that it’s more accessible than they might think.
My parents live in a pretty traditional suburban subdivision, so their interest in composting in their suburban yard got me thinking a lot about this question. I really wanted to be sure that any advice or recommendations I provided to them led only to a successful composting experience.
We started by brainstorming the best place to put a compost bin in their yard. We considered exposure to sunlight, accessibility to their kitchen, proximity to their garden, and several other factors.
We also talked about the type of container that made the most sense for their yard and their budget.
They decided to start with a simple chicken wire enclosure to limit their initial investment. Because this system is open, they’ll need to be a bit more mindful about managing the pile to prevent attracting unwanted wildlife or neighbor pets. However, they could have considered several other more expensive enclosed tumblers and containers that may be suitable for new suburban composters.
9 Ways To Compost In The Suburbs
If you’re thinking about composting at home in a suburban neighborhood or subdivision, have no fear that there are plenty of options available to you. Those options might not look the same as someone who has a good bit of outdoor space and doesn’t mind periodic nighttime visits from raccoons snacking on their avocados, but there are definitely many great options that will work great. Here are a few great options for composting at home in a suburban setting.
Curbside Composting Service
Many suburbs have curbside composting services through private companies or municipal programs. If you live near one of these companies and want to compost but don’t feel like taking on the task yourself, sign up for the service.
There are lots of composting services in cities around the country (and the globe). Do a quick web search, and I bet you can find one near you, especially if you live close to a major city.
For those who are up for the task of composting at home on their own, there are lots of ways to compost in the suburbs in your own yard with bins, buckets, buried containers, and more.
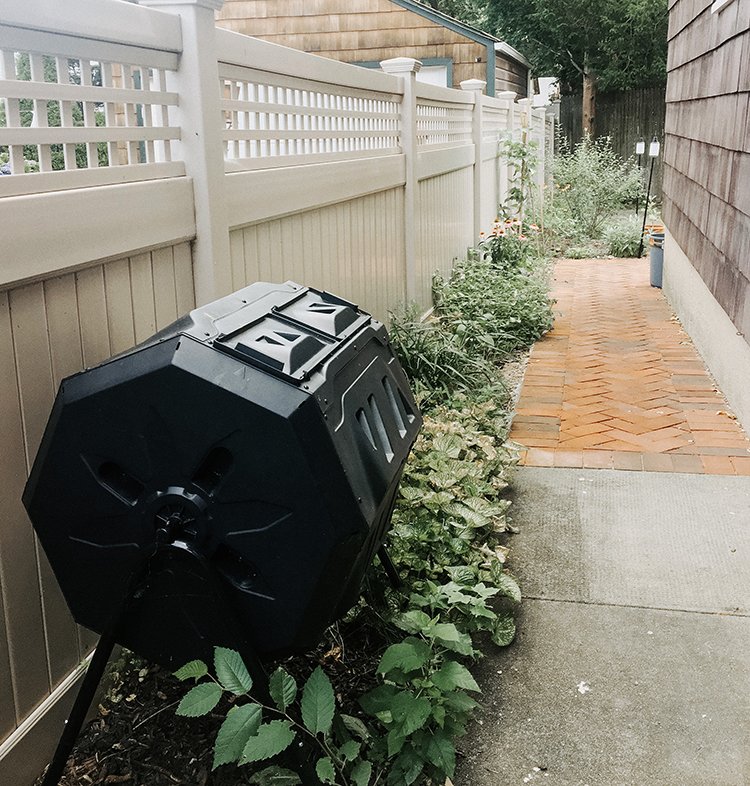
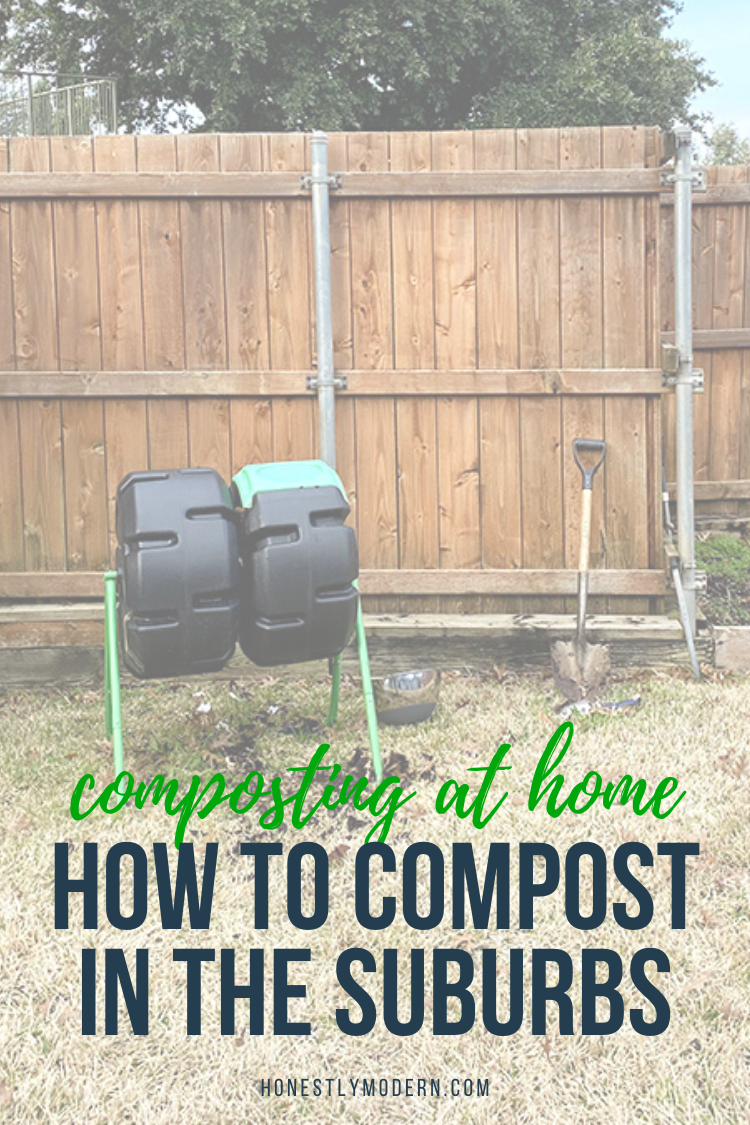
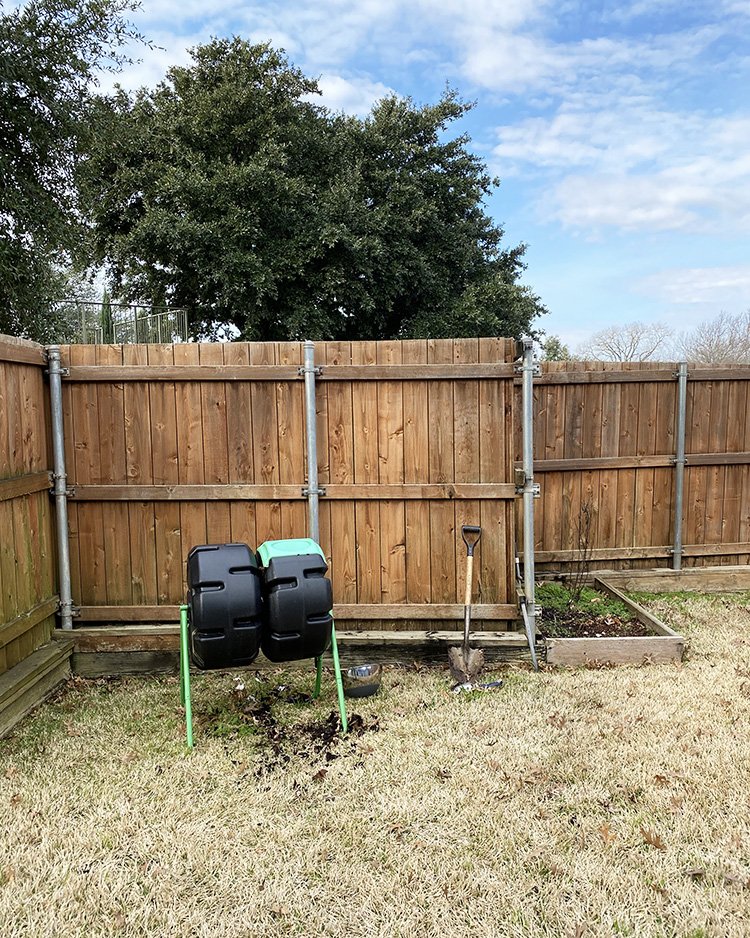
Single and Dual-Bin Composting Tumblers
Many suburban composters use single and dual-bin tumbler systems purchased from garden stores, big-box retailers like Home Depot or Lowe’s, and even Amazon. I’m always going to encourage purchases from local suppliers and family-owned or co-op online garden stores, but do what is most accessible to you. No judgment.
Tumblers are containers that are raised a couple of feet off the ground and are closed so curious wildlife cannot get into them. To use them, you simply add greens like food scraps and browns like dried leaves or cardboard and rotate the tumbler periodically for aeration.
Tumblers tend to take a bit longer to produce finished compost compared to standard, well-managed heaps or bins. However, they are really easy to use, fairly simple to install, and won’t lead to nervous side-eyes from neighbors.
Some tumblers have a single compartment. While in use, you won’t have fully finished compost unless you stop adding greens and browns. While adding nothing new, you can allow all of the compost ingredients time to properly decompose.
Fancier tumblers have dual containers, or side-by-side bins, that spin together but maintain separate compartments. This allows you to add food scraps and carbon materials to one side while materials in the other side decompose and become finished compost ready for use in your garden, container, or wherever you need to replenish the soil.
When you’re ready to remove the finished compost, you clean out one side of the tumbler, start putting new food scraps and carbon materials into that side, and leave the first side (where you had been putting fresh compost ingredients) to fully decompose and finish.
The dual-bin tumblers can be a bit more expensive, but you can continue to use them while also creating fresh finished compost at the same time.
Alysia has a dual-bin compost tumbler in her yard and has no issues with animals or a mess.
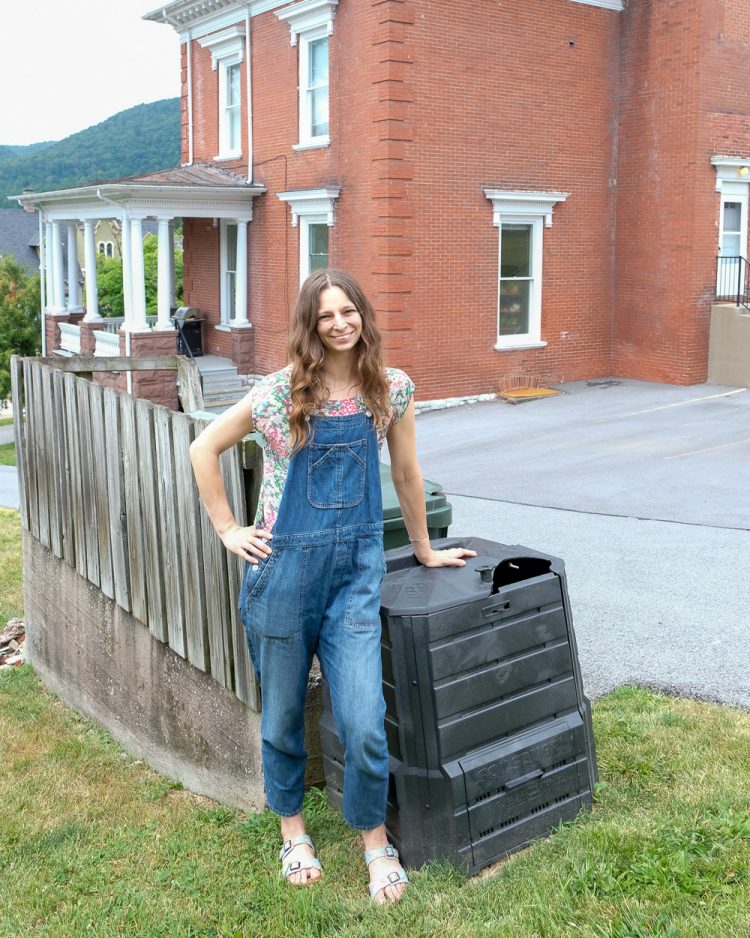
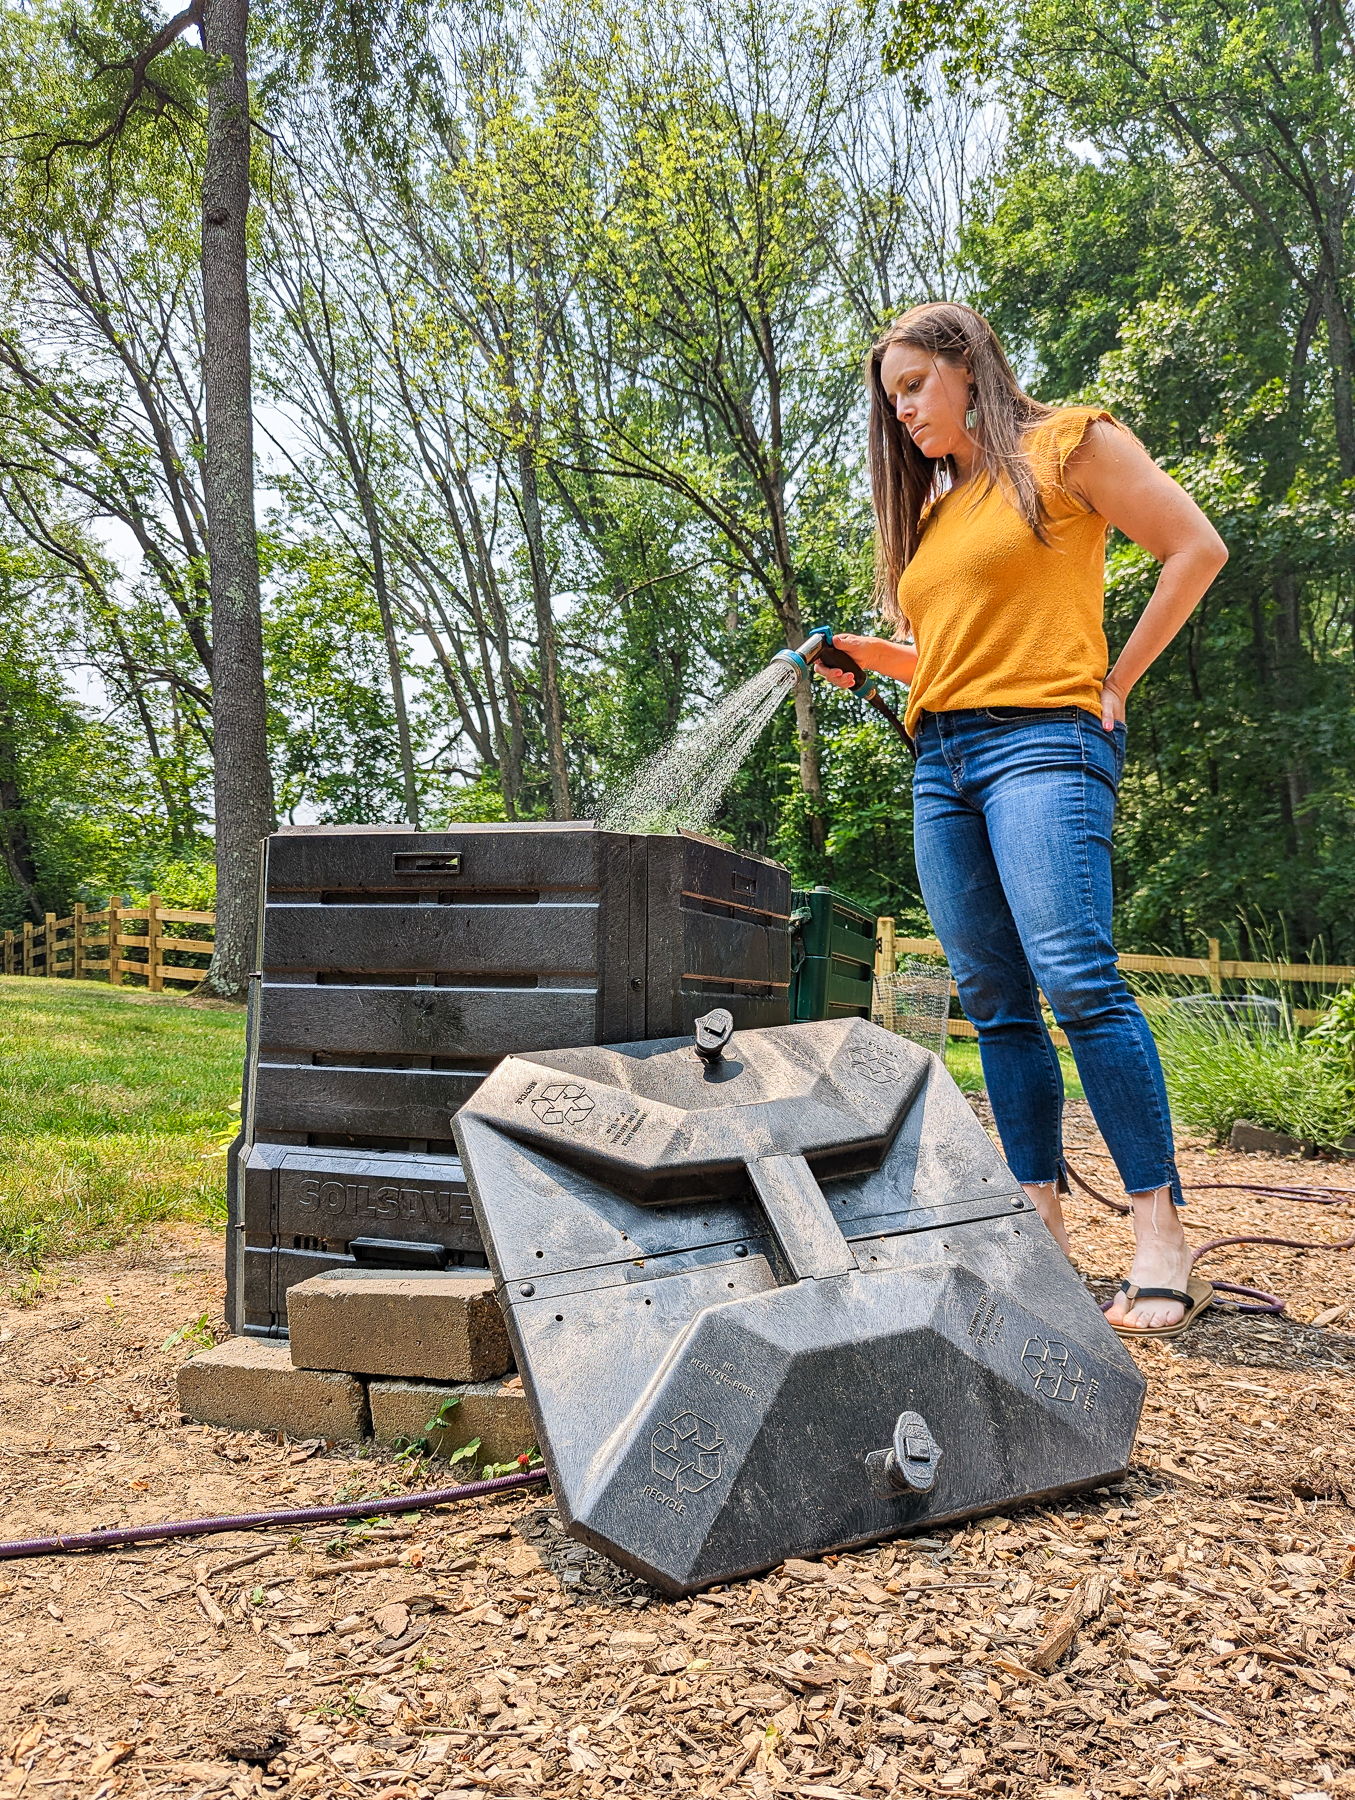
Standing Compost Containers
Suburban composters can also look for standing compost bins that are fully enclosed to prevent attracting pests and wildlife while also accessing finished compost from a sliding door at the bottom of the container.
Like the tumblers, these bins do not require much maintenance so they can be great for families looking for a simpler solution and have the financial resources to invest in something a bit more expensive than a pile.
Sarah uses a standing compost bin that she purchased from her municipal waste collection organization.
Repurposed Rain Barrel
When we moved into our current house, the previous owners had repurposed their rain barrels as compost bins. This works quite well because it contains the ingredients, keeps the pile warm to facilitate the decomposition, and it is aesthetically pleasing if well-maintained.
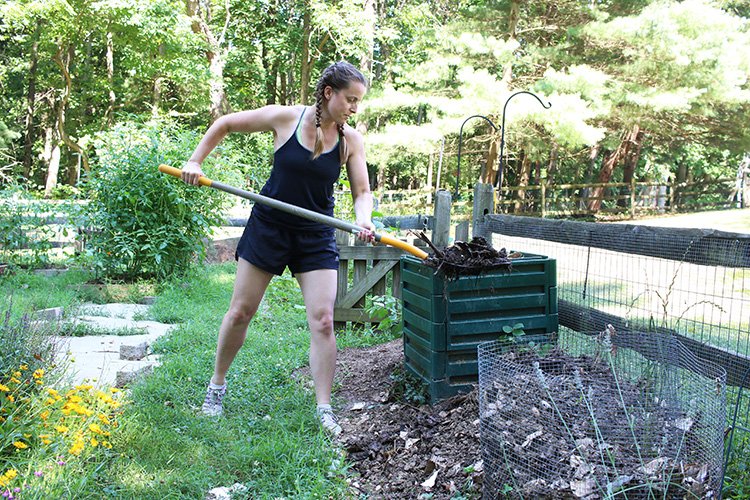
Chicken Wire Cylinder Enclosure
This might be one of the simplest systems to set up. To keep an exposed heap or pile contained, create a cylinder using inexpensive chicken wire to prevent composting materials from spreading and feeling messy.
As you might expect, the chicken wire does little to deter wildlife. However, so long as the compost pile is well-maintained, turned regularly, and food scraps are slightly buried, you shouldn’t have too many issues with unwanted pests or animals.
Trash Bin With Locked Lid
For a low-cost option that’s a little more intensive to manage, you could also use an old trash bin or large container punctured with holes to allow for air circulation. Be sure to include holes on the bottom and on the sides for bugs and worms to come up from the soil as well as allow air to circulate through the composting material. Turn the material frequently to maximize airflow and speed up the decomposition.
If the trash bin has a lid, you can lock it to keep animals out, if they become a problem. Further, you may have to water it occasionally if rain doesn’t fall into the bin. If you want to make this on your own, there are lots of video tutorials online.
David uses a three-bin system made from old trash cans (and doesn’t even need to lock the lids).
Double Bucket & Bury System
This is a more creative way to generate the same decomposition with a two-phased approach. Start by creating a composting bucket system by connecting two 5-gallon buckets together as Jess did for the composting system that she uses in her suburban neighborhood. After the materials have broken down a bit, she buries the partially decomposed organic matter in the soil in her garden where it continues to break down and feed the soil and her plants.
This system allows her to perform some of the decomposition in enclosed buckets where she can stir or turn it to aerate while also keeping out animals. So long as she turns it regularly and includes some dirt or soil in the bucket, it doesn’t create any stinky smells.
Then she buries broken-down pieces of compost matter that don’t attract animals when buried underground yet aren’t large chunks of matter fresh from her kitchen or yard waste. She shared all about this method in her edition of Compost Chronicles.
Buried Buckets Walking Path
This idea seems so novel and came from the Regenerative Gardening online class I took through Kiss the Ground and taught by Farmer Rishi. (P.S. If you’re interested in taking the class, I learned a ton, and you can get a 10% discount with code SOIL2020)
He recommended digging holes large enough for small buckets such as those that hold trees at nurseries. You could also try using containers like bulk yogurt bins with holes in them.
In each hole, insert two buckets, one inside the other. Effectively, one bucket maintains the hole structure while the second holds organic matter mixed with a bit of soil. Cover each hole and bucket system with a paving stone to create a walking path through the garden. Under each paving stone, you have mini piles of composting matter that you can easily remove when the matter has finished decomposing.
As you have more food scraps and carbon materials, add them to a bucket until that bucket is full. Then move to the next bucket. Because each of the buckets is under a heavy paving stone, animals can’t get to the decomposing food and smells won’t attract them to your garden. As some buckets get filled, other buckets finish composting and are ready to be used in the garden.
I think this is such an interesting idea. I haven’t tried it yet, but it’s on my list of things to try at some point. We have a few paving stones that we won’t need by next summer, so I plan to repurpose those and create a composting walking path in my garden next summer. I’ll share more about it when I finish it! How neat and novel, right?
Bokashi Composting
Bokashi is a composting method that is quite different from many others I’ve mentioned here. Bokashi relies on fermentation that quickly converts food waste into compost material that isn’t quite finished compost and can be buried in soil or added to a compost pile to finish decomposing.
While other methods use oxygen to decompose food scraps and other organic waste, Bokashi is an anaerobic (i.e. without oxygen) process by which organic matter decomposes in a closed container.
Bokashi composting occurs in a special bucket, so this part of the process could happen in an apartment. However, there is a fermented (or pickled) food scrap by-product that needs to be buried or added to a compost pile. Thus, it can be a great way to start the composting process indoors in a small space so long as you have a small garden or patch of soil in which to bury the by-product (which shouldn’t attract animals if it’s buried).
Aesthetic Considerations
Depending on the expectations of your neighbors and your own preferences, you may prefer to place your compost bin behind a bush, plant, or small tree so it doesn’t detract from curb appeal. I’m not suggesting this should be a priority. But if it is, a natural barrier to keep the compost out of eyesight might be a solution.
Home Owner Association Considerations
Before composting in your yard, check the restrictions of your Home Owners’ Association, if you are part of one. Enclosed tumblers placed in more discrete locations might be more suitable for neighborhoods with strict regulations.
Do you compost in the suburbs? If so, what type of system do you use? Any tips or tricks that have worked for you?