
DIY: Thrifted (New) Shower Curtain Turned Skirt


So I suppose this might take a bit of explaining…
To begin, I occasionally enjoy a trip to the thrift store to peruse through the racks on those here and there days when I feel like shopping, have nothing particular in mind to buy, and really don’t need to be spending money on new clothes. The thrift store scratches my shopping itch, protects my bank account (for the most part), and typically leaves me with a couple of new fun things to add to my rotation.
Also relevant to the story, I wanted a skirt with big geometric patterns. I saw one from another company but they are a bit out of my price range. So for now, they remain on my wishlist.
As I meandered through the thrift store last week, not at all in search of a shower curtain, this blue and white fabric caught my eye. I loved the pattern! I did not need a new shower curtain but I loved the fabric for a skirt.
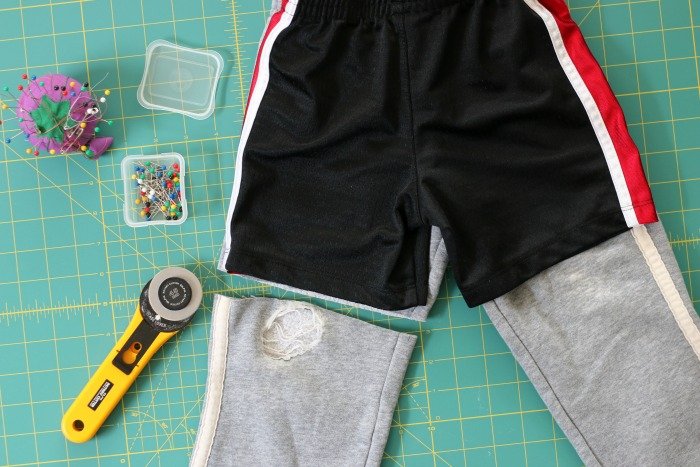
I spent about fifteen minutes in the store diligently inspecting every inch of the fabric (it was new, by the way, despite being at the thrift store ~ a used shower curtain as a skirt might have been kind of gross?) and walked out with a 100% cotton, easy for beginners to sew 72″ x 72″ piece of fabric. Best of all, I used the manufacturer’s hem as the bottom of the skirt so I did not have to fight my crooked cutting scissors (it’s always the equipment, obviously) to make a straight hem.
Scroll through to see detailed instructions on how I made this super easy skirt. (Seriously, I made two. The first took me about an hour and a half and the second, having the first as a practice round, took about thirty minutes.)
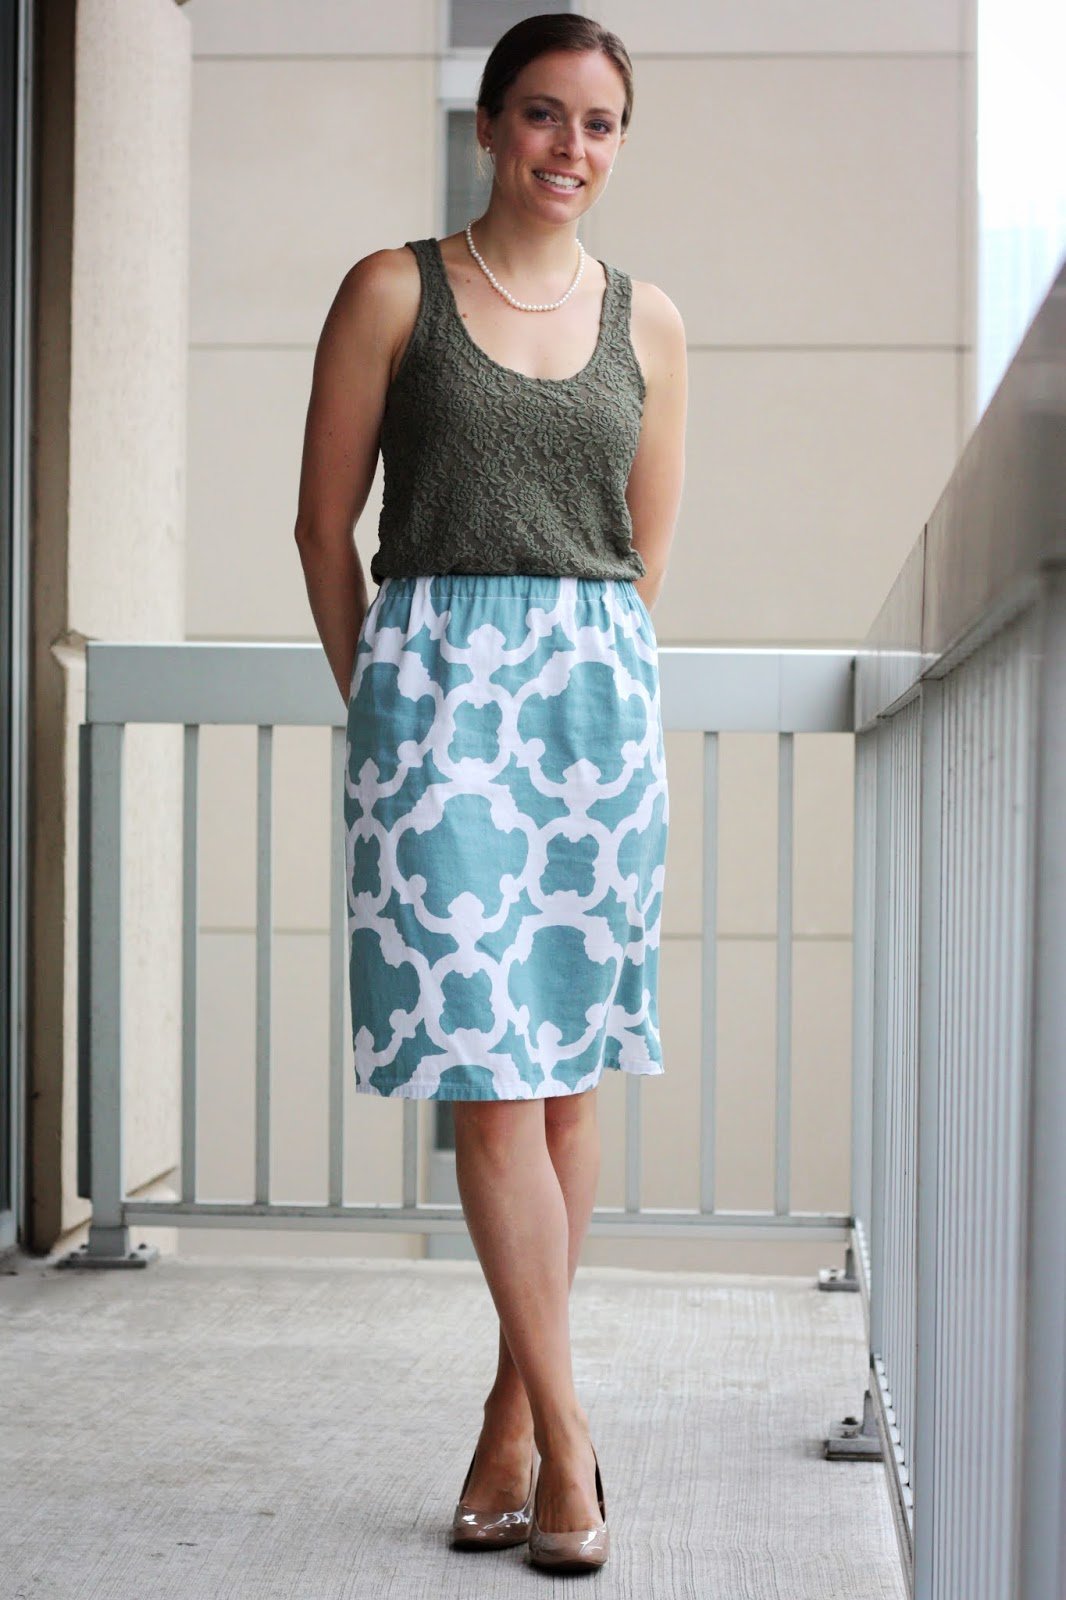
The warm morning sun made it too hot to wear the blazer to and from the office, so I threw it in my bag and enjoyed the walk in just the tank and skirt. I don’t have any other skirts that are 100% cotton (at least I think that’s the case), so this super light skirt kept me nice and cool every step of the way.


I mixed three different patterns, as I tried to show more closely above. I think it works?
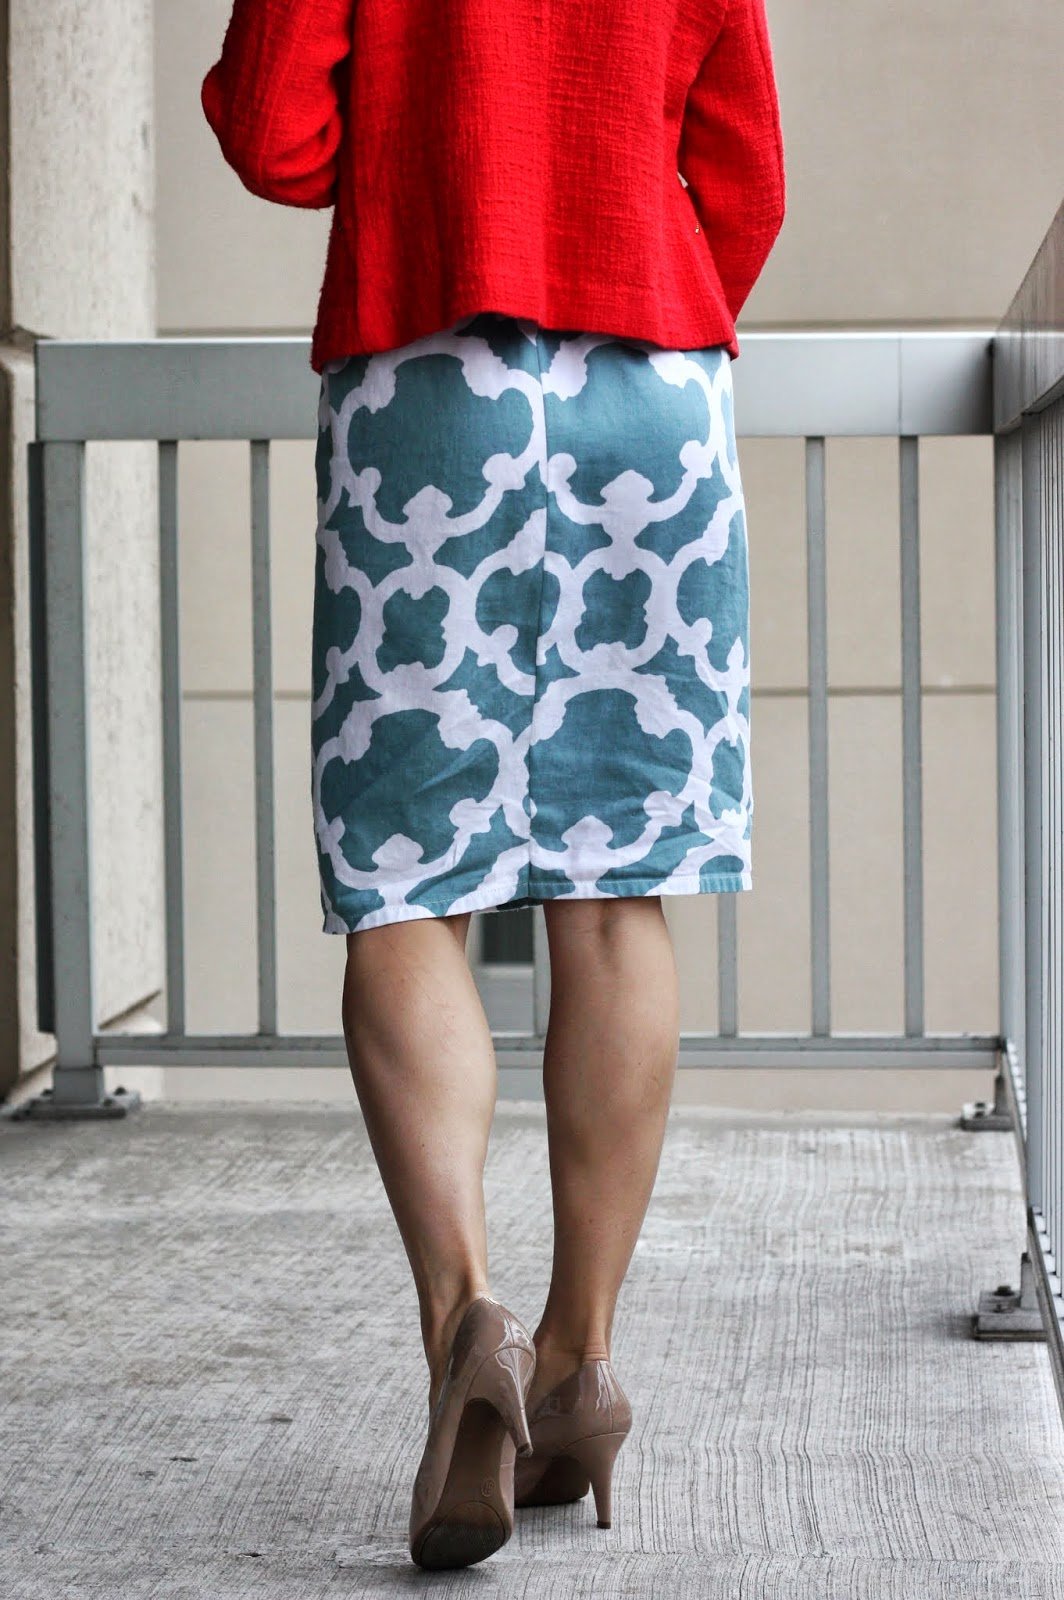
And I am no professional seamstress (at all) so you can see I didn’t match up the pattern at the seam. I got pretty lucky toward the bottom, but taking the project up a notch was out of my beginner league for now. Maybe down the road…

Finally, the tutorial steps. The moment you’ve been waiting for (because I know simple skirt tutorials are nowhere else to be found on the massive Internet world…) No matter, here’s my iteration.
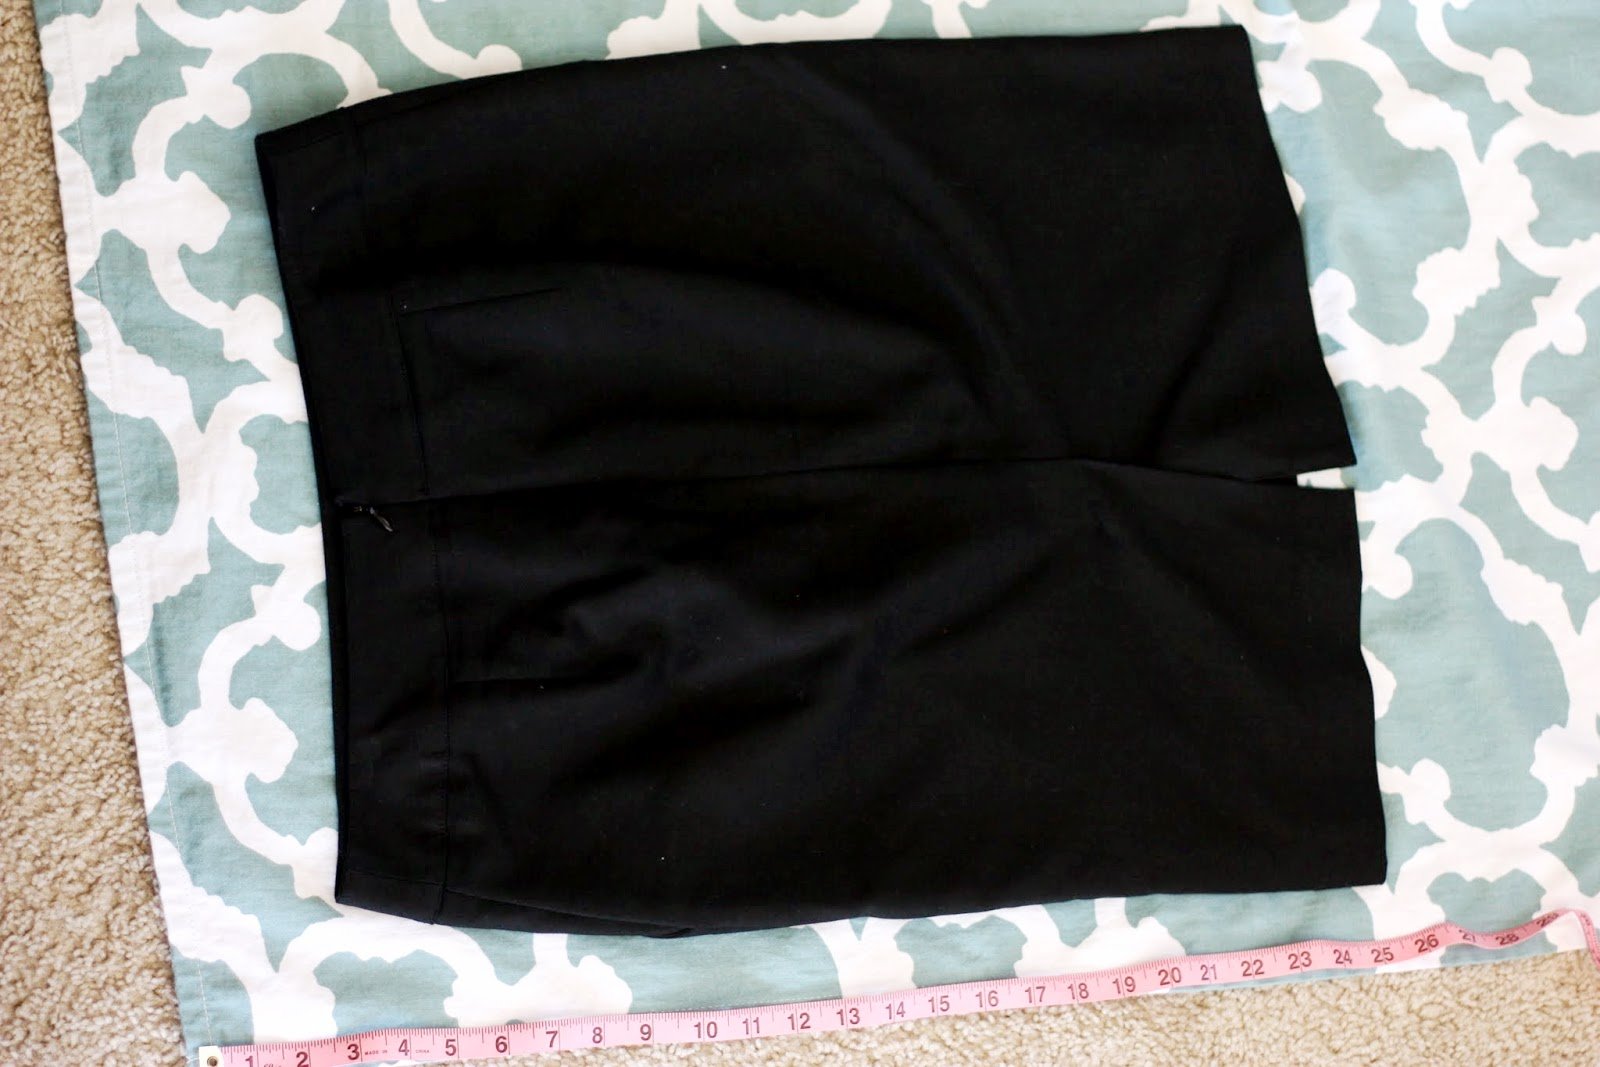
Step 1: To get a general idea of length and width, I used a skirt I already owned in a fabric most similar to the one I used. My fabric had no stretch, so I used a skirt with no stretch as well.
Step 2: After determining the desired size of the fabric panel (I used just one rectangular piece of fabric to give the skirt a straight fit down my hips and legs), I folded over the fabric to use the manufacturer’s hem as a guide for the opposite cut of the fabric (I’ll take any available advantage to help my crooked cutting scissors cut more accurately).

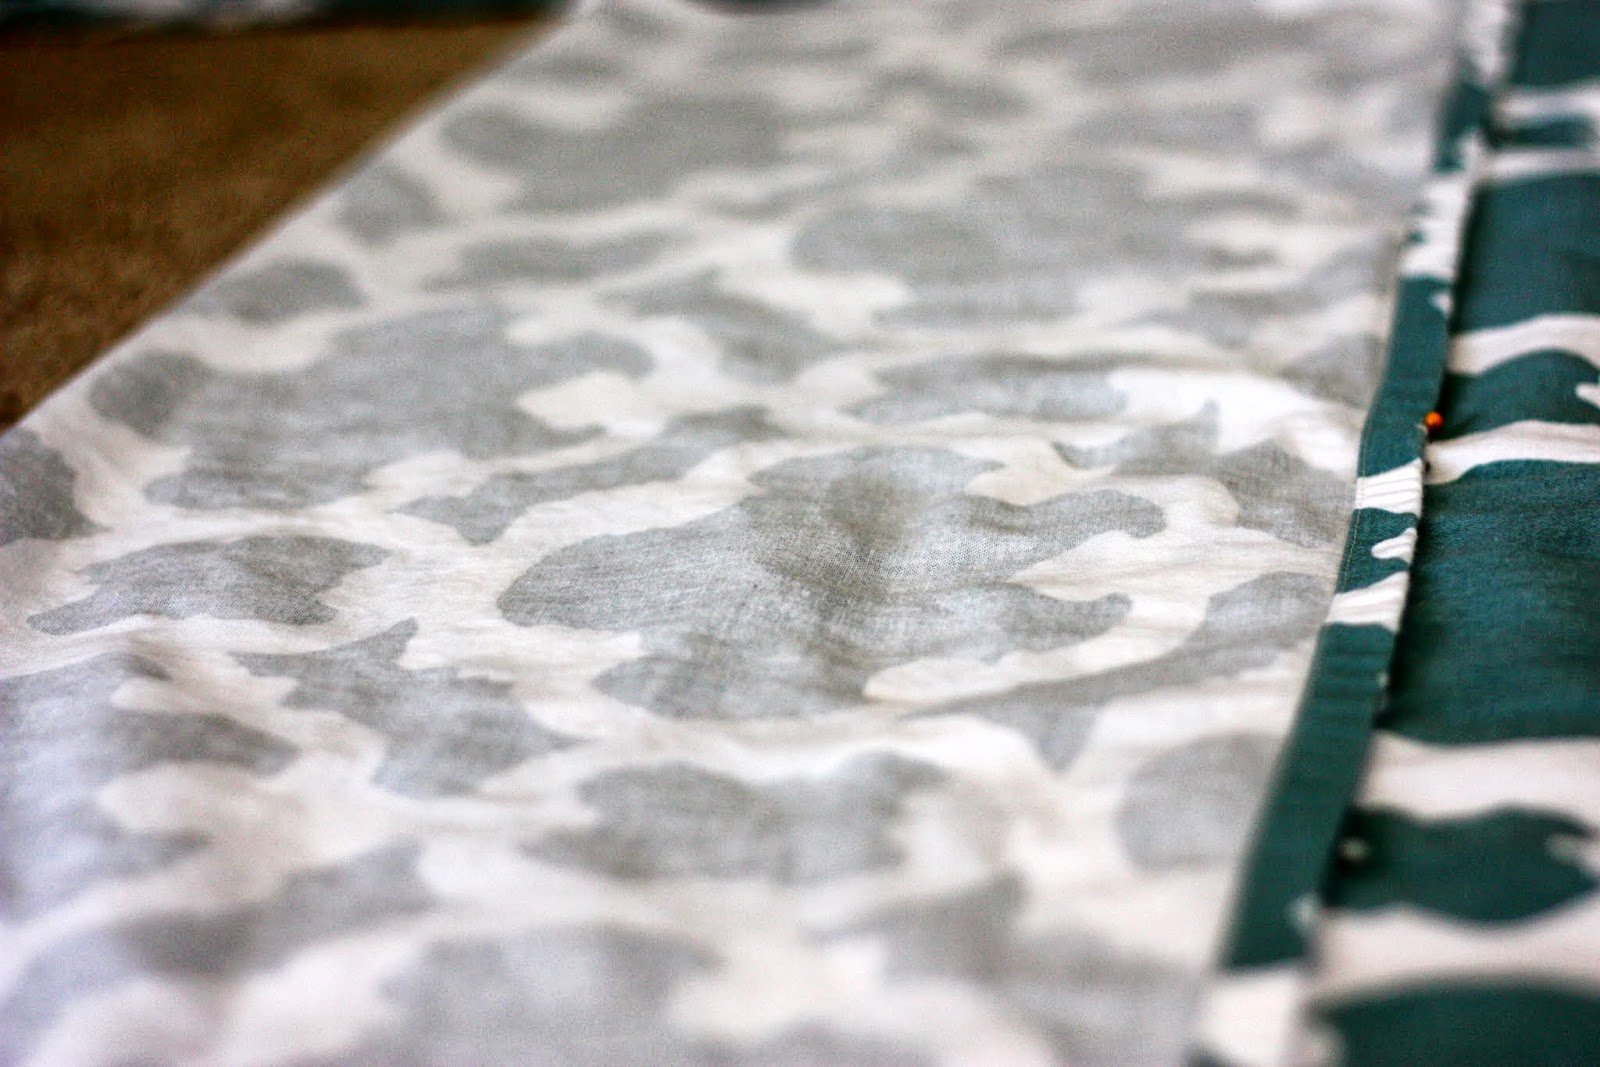
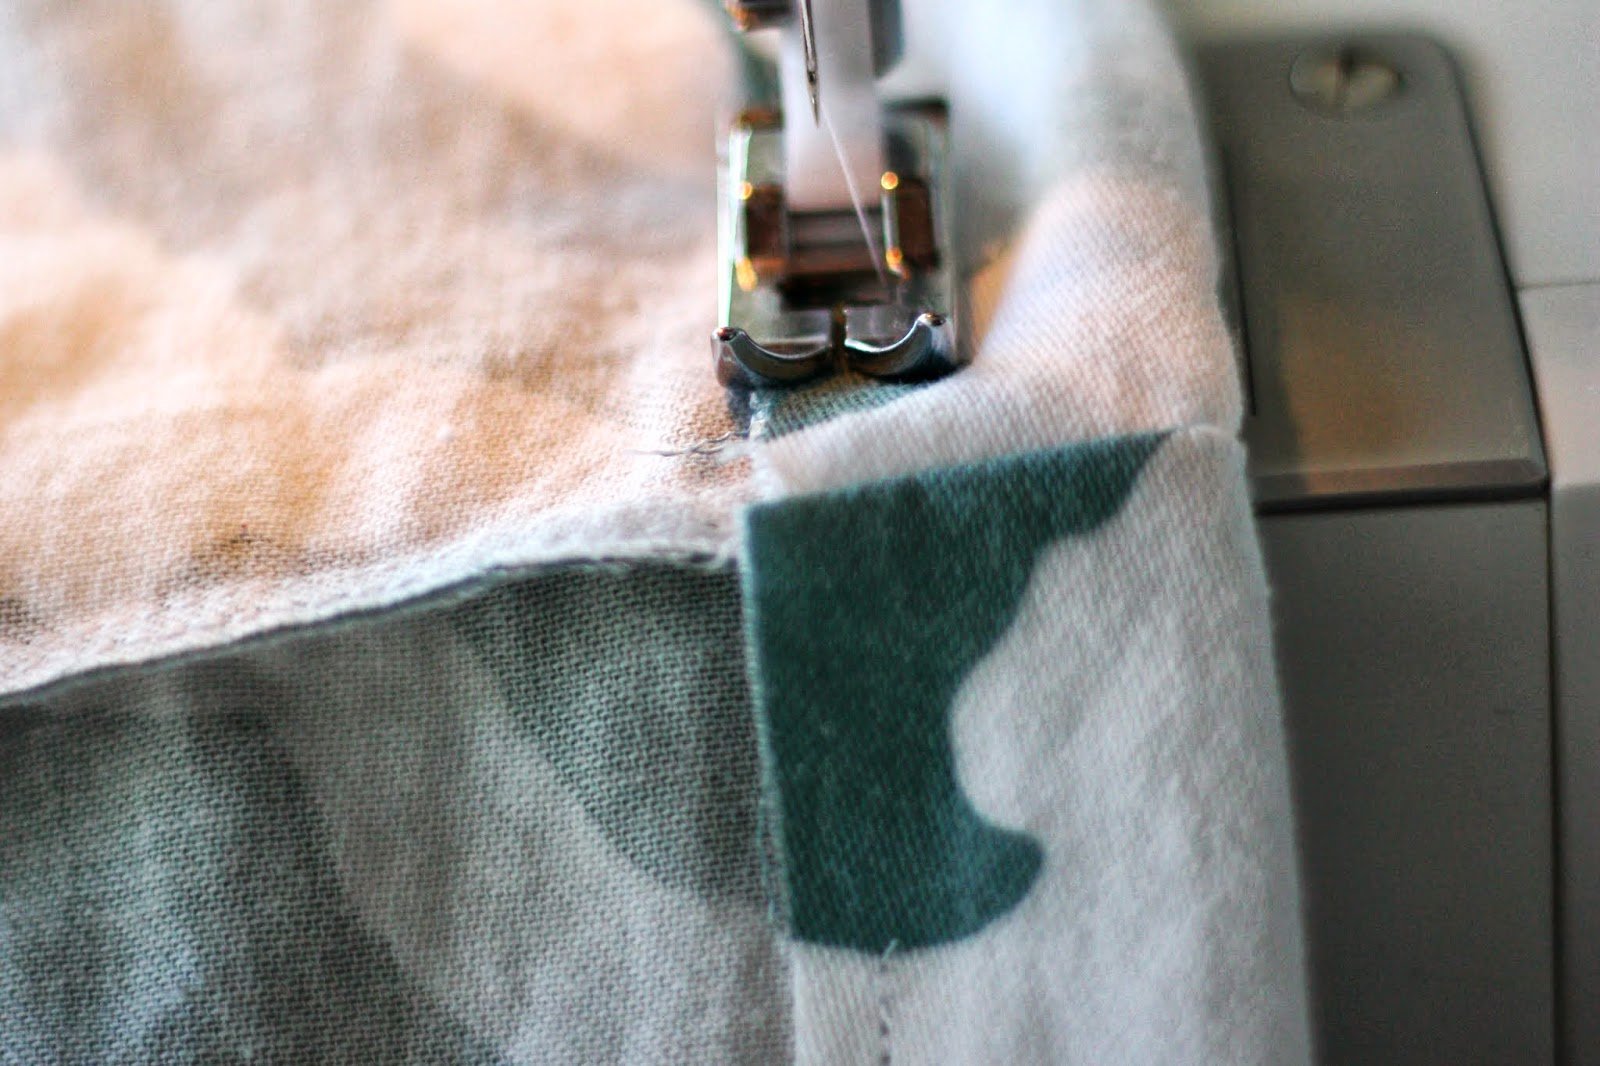
Step 3: Fold the fabric, right sides together, to create the seam that goes vertically down the back. In the photo above, you can see that I sewed one seam (to the right of the foot) which resulted in a skirt that was too wide. So I remeasured and sewed another seam (under the foot above) to correct the sizing. Then I added a zig-zag stitch along the seam to prevent fraying. Don’t forget to cut off the excess fabric along the seam.
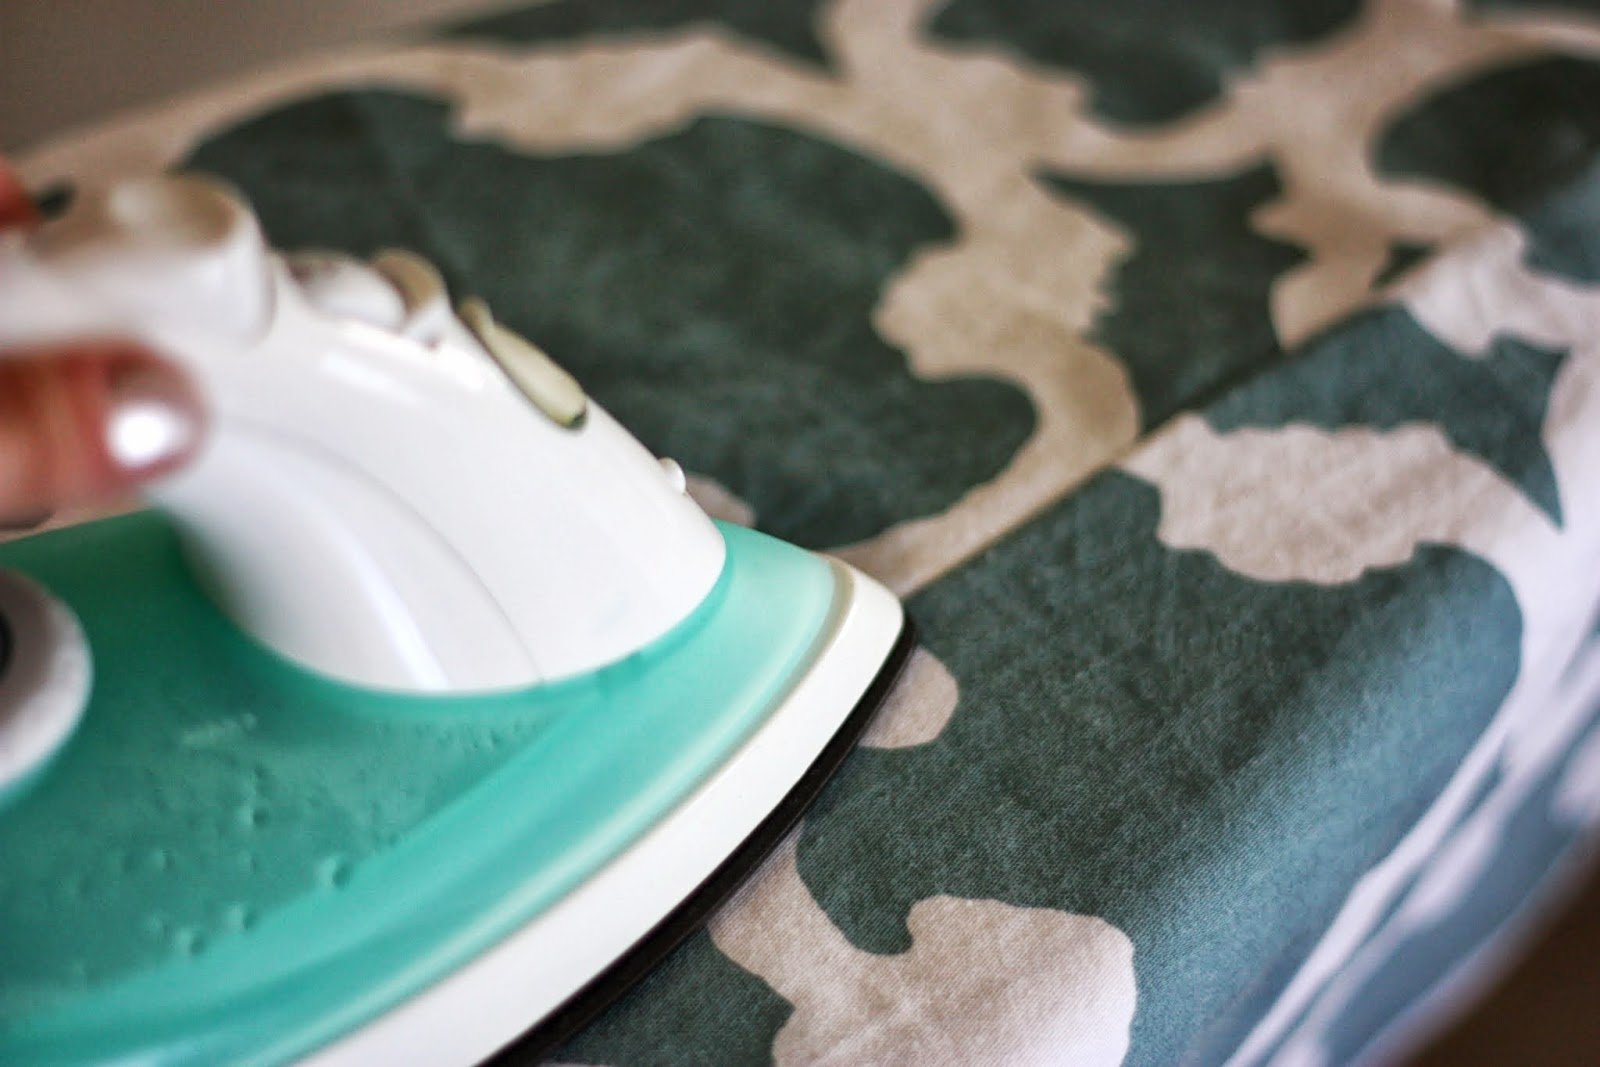
Step 4: Press the seam.
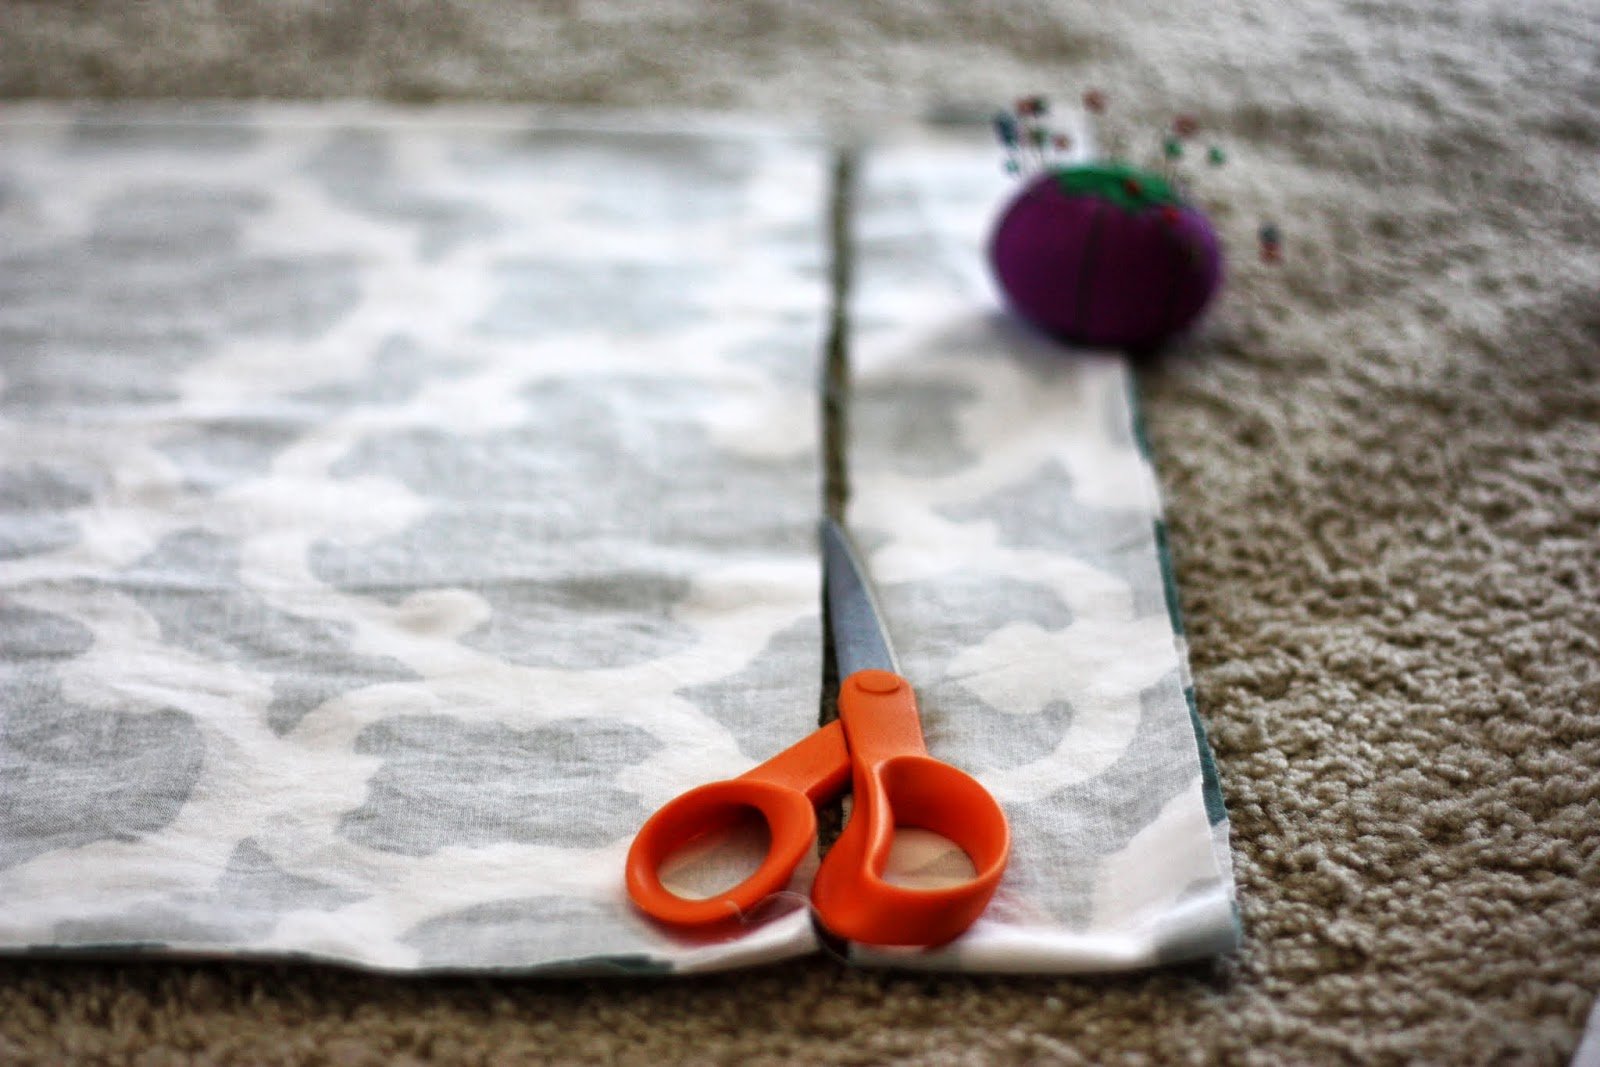
Step 5: Determine the desired length of the skirt. Although I used my own skirt as a guide, it ended up being a bit longer than I wanted. So after pulling the unfinished skirt on, deciding how long I wanted it to be, and adding a couple of inches for elastic casing, I trimmed the excess fabric as shown above. (Because I relied on the manufacturer’s hem along the bottom of the skirt, I cut the excess fabric from the waist.)

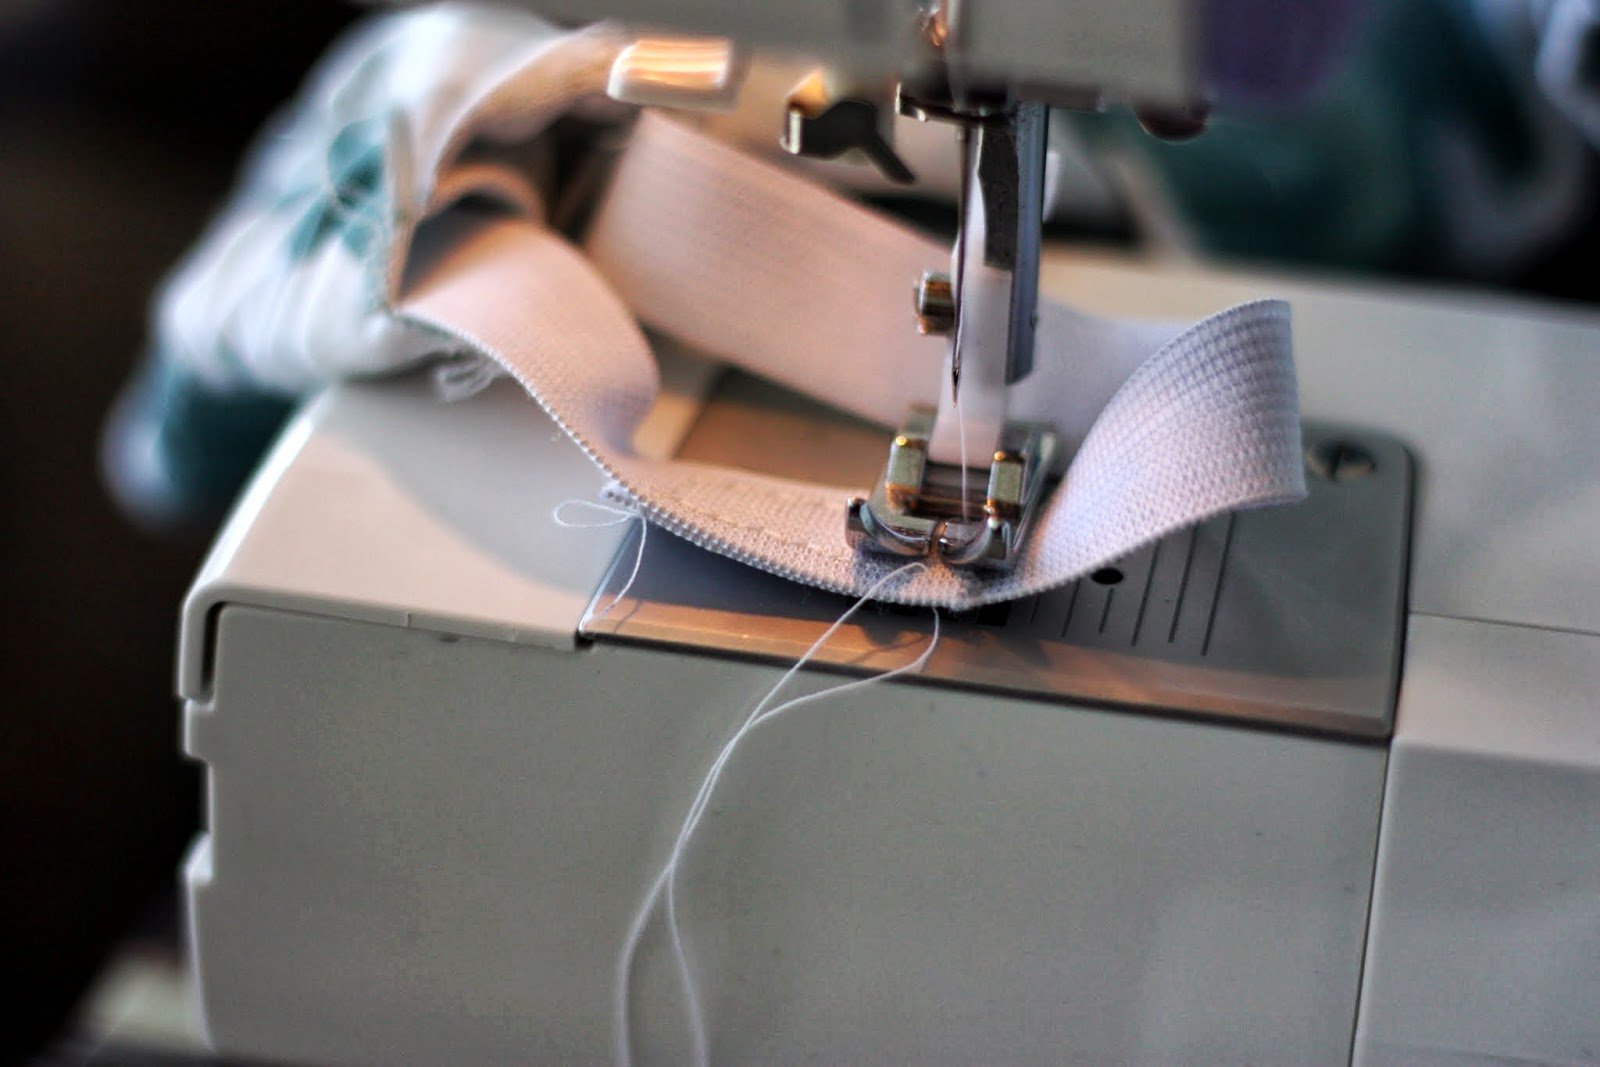
Step 6: Create the casing for the elastic. I used 3/4″ knit, non-roll elastic. Many options would work here. I added a half inch to the size of the elastic to leave a bit of space in the casing. I folded the fabric down 1 1/4″, pinned, and sewed a double straight stitch to create the casing. Be sure to leave an inch or two open through which to thread the elastic.
Step 7: Measure the elastic to fit around your waist tightly. My elastic ended up being about 4-5″ less than the actual measurement of my waist.

Step 8: My mom bought be me this cool little elastic threader, so I used this to thread the elastic and create the waistband. But a safety pin attached to the end of the elastic would work just as well. Be sure not to pull the other end of the elastic into the casing – it’s tough to get out without re-threading the entire piece of elastic.

Step 9: Once threaded, sew the ends of the elastic together. I sewed around all four edges of the overlapping square for this skirt. Even though I used white thread, you can see the stitching above.
Step 10: Sew the opening closed and you are ready to wear the skirt. I know a professional seamstress may have had some other tips, but this seemed to work for me!
Enjoy!


What a great way to repurpose a shower curtain! That skirt really looks nice on you.
Thank you!