
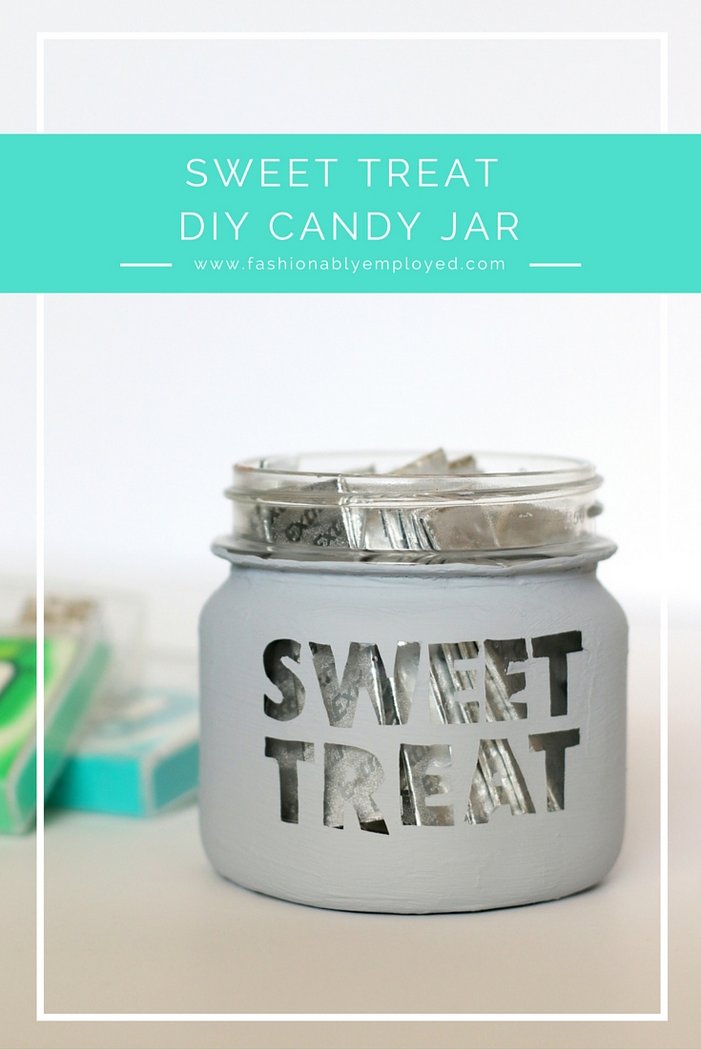
A Sweet Treat DIY Snack Jar
Not long ago, I transferred within my company to a new job. I previously worked in a small(ish) group on primarily local projects with my Chicago team. I now work in a more national role interacting with people within our firm from all over the country.
Consequently, I sit on a new floor of our office with a whole bunch of people I’ve never met. In my new role, I also need to get to know, oh, I don’t know, everyone?! It will serve me well to get crackin’ on establishing relationships with as many people as possible, most of whom I’ve never talked to despite ten years at my firm.
The Offering
To aid in meeting so many new faces, I pulled out the oldest trick in the book; lure them in with candy! (I say that only in the most genuine, not “creepy person in a sketchy car luring children” kind-of-way, just to set the record straight.)
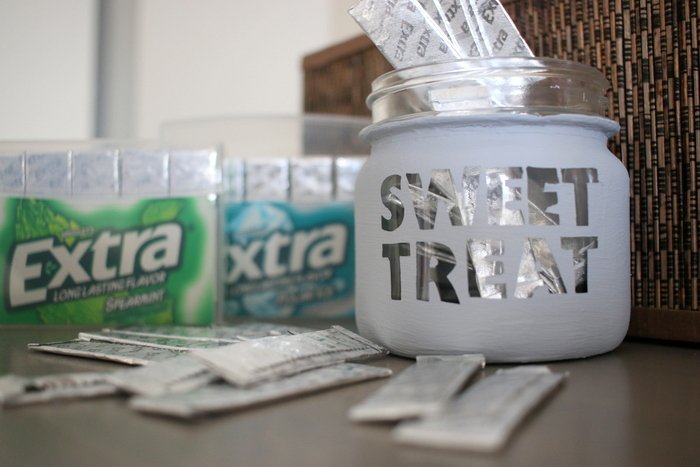
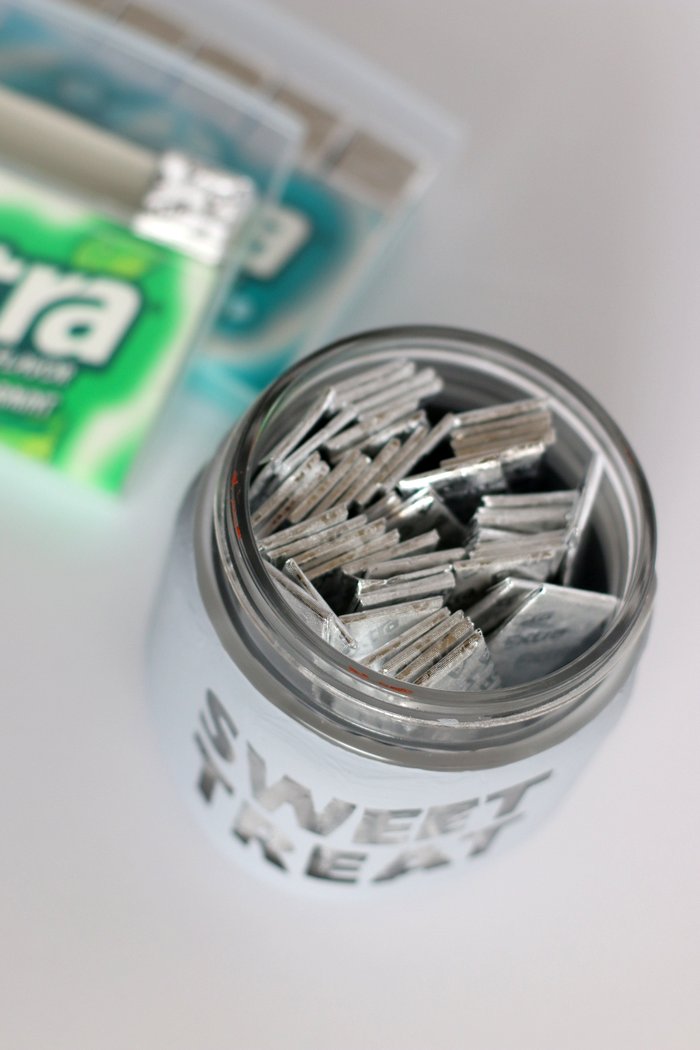
I don’t have a lot of fancy “decor” in my new office, but I added this little piece of handmade “art” to my desk. As you might expect based on the words, I plan to stash small sweet treats in my little homemade candy jar to convince my co-workers to pop their head in my office and say hello. Not only does the candy provide a great opportunity for connection, but the piece itself is a conversation starter. Not many accountants have crafty DIY projects displayed on their desks (at least at my company).
When I invisioned the project in my head, I wasn’t entirely sure how it would materialize. In my humble opinion, it’s totally awesome and I love it!
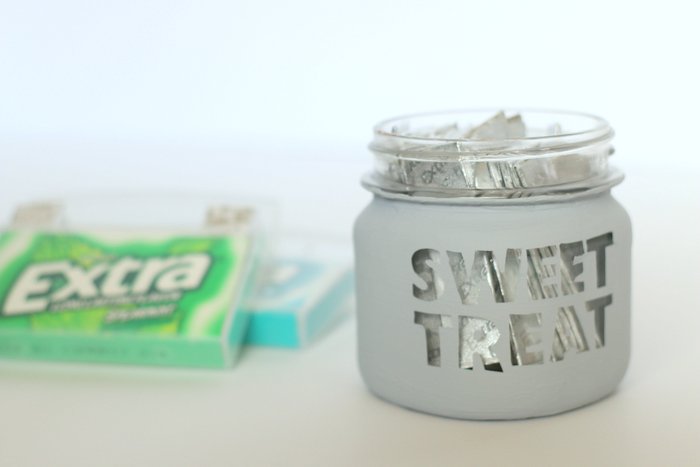
For starters, who doesn’t love vintage mason jars? This one is straight from my Grandma’s kitchen. So trendy, right?
After finishing the project, I brought my upcycled DIY candy jar to work and set it conspicuously on the corner of my desk nearest the door so everyone could see it.
I’m hoping this little sweet treat jar will help me get to know better some of the new people I sit near. Of course the DIY nature of the jar offers an opportunity for conversation. But even if you’re not into craft projects or don’t have an old mason jar lying around, a candy jar at the office offers a friendly invitation to others to stop in and chat. It might just hold a few sticks of gum or whatever treat you choose, but that small offering says so much more.
Do you have a candy jar at your desk? What do you think?
How to Make Your Own
Of course, if you’d like to make your own candy jar, I put together a tutorial to show you how I made mine. Not only do I have some photos to help you navigate the project (even though it’s pretty simple), but I also started a YouTube Channel and made a video for you! Be sure to check it out and subscribe so you get notified when I add new videos.
Let’s get down to business on this upcycled DIY candy jar.
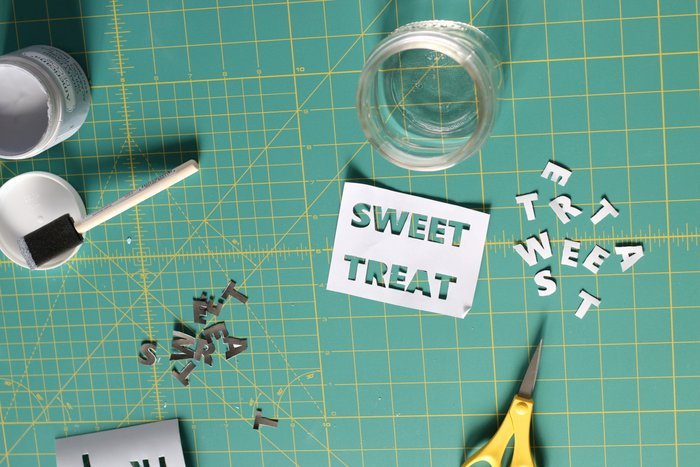
Step 1: Gather your supplies. You’ll need:
- mason jar
- Xacto knife
- chalky paint (or something that works on glass)
- removable vinyl sticker paper
- paint brush
- foam surface (optional, for cutting out the letters from the sticker paper)

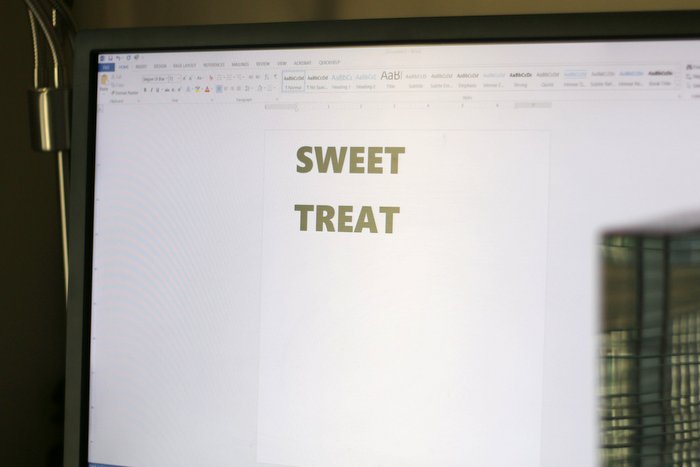
Step 2: Create a template for your letters. I used a simple font and printed it from my computer. You could use stencils or hand cut the letters if you’re particularly talented with an Xacto knife.
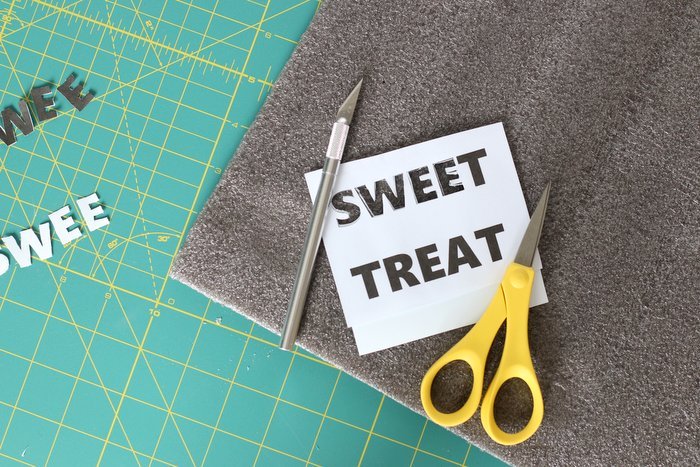
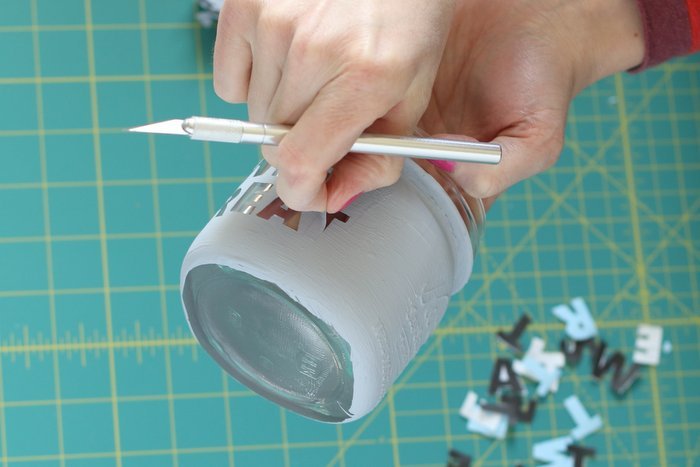
Step 3: Cut out your letters. I used the knife. But you could also use scissors if you don’t have a knife.
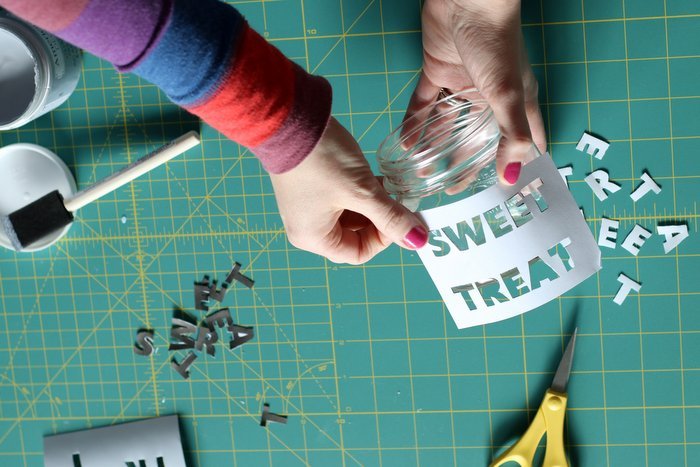
Step 4: Use the outline of the letters as a stencil to determine where on the jar you’d like to place the letters.
Step 5: (not shown) Remove the backing from the stickers and place the vinyl sticker letters on the jar, as desired.
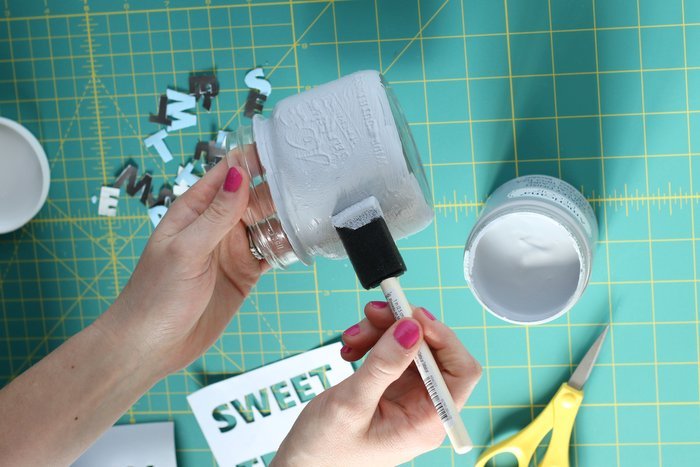
Step 6: Paint over the entire jar, including over the sticker letters. Allow the first layer to dry and repeat to add a second layer of paint.
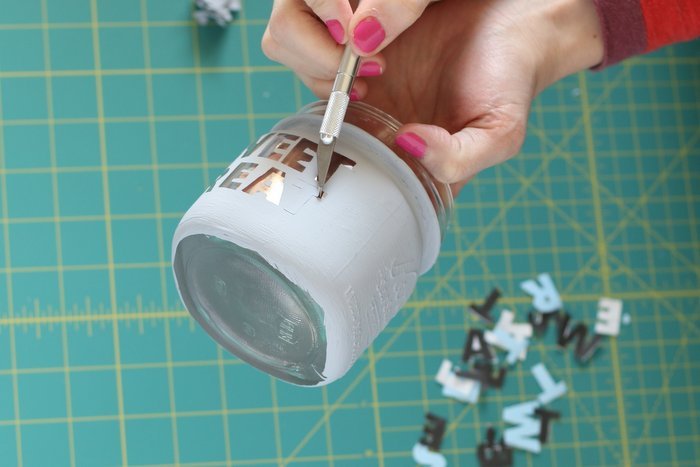
Step 7: Peel the stickers off the jar. I found that using the Xacto knife really helped to get under the stickers and pull them off pretty easily.
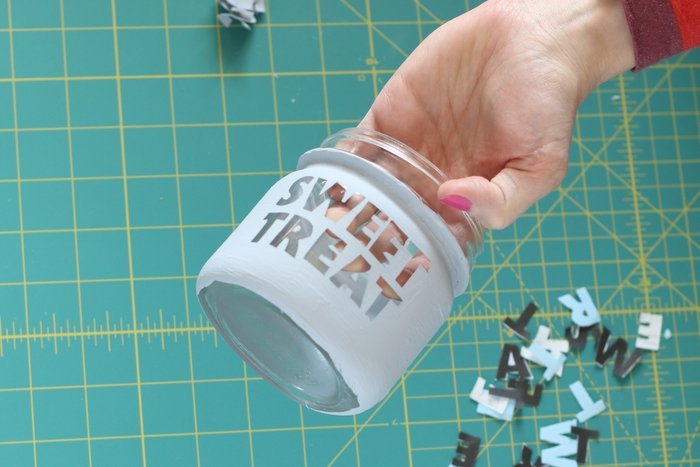
And that’s it! The whole project took me a couple of hours, but that included time to let the paint dry. Obviously I squeezed in a few other productive activities and didn’t actually watch paint dry. It doesn’t require too many supplies, and it definitely doesn’t take any advanced crafting skills.
If you give it a try, be sure to let me know how it goes!

Jen Panaro
Jen Panaro, founder and editor-in-chief of Honestly Modern, is a self-proclaimed composting nerd and advocate for sustainable living for modern families. To find her latest work, subscribe to her newsletter, Sage Neighbor.
In her spare time, she’s a serial library book borrower, a messy gardener, and a mom of two boys who spends a lot of time in hockey rinks and on baseball fields.


This is such a cute DIY! Thanks for sharing, lady!
-Ashley
Le Stylo Rouge
Thanks Ashley! Appreciate the note and thanks so much for stopping by. 🙂
What a clever way to get people to come visit your new office! I’m sure your treat jar packed with Extra® gum will be a big hit with your co-workers! #client
WOW Jen this is so adorable!
Thank you Ada!