Sustainable Crafts: Oui Yogurt Jar Easter Bunnies
Are you looking for a fun sustainable crafting activity, just in time for Easter? This kid-friendly DIY teaches you how to upcycle Oui Yogurt jars into adorable Easter bunnies!
This post contains affiliate links.
Here’s the thing about Florida: it is probably the only place on Earth where so much crazy stuff goes down that no one will bat an eye at a full-grown man hopping around in a giant bunny costume.
I love Easter, and every year, my parents host a neighborhood-wide Easter egg hunt with close to 100 kids.
It is an ORDEAL. We break the park up by age group and hide the eggs with an appropriate level of difficulty. My dad wakes me up at 7:00 AM stomping around shouting about how I’m going to miss out on my chance to help hide the eggs, “Come on, now! Get up! You’re missing it all. I made you coffee.”
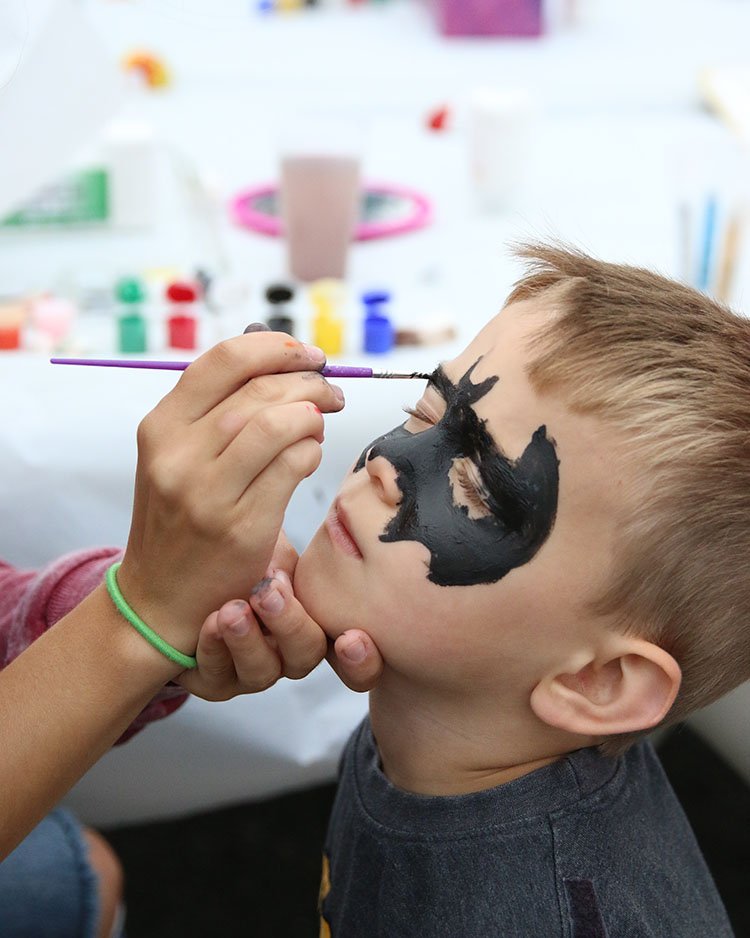
My mom spends weeks and weeks making favors for the kids, which some unsuspecting kind soul must hand out while hopping around in a full-body bunny suit and face paint… in what is often a zillion-degree tropical heat.
This brings me to my point: it is in my blood to go ham on Easter. I wanted to create adorable little baubles to leave on the doorsteps of our loved ones this year without trashing the planet. All those candy wrappers, plastic eggs, and plastic Easter grass are such a downer.
So today, I’m doing a sustainable craft: my take on the Oui by Yoplait challenge to repurpose their yogurt jars. (Note: you can purchase lids for your existing jars here if you’d rather upcycle them for spices, loose change, or crafting supplies with even less effort.)
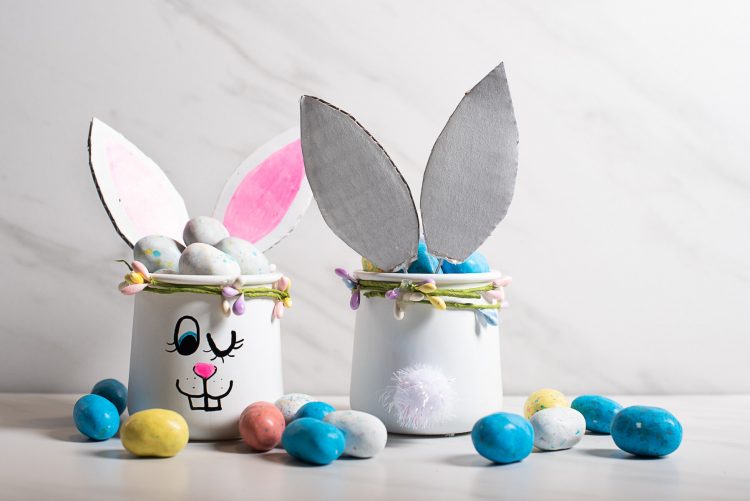
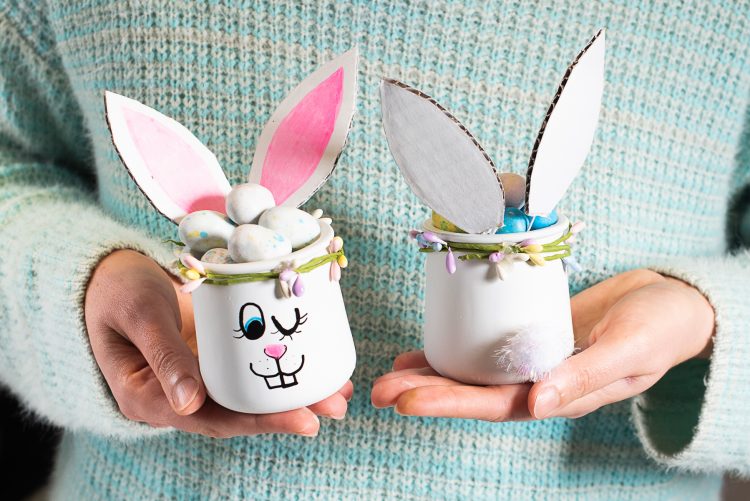
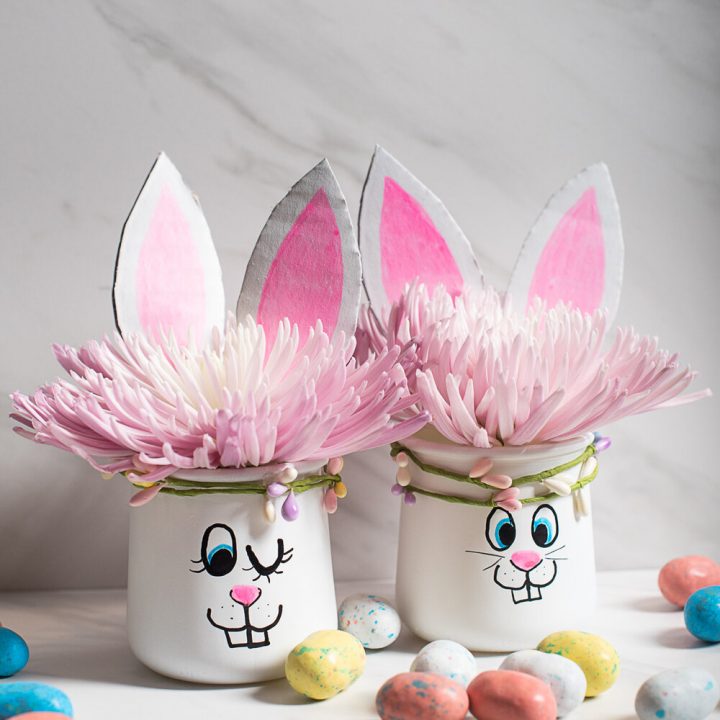
We’ll be making adorable, pint-sized bunny rabbits for you to fill with candy, flowers, or tiny surprises for your loved ones. They’re precious lined up on a mantle, in the center of your place settings to welcome brunch guests, or left on your neighbors’ doorsteps filled with flowers.
Why Upcycling and Sustainable Crafting Matters
We produce a lot of trash, and upcycling and sustainable crafting is one way to put that “waste” to good use.
As of 2018, the United States racked up a total generation of municipal solid waste of 292.4 million tons. Only 69 million tons of the 292.4 million tons of municipal waste were recycled of which only 4.43% was glass.
While I couldn’t find statistics for the US, the UK generates a whopping 8,000 tons of waste just from Easter egg packaging and cards alone.
This might not be a zero-waste craft, but it’s a step in the right direction, and it is SO FUN. I’ve literally been chasing my husband around yelling, “But look at THIS one!! This one is even CUTER!” He’s hiding among the throw pillows, desperately clutching the remote and a beer. It’s fine.
Let’s get started.
Adorable Easter Bunny Jars from Repurposed Oui Yogurt Jars
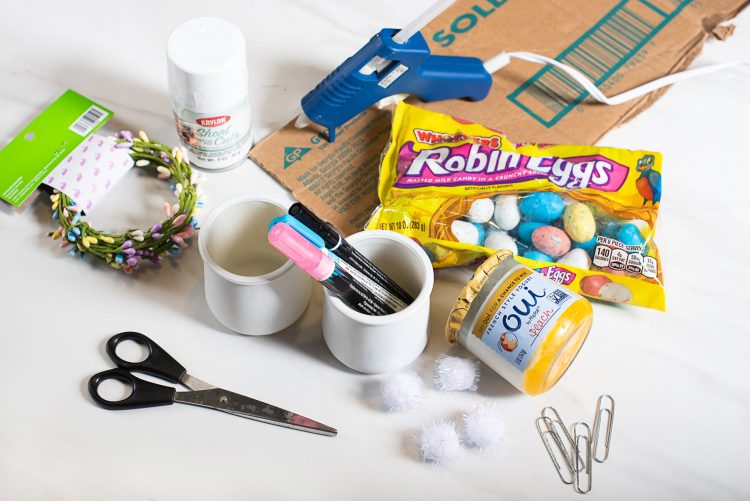
Materials For DIY Upcycled Easter Bunny Jars
- Oui Yogurt jars, empty and cleaned
- Goo Gone
- Cardboard box or cardstock
- Strong scissors (or wire clippers or Xacto knife)
- White spray paint (I used matte) or craft paint
- Paper clips
- Cotton balls or decorative pom poms
- Paint pens or Sharpies
- Easter garland (optional)
- Fresh flowers, Easter candy, beeswax crayons, or air plants for gifting
Alternative Materials Options
Glass Jars | The Oui Yogurt jars are pretty cute, and the fancy lip on the top of the jars is just perfect for this project. But if you don’t have Oui by Yoplait jars, you could also use baby food jars or any other small, upcycled jar you’ve repurposed. After all, you’re not a real environmentalist without a collection of upcycled glass jars, right? (I’m kidding, of course).
Easter Garland | You may be able to find just enough Easter garland at your local thrift store. But if you can’t land any, a bit of repurposed ribbon in a pastel color will work just great (and they tend to have plenty of ribbon in the ‘odds and ends’ section of the charity shop).
Cardboard Boxes | Reusing cardboard boxes is our jam, and there are so many ways to reuse your cardboard boxes after you cut out cute little bunny ears for this Easter project.
Instructions:
- Remove the Oui Yoplait labels by soaking your jars in warm water. Mine came off easily after about 10 minutes. Then use Goo Gone and a paper towel to remove any adhesive residue. Wash your jars with soap and water and dry thoroughly. (I hit mine with a hairdryer to speed this along.)
- While your jars are soaking or drying, trace your bunny ears on a piece of cardboard or stiff cardstock. I used an empty Amazon box because it was free and needed upcycling. Use your scissors or an Xacto knife to cut out your bunny ears. I traced a football shape on a piece of scrap paper and used that as a tracing template on my cardboard, and then snipped off the pointy end on one side of each of my ears.
- Lay your ears flat on a protective tarp or large piece of cardboard – again, I reused an old, flattened moving box for this – and spray paint one side using broad sweeping strokes in a well-ventilated area. Then spray paint your Oui Yogurt jars.
- Let everything dry. If the humidity is high where you are, you may want to set up a dehumidifier or bring them inside to speed along the process. Once everything is dry, flip your bunny ears over and spray paint the remaining blank side. Touch up your glass jars as needed. Mine had some drips on the first go-round, but they were invisible by the time I added my second coat. Let dry completely. Your dry time will vary and depend on the temperature and humidity. Mine dried within an hour once I brought them inside and put a fan on them.
- Shake your paint pens to prep for drawing your faces on the jars, and let your glue gun heat up. You may want to practice your bunny faces a time or two before you get started. Working with one color at a time, draw your faces. Let your ink dry completely between colors; this step won’t take long.
- While your faces are drying, add the pink portion to your bunny ears. Then unwind your paper clips, straighten them as much as possible, and trim to your desired length using strong scissors or wire cutters (I used scissors). This will probably vary based on what you’re going to put in your bunny jars, but in general, you’ll want them to be just a bit shorter or the same length as the depth of the jars.
- Attach your decorative pom poms or cotton ball as the “tail” with your hot glue gun. You’ll want it to be exactly on the opposite side of the jar from your face.
- Wind your garland around the top lip of your jar and secure it with hot glue, and then run a thin line of glue along the flattened end of your bunny ears and push the end of your paper clip wire into the glue. Hold it still until the glue has cooled to prevent wonky ears.
- Fill your jar with flowers, Jelly Beans, Robins Eggs, or small gifts, and slip the wire end of your ears into the jars. Voilà! A sustainable craft that is sure to make every bunny smile.
All photos via Reese Moore Photography
A Note on Buying and Borrowing Supplies
Note from the Editor: We’ve included affiliate links to some of the products used in this project. If you purchase through one of these links, Honestly Modern earns a small commission that has no impact on your purchase price.
Overconsumption is one of the key contributors to the climate crisis. With a focus on eco-friendly living, reducing consumption is an important principle of our content. We encourage you to use supplies you already have on hand, borrow tools or materials from friends, and shop secondhand when possible. We love Buy Nothing groups for lending requests, shared a bunch of ways to get sustainable craft supplies, and we have a full guide on all things secondhand shopping.
For ease of knowing which products to use in tutorials, we have included affiliate links to specific product recommendations. Despite a preference to support other retailers besides Amazon, we do include links to Amazon products at times when other links are not reasonable or useful for readers. Sustainability requires finding a balance that works and is sustainable itself. Gather supplies in the way that is most accessible to you.
As you set out to complete your project, we encourage you to remember the many R’s of sustainable living like reuse, reduce, recycle, repair, and more.
DIY Upcycled Easter Jars
Are you looking for a fun sustainable crafting activity, just in time for Easter? This kid-friendly DIY teaches you how to upcycle Oui Yogurt jars into adorable Easter bunnies!
Materials
- Oui Yogurt jars, empty and cleaned
- Goo Gone
- Cardboard box or cardstock
- White spray paint (I used matte) or craft paint
- Paper clips
- Cotton balls or decorative pom poms
- Easter garland (optional)
- Fresh flowers, Easter candy, beeswax crayons, or air plants for gifting
Tools
- Strong scissors (or wire clippers or Xacto knife)
- Paint pens or Sharpies
Instructions
- Remove the Oui Yoplait labels by soaking your jars in warm water. Mine came off easily after about 10 minutes. Then use Goo Gone and a paper towel to remove any adhesive residue. Wash your jars with soap and water and dry thoroughly. (I hit mine with a hairdryer to speed this along.)
- While your jars are soaking or drying, trace your bunny ears on a piece of cardboard or stiff cardstock. I used an empty Amazon box because it was free and needed upcycling. Use your scissors or an Xacto knife to cut out your bunny ears. I traced a football shape on a piece of scrap paper and used that as a tracing template on my cardboard, and then snipped off the pointy end on one side of each of my ears.
- Lay your ears flat on a protective tarp or large piece of cardboard - again, I reused an old, flattened moving box for this - and spray paint one side using broad sweeping strokes in a well-ventilated area. Then spray paint your Oui Yogurt jars.
- Let everything dry. If the humidity is high where you are, you may want to set up a dehumidifier or bring them inside to speed along the process. Once everything is dry, flip your bunny ears over and spray paint the remaining blank side. Touch up your glass jars as needed. Mine had some drips on the first go-round, but they were invisible by the time I added my second coat. Let dry completely. Your dry time will vary and depend on the temperature and humidity. Mine dried within an hour once I brought them inside and put a fan on them.
- Shake your paint pens to prep for drawing your faces on the jars, and let your glue gun heat up. You may want to practice your bunny faces a time or two before you get started. Working with one color at a time, draw your faces. Let your ink dry completely between colors; this step won’t take long.
- While your faces are drying, add the pink portion to your bunny ears. Then unwind your paper clips, straighten them as much as possible, and trim to your desired length using strong scissors or wire cutters (I used scissors). This will probably vary based on what you’re going to put in your bunny jars, but in general, you’ll want them to be just a bit shorter or the same length as the depth of the jars.
- Attach your decorative pom poms or cotton ball as the “tail” with your hot glue gun. You’ll want it to be exactly on the opposite side of the jar from your face.
- Wind your garland around the top lip of your jar and secure it with hot glue, and then run a thin line of glue along the flattened end of your bunny ears and push the end of your paper clip wire into the glue. Hold it still until the glue has cooled to prevent wonky ears.
- Fill your jar with flowers, Jelly Beans, Robins Eggs, or small gifts, and slip the wire end of your ears into the jars. Voilà! A sustainable craft that is sure to make every bunny smile.
If you liked Sustainable Crafts: Oui Yogurt Jar Easter Bunnies, You May Enjoy:
Simple DIY Macrame Easter Egg Bird Feeder
4 Ways To Reuse Plastic Easter Eggs Year-Round
5 Tips for Eco-Friendly Easter Egg Dyeing for Kids
About the Author

Reese Moore
Reese Moore is a photographer, content creator, and pickle connoisseur who divides time between Charleston and Lake Lure. When she’s not behind the lens shooting stunning images for Reese Moore Photography, Reese loves to spend her time wandering the woods with her dog Gatsby or adventuring with her husband Logan in their Airstream Basecamp.
![13 Great Ways To Compost At Home [Reviews + Comparisons]](https://www.honestlymodern.com/wp-content/uploads/2020/03/fruit-veggies-and-paper-and-cardboard-for-a-compost-bin-at-home.jpg)
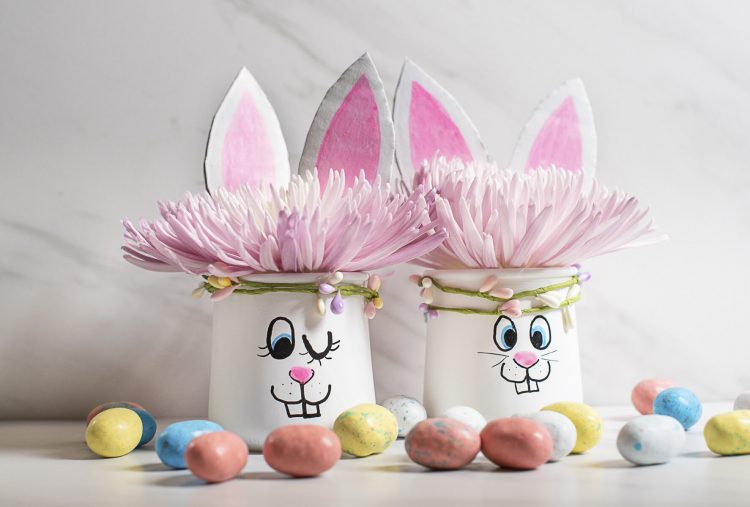
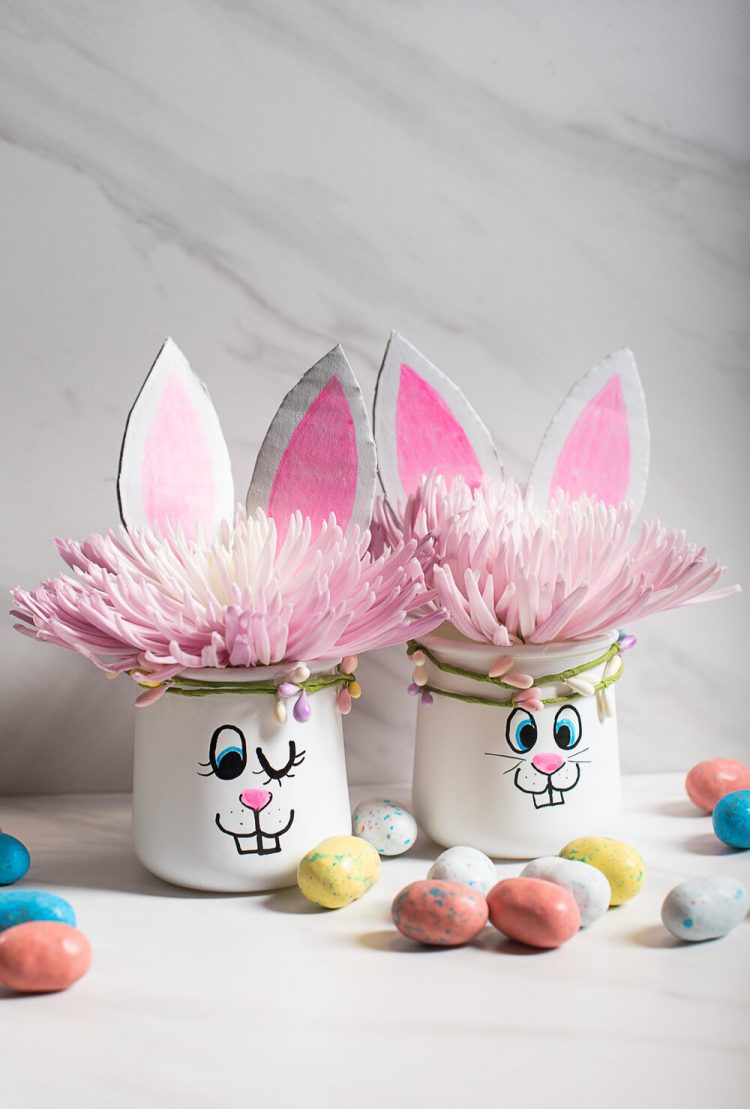
What kind of flowers are in the jars
I think they are asters.